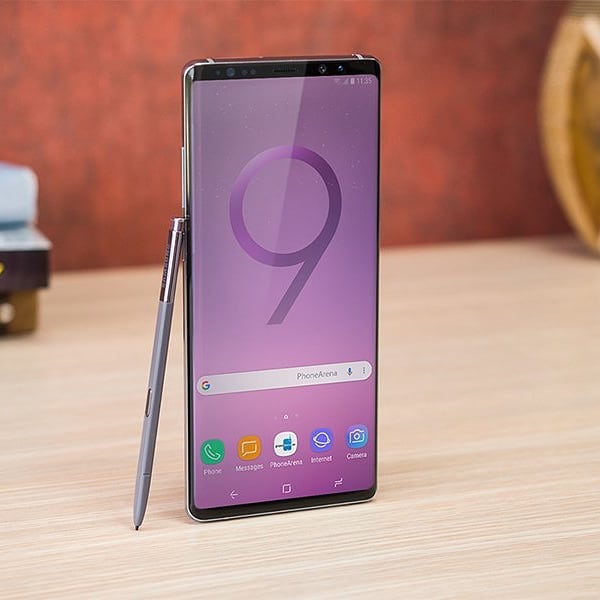
The Samsung Galaxy Note 9 is an Android phablet smartphone designed, developed and marketed by Samsung Electronics as part of the Samsung Galaxy Note series. It was unveiled on 9 August 2018, as the successor to the Samsung Galaxy Note 8.
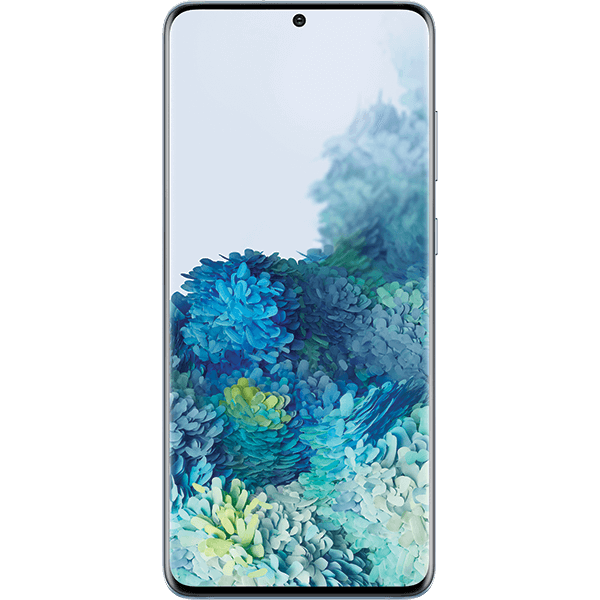
The Note 9 has a 6.4 inch 1440p Super AMOLED display with an 18.5:9 aspect ratio. The design on the front is otherwise similar to the Note 8, using an “Infinity Display” as marketed by Samsung.
The Note 9 has a Qualcomm Snapdragon 845 SoC in the U.S. and China or a Samsung Exynos 9810 SoC outside the U.S. & China. It has 128 or 512 GB storage options. The 128 GB model has 6 GB of RAM while the 512 GB has 8 GB of RAM. All models also have a microSD card slot as well potentially maxing out the phones storage to nearly a Terabyte of data.
The Note 9 has IP68 water & dust resistance and a USB-C connector that supports Samsung DeX without a dock and the phone also has a 3.5 mm headphone jack along with AKG tuned stereo speakers with Dolby Atmos support.
How To Fix Wired Headphones Not Working Samsung Galaxy Note 9:
By following these steps:
The easiest way to figure out what’s causing the issue is to try another set of headphones on your phone, or try your current headphones with another device.
Remove all accessories and restart your phone:
We want to make sure there isn’t anything that may interfere with plugging in the headphones. Remove the headphones and any connected accessories such as cases, charms, or skins. Once, you have removed everything, restart your phone.
Inspect your headphones for damage:
Take a look at the connector on your headphones and make sure it’s not bent or broken, and that the cable is not damaged or showing any exposed wires.
The easiest way to rule out your headphones as the issue is to try another set of headphones on your phone, or try your original headphones with another device.
Check the headphone jack and volume buttons:
Use the volume up and down keys to make sure they’re working. You also need to inspect the headphone jack on the phone with a flashlight and make sure there is no debris or bent pins. If the pins are bent, please visit the Support Center to request service.
Look for Software Updates:
Check if there are any software updates for your phone by going to Settings > Software Updates. Depending on your carrier, you may need to go to Settings > System Updates. If an update is available be sure to install by following the on screen prompts.
We want to make sure your phone has the latest software installed before continuing further troubleshooting.
Adjust the volume:
Make sure the media volume is not set to mute. When muted the speaker icon will be gray and crossed out.
There are two ways to adjust the volume, using the volume buttons on the side of your phone or using the media volume slider on your screen.
If the volume buttons appear stuck or don’t work service is required.
Audio playback:
Open your favorite music or video app and play some audio.
Plug your headphones back in and check if you have sound.
If you don’t have any sound, continue below to the next step.
If you have sound but only from one earbud, this may indicate the headphones are failing and need to be replaced. To be sure, try another audio clip and make sure it is in stereo and not mono. When mono audio is played it is normal for only one earbud to work. Most music apps play their tracks in stereo.
Reboot the phone in Safe mode:
Press and hold the Power key until the Power menu is displayed, and then touch and hold Power off until Safe mode is displayed.
Touch Safe mode to start your phone in Safe mode.
If you have a security feature set up on the phone, you’ll be required to enter your credentials once the phone reboots.
If you’ve entered Safe mode successfully, you’ll see Safe mode displayed at the bottom of the screen.
You can also enter Safe mode using the hardware keys on the phone. Power off your phone, and then power it back on. When the Samsung logo appears, press and hold the Volume Down key until you see Safe mode at the bottom of the screen.
Check if the phone is still having the same problem:
Now that you’re in Safe Mode use your phone like your normally do. Launch your camera, record a short video clip, access the internet, or connect your headset.
If the issue doesn’t appear in Safe Mode then a recently downloaded or updated app may be the issue. Uninstall any apps you downloaded just before your phone began having the issue.
Reboot the phone normally:
Press the Power key, and then touch Power Off. Wait until the phone completely turns off, and then press the Power key again to turn it on. See if the issue has been resolved. You can repeat the steps above for each app.
To determine if the device has experienced liquid damage, you can check the LDI (Liquid Damage Indicator). The LDI is inside the SIM Card Tray slot.
You will need the ejector tool that came with your phone and a flashlight to complete these steps.
Power off your phone and insert the ejection tool into the SIM/MicroSD on your phone to eject the tray.
Shine your flashlight into the SIM/MicroSD slot.
If the device has been exposed to moisture, the LDI will be solid pink/purple/red. Service is required.
If the device has not been exposed to moisture, the LDI will be solid white or solid white with pink/purple Xs. Continue to the next step below.
Perform a Factory Data Reset:
A Factory Data Reset will remove all data from the phone, including pictures, contacts, applications, and documents.
From a home screen, swipe up or down to open the app drawer and then Touch Settings.
Search for and the touch Factory Data Reset.
Touch Reset, then follow the prompts to complete the reset.
Go through the initial setup after the phone reboots.
Experiencing difficulties with your Android Device, check out our “How To” page on how to resolve some of these issues.
Other Android Technical Reviews:- Android