In today’s fast-paced world, staying connected is essential. That’s why Apple introduced the Dual SIM feature in their iPhones, allowing users to keep their personal and professional lives separate without the hassle of carrying two phones. With the launch of the iPhone XS, XS Max, and XR, Apple also introduced the eSIM, a digital SIM card that eliminates the need for a physical nano-SIM. In this comprehensive guide, we will walk you through the process of activating Dual SIM and eSIM on your iPhone XS or iPhone XR.
Dual SIM and eSIM
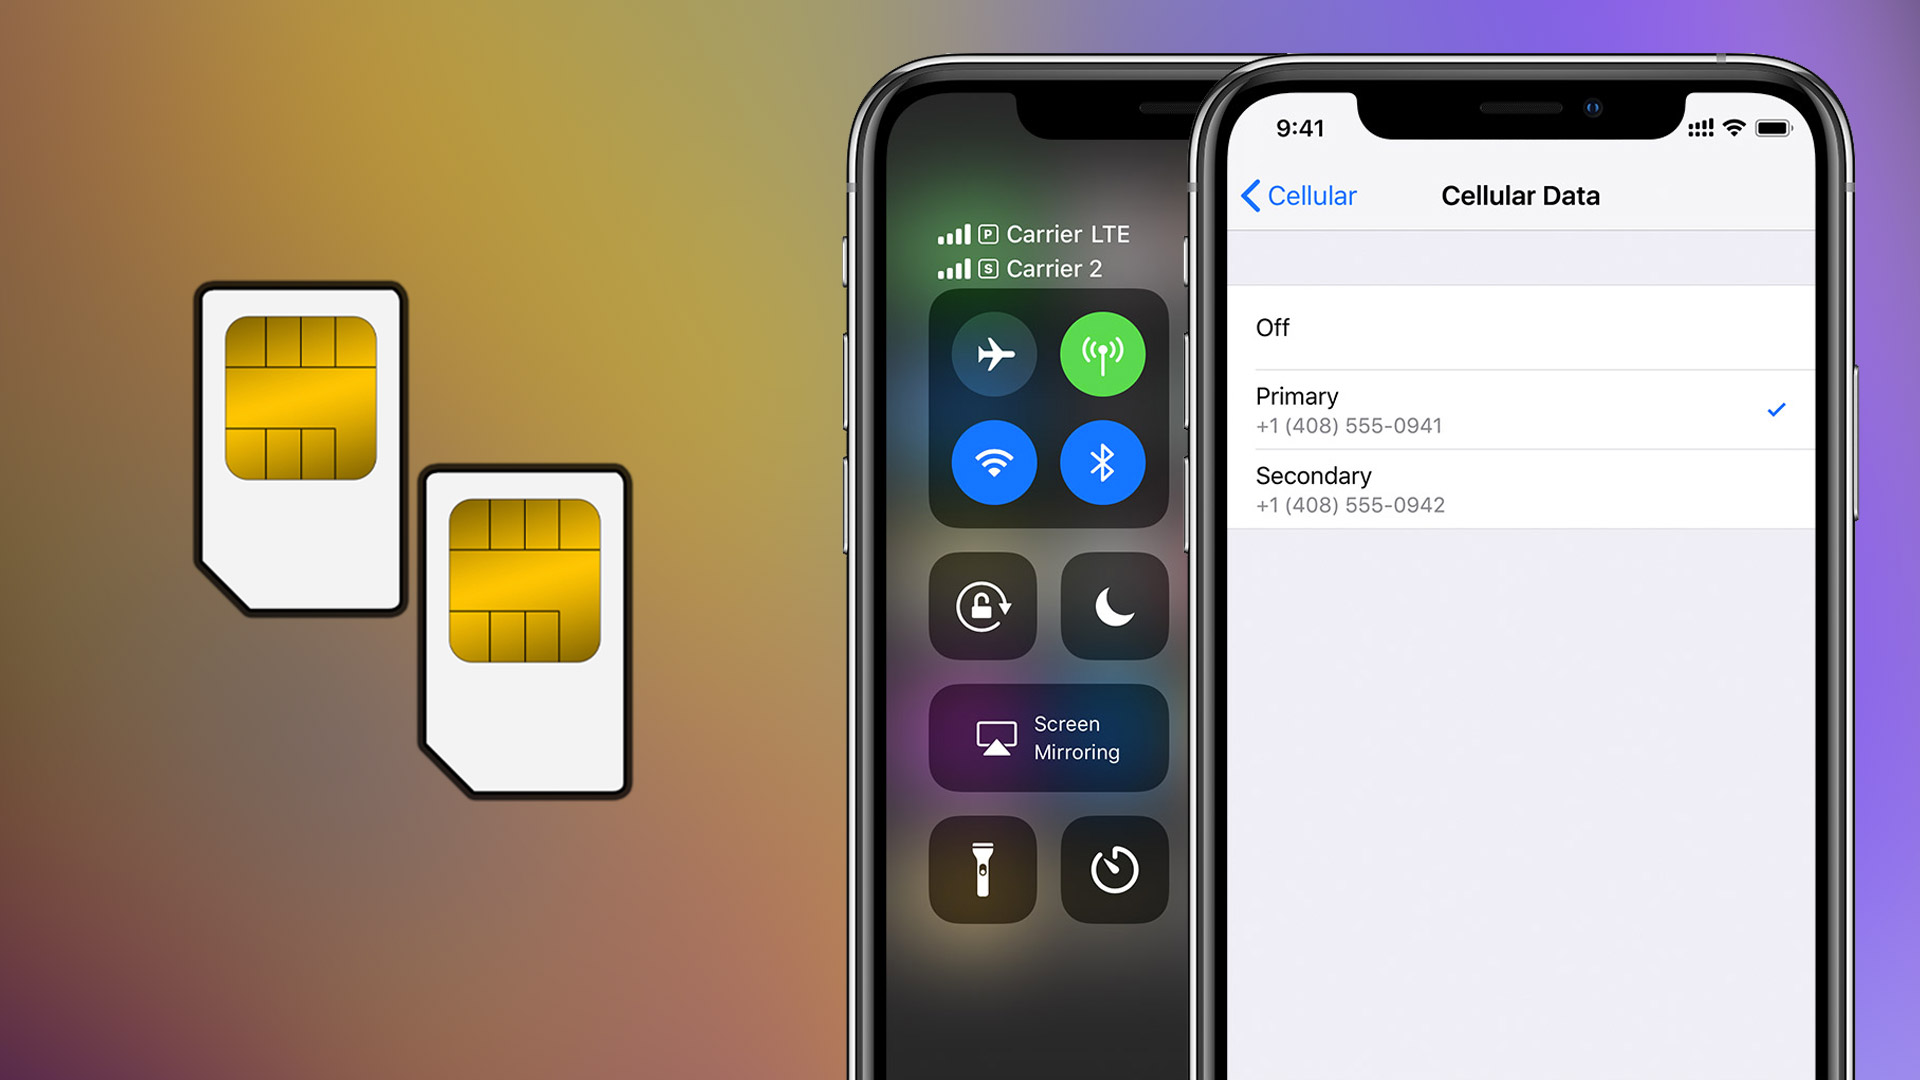
Before we dive into the activation process, let’s first understand what Dual SIM and eSIM are. Dual SIM is a feature that allows you to use two different phone numbers on a single device. This is particularly useful for individuals who want to separate their personal and work contacts or for frequent travelers who want to use a local SIM card while abroad.
On the other hand, eSIM, short for embedded SIM, is a digital SIM card that is built into your device. Unlike a physical SIM card, which needs to be inserted into a SIM card slot, the eSIM is stored electronically on your iPhone. This means that you can activate a cellular plan without the need for a physical SIM card.
Prerequisites for Dual SIM and eSIM Activation
Before we proceed with the activation process, there are a few prerequisites that you need to fulfill:
- Compatible Devices: The Dual SIM feature and eSIM are available on iPhone XS, iPhone XS Max, and iPhone XR, and later models.
- Wireless Carrier Support: You need to have a wireless carrier that supports eSIM. In India, Airtel, Vodafone, and Reliance Jio are the major carriers that currently support eSIM.
- iOS Version: Make sure that your iPhone is updated to iOS 12.1 or later. To check your iOS version, go to Settings > General > About > Version. If you are using an older version, update your iPhone to the latest iOS version by going to Settings > General > Software Update.
Now that you have fulfilled the prerequisites, let’s proceed with the activation process.
Activating eSIM and Dual SIM on iPhone XS and iPhone XR
Activating eSIM and Dual SIM on your iPhone XS or iPhone XR is a straightforward process. Here’s a step-by-step guide to help you through it:
Step 1: Open Settings
Begin by opening the Settings app on your iPhone. It is represented by a gear icon and can usually be found on the home screen.
Step 2: Access the Cellular Settings
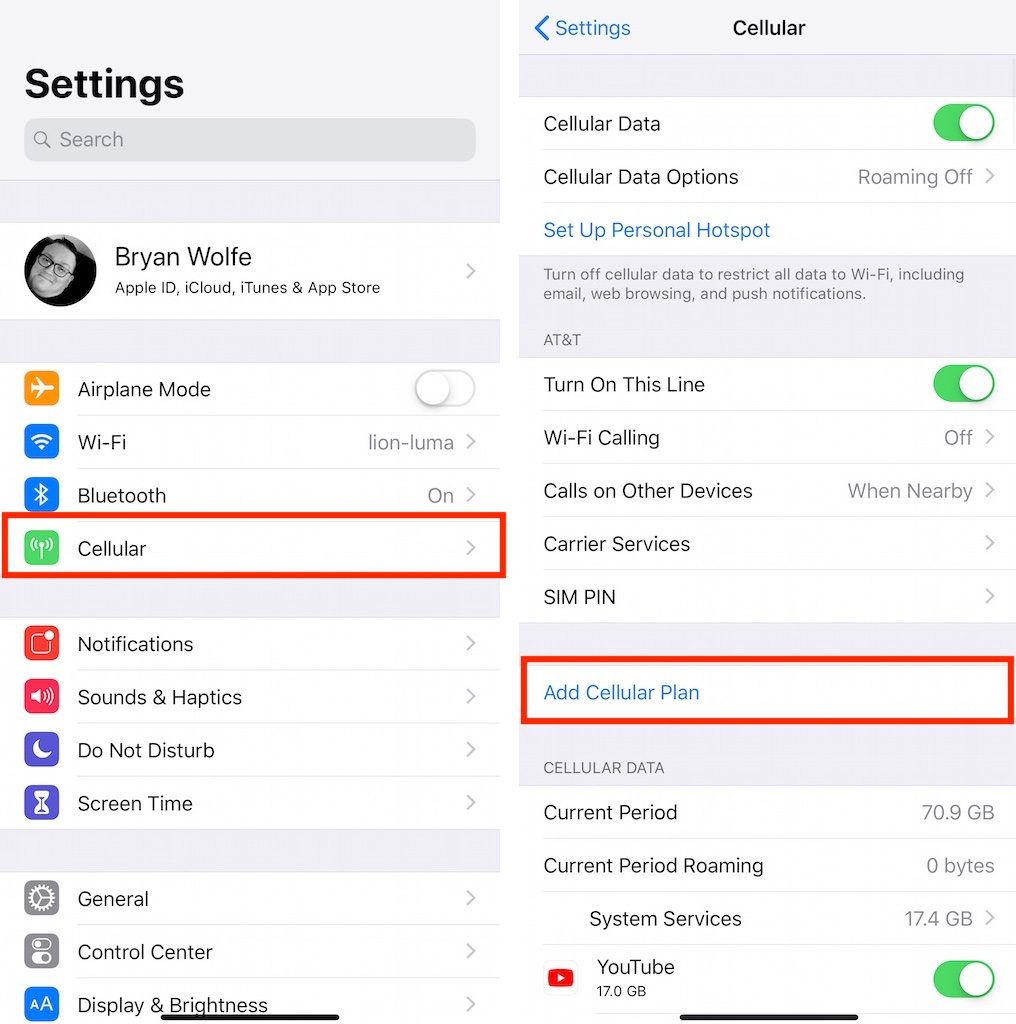
Once you are in the Settings app, scroll down and tap on “Cellular.” This will take you to the Cellular settings page.
Step 3: Add a Cellular Plan
On the Cellular settings page, you will find an option to “Add Cellular Plan.” Tap on it to proceed with the eSIM activation process.
Step 4: Scan the QR Code
To activate your eSIM, you will need to scan the QR code provided by your wireless carrier. Use your iPhone’s camera to scan the QR code, ensuring that it is properly aligned within the scanning frame.
Alternatively, if the QR code is not working or if your carrier does not provide one, you can manually enter the eSIM information provided by your carrier. Follow the on-screen instructions to enter the necessary details.
Step 5: Set Up the SIM
After scanning the QR code or entering the eSIM information, you will be asked to set up the SIM. This step allows you to customize how you want to use the second SIM. For example, you can choose to use it as data only or have separate work and home lines on the same phone.
Step 6: Confirmation and Activation
Depending on your carrier, you may need to enter a confirmation code to enable eSIM. If required, enter the confirmation code provided by your carrier and follow the on-screen instructions to complete the activation process.
Managing Multiple eSIMs on iPhone XS and iPhone XR
One of the advantages of eSIM is that you can store multiple eSIMs on your iPhone. However, keep in mind that you can only use one eSIM at a time. To switch between eSIMs, follow these steps:
- Open the Settings app on your iPhone.
- Tap on “Cellular” and then select “Cellular Plans.”
- From the list of available plans, tap on the eSIM you want to use.
- Finally, tap on “Turn On This Line” to activate the selected eSIM.
Carrier Support for eSIM in India and Worldwide
In India, Airtel, Vodafone, and Reliance Jio are the major carriers that support eSIM. If you are a customer of one of these carriers, you can easily activate eSIM on your iPhone XS or iPhone XR by following the steps mentioned above.
Outside of India, eSIM support varies by country and carrier. Here is a list of some countries where eSIM is supported: Argentina, Australia, Austria, Bahrain, Belarus, Belgium, Brazil, Cambodia, Canada, Chile, Colombia, Croatia, Czech Republic, Denmark, Ecuador, Estonia, Finland, France, Germany, Greece, Guam, Hong Kong, Hungary, Italy, Jordan, Kazakhstan, Kuwait, Latvia, Lebanon, Luxembourg, Malaysia, Mexico, Netherlands, New Zealand, Norway, Oman, Philippines, Poland, Portugal, Qatar, Romania, Saudi Arabia, Singapore, Spain, Sri Lanka, Sweden, Switzerland, Taiwan, Thailand, United Arab Emirates, United Kingdom, United States, Vietnam, and Viettel.
However, it’s important to note that carrier support for eSIM may vary, so it’s always best to check with your specific carrier to confirm if they offer eSIM support.
Conclusion
With Dual SIM and eSIM support on the iPhone XS and iPhone XR, Apple has made it easier than ever to stay connected. Whether you want to keep your personal and work numbers separate or use a local SIM card while traveling, the Dual SIM and eSIM features provide the flexibility you need. By following the simple steps outlined in this guide, you can activate eSIM and Dual SIM on your iPhone XS or iPhone XR, giving you the freedom to manage multiple numbers effortlessly. Stay connected and enjoy the convenience of Dual SIM and eSIM on your iPhone!