

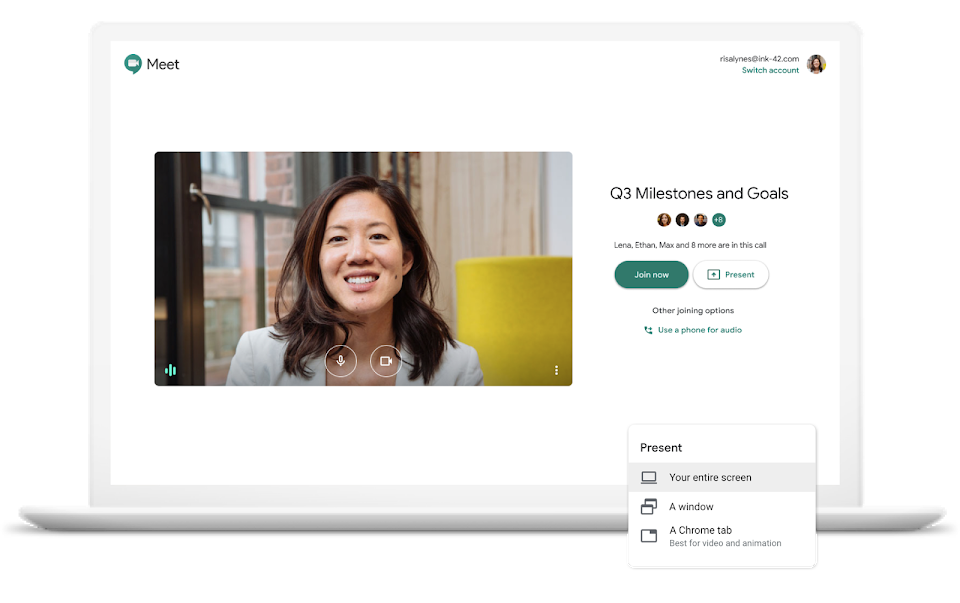
In today’s digital age, video conferencing has become an essential tool for communication and collaboration. With platforms like Google Meet, professionals and students can connect with others from the comfort of their own homes. While Google Meet offers a range of features, one essential capability that may not be immediately apparent is the ability to share attachments during a video conference. In this comprehensive guide, we will walk you through the step-by-step process of attaching files to Google Meet, allowing you to enhance your virtual meetings with valuable documents, presentations, and more.
Why Attachments Matter in Google Meet
Before we dive into the specifics of how to attach files to Google Meet, let’s explore why this capability is important. Attachments enable participants to share relevant materials with one another, enhancing the overall meeting experience. By attaching files, you can provide supporting documentation, share presentations, or distribute important information to all attendees. This feature is particularly useful for collaborative projects, educational sessions, or business meetings where visual aids or reference materials are necessary.
Step 1: Install Google Meet
To begin utilizing the file attachment feature in Google Meet, you will need to have the Google Meet application installed on your device. While Google Meet can be accessed via web browsers, certain features like screen sharing are only supported on the desktop version of the app. To ensure a seamless experience, we recommend installing the app from your respective app store. You can find the Google Meet app for Android and iOS devices, both available for free.
Step 2: Schedule an Event in Google Calendar
Google Meet requires a Google account for participation. If you already have a Google account, you can use it to access Google Calendar, which makes scheduling a video conference a breeze. If you don’t have Google Calendar installed, we recommend downloading it from your app store. Once you have the app, follow these steps to schedule an event and generate a Google Meet link:
- Open Google Calendar and navigate to the date and time you want to schedule your meeting.
- Create a new event by tapping on the desired time slot.
- In the event details, give your meeting a name and provide any additional information or agenda items.
- Scroll down to the “Add Video Conferencing” field, and tap on it.
- Google Calendar will automatically generate a Google Meet link for your event.
Step 3: Access Attachment Options
After scheduling your meeting in Google Calendar, you can proceed to attach files to your Google Meet video conference. The method for attaching files varies depending on whether you are using the mobile app or a desktop browser.
Mobile App:
- Open the Google Calendar app and locate the scheduled meeting.
- Tap on the meeting to access the event details.
- Tap the attachment icon located at the bottom left corner of the screen.
- You will be presented with various attachment options, including recent downloads, saved files, and files from your Google Drive.
- Select the desired file(s) you wish to attach. You can attach multiple files by tapping the attachment icon again.
Desktop Browser:
- Open Google Calendar in your preferred web browser and navigate to the scheduled meeting.
- Click on the event to view the event details.
- In the event details, locate the “Add Attachment” field.
- If you are using Google Chrome or a similar browser, you can upload files from your computer by accessing the desktop version of Google Calendar. This allows you to browse and select files directly from your device.
- If you prefer to attach files from your Google Drive, you can do so by selecting the file(s) from the drive.
Step 4: Join the Meeting and Access Attachments
Once your meeting time arrives, you can join the video conference by opening the Google Meet app or clicking the meeting link in your Google Calendar event. As a participant, you will have access to the attachments that have been added to the meeting.
To access the attachments during the meeting:
- Open the Google Meet app or navigate to the meeting link in your browser.
- Once in the meeting, look for the circled “i” icon on the navigation bar.
- Tap on the “i” icon to access additional meeting information.
- Here, you will find a list of attachments that have been added to the meeting.
- Tap on an attachment to open it in Google Drive and view its contents.
If you realize that you forgot to add an attachment before the meeting, don’t worry. You can easily go back to the Google Calendar event and edit it by tapping the pencil icon. Alternatively, you can proceed to the next step to learn how to add links in the chat during an ongoing meeting.
Step 5: Add Links in Chat (Optional)
In some cases, you may need to share additional files or resources during an ongoing meeting. Instead of backtracking to Google Calendar to add an attachment, you can utilize the chat feature in Google Meet to share links to cloud-hosted files. This feature is particularly useful if you have started an impromptu meeting without a prior Calendar event.
To add links in the chat during a meeting:
- Tap the message icon in the middle of the navigation bar to access the chat.
- Copy the link to the file you wish to share from any file-sharing service.
- Paste the link into the message field and hit send.
- The chat will treat the link as a hyperlink, allowing participants to click and access the file.
Adding links in the chat provides a convenient workaround, ensuring that participants can access important resources in real-time without interrupting the flow of the meeting.
Step 6: Enhancing Collaboration with Attachments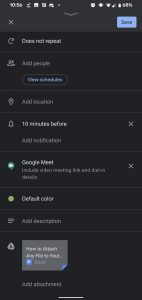
Attachments in Google Meet not only allow participants to view and reference files during a meeting but also enable collaboration on those files. Whether you’re working on a presentation, reviewing a document, or sharing a video, participants can collaborate directly within the attached files.
By opening the attached files in Google Drive, participants can:
- View the content of the files.
- Make edits or suggestions using Google’s suite of productivity tools.
- Comment on specific sections or provide feedback.
- Collaborate with others in real-time.
This collaborative aspect of attachments in Google Meet enhances teamwork and streamlines the sharing and editing process, making it easier to work together remotely.
Conclusion
Attaching files to Google Meet video conferences is a valuable feature that enhances communication, collaboration, and productivity. By following the simple steps outlined in this guide, you can easily share attachments with meeting participants, providing them with essential resources and facilitating effective collaboration. Whether you’re presenting a slideshow, sharing important documents, or collaborating on a project, the file attachment feature in Google Meet will undoubtedly enhance your virtual meetings and streamline your workflow. Embrace the power of attachments and take your Google Meet meetings to the next level.
Remember, effective communication and collaboration are the keys to success in the modern digital landscape, and Google Meet is here to make those connections seamless and efficient. So, why wait? Start attaching files to your Google Meet video conferences today and unlock the full potential of virtual collaboration.
Experiencing difficulties with your Device, check out our “How To” page on how to resolve some of these issues.

4 comments