
The menu bar which is present at the top of the screen on your MacBook Pro is very useful. You can use it to control a lot of things on your MacBook. But this menu bar becomes a problem when you have a device with a small screen or when you simply want to hide it to make the screen even bigger. In this case, you can set it to hide automatically when you are not using it. As soon as roll your mouse over that area or use a certain key combination, it again appears so that you can use it normally. With the release of the latest OS X 10.11, there is a very simple method using which you can set the menu bar to hide automatically. So here is how you can save some of the previous space on your MacBook Pro.
Steps to Auto-Hide the menu bar on a MacBook Pro
Click on the Apple icon on the top right corner and then select the System Preferences.
A new dialog box will appear. Here click on General.
Now check the box near the “Automatically hide menu bar” option. 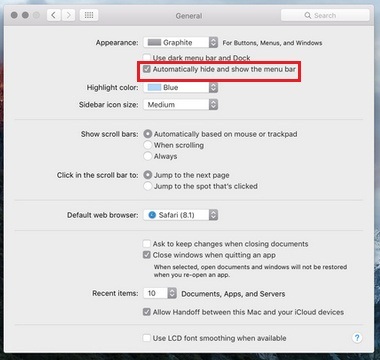
This will set the menu bar to hide automatically.
Now you can either use the mouse or keyboard keys to access it. The default keys for this task are Ctrl+F2, but you can change it as per your convenience.
To do this go to Apple menu and then to System Preferences.
Now click on the keyboard icon.
You will now see the keyboard dialog box. Here choose the shortcut tab.
Now click on the keyboard from the left side menu.
A list of options will now appear. Check and make sure the checkbox next to Move focus to the menu bar is checked.
Now click on the key combination which is present on the right side of that option.
Once it is highlighted you can type the key combination which you want to use for this task.
You have successfully changed the key combination.
You have successfully set the menu bar to hide when it is not in use.


