
The first custom ROM for the Xiaomi Redmi Note 10 smartphone was released sometime back and that custom ROM is the Pixel Experience ROM.
In this article, we are going to show you how to install that ROM on The Xiaomi Redmi Note 10 with either the mojito code name or the sunny code name.
Now before we can begin, we’re going to need to have set up some things. The big requirement here is you’re going to need to have your bootloader unlocked ahead of time:
Most people have to wait for about seven days to get their bootloader unlocked from Xiaomi. So be sure to do that some days before installing any custom ROM on your Xiaomi device.
We also need to download the recovery link as well as the custom ROM file that we’re going to be flashing on our Xiaomi Redmi Note 10 device.
Typically, whenever you have to install any early Custom ROM on any Xiaomi device, it is required to begin with a certain MIUI firmware.
So, in this article, the required firmware for this Pixel Experience Rom is 12.0.5. You need to have this required firmware because the required firmware will likely change with subsequent updates to pixel experience.
As new versions of MIUI come out there are going to be new versions of the Pixel Experience that follow as well, which are based on the newer versions of MIUI.
So be sure to read the official original XDA thread which you can find from this link. You can also find all the download files from the link. It will tell you which version of MIUI is the required firmware to begin with before we start flashing recoveries and Custom ROM.
This is also likely going to change in the future whenever we get an official version of TWRP and whenever we get some Custom ROMs that are based on AOSP.
As of right now to install this early build of Pixel Experience on the Xiaomi Redmi Note 10 we are going to need to start on the required firmware.
We’re also going to need to download the recovery image file that we need to install on our phone and we need to download the actual Pixel Experience custom ROM from the link.
We’re going to need to put those files in our ADB and Fastboot tools folder. If you haven’t already installed ADB and Fastboot tools then you can do it by visiting the link.
Download & Install Pixel Experience Custom ROM on Xiaomi Redmi Note 10:
After you have met all the requirements, you can power off your Xiaomi Redmi Note 10 so that we can boot the phone into Fastboot Mode to complete the first step which is flashing the AOSP recovery image on our device.

Now that our Xiaomi Redmi Note 10 is in Fastboot mode we have to connect it to our PC via a USB cable.
We are going with the Windows PowerShell in this instance, we can also open up a terminal PowerShell or a command prompt in the same folder as our ADB and Fastboot tools.
We can also move our recovery and custom ROM files to the same folder where we have our ADB and Fastboot tools.
If you want to make sure everything is ready to go before you begin anything, you can type out the command “fastboot devices” to make sure that your device shows up or is listed in PowerShell.
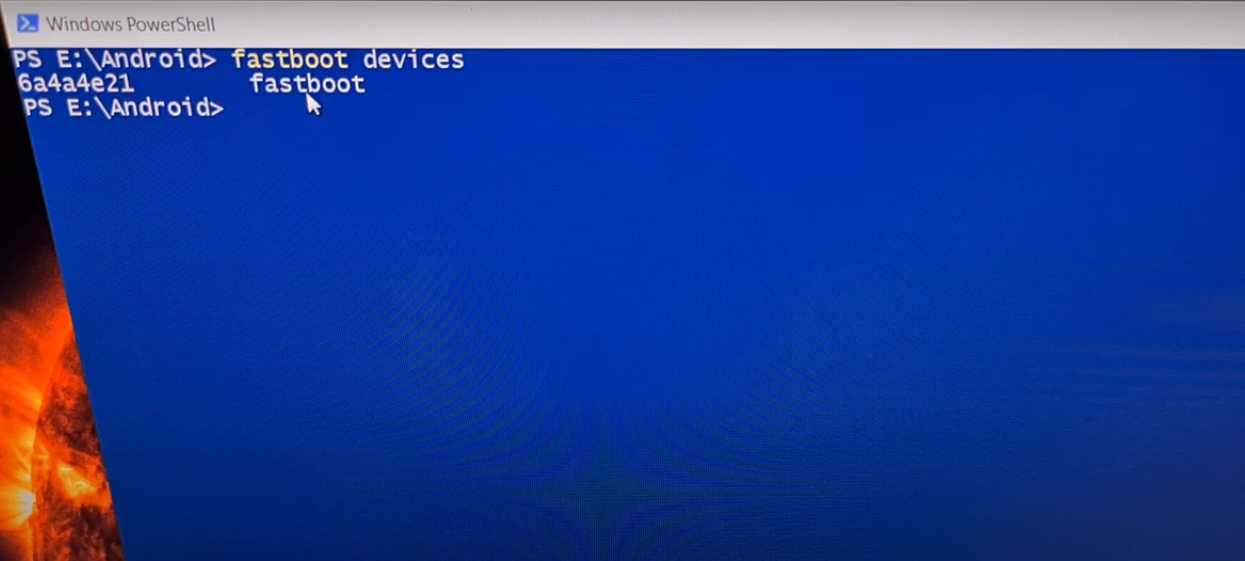
If we get messages like unrecognized or unauthorized, anything like that then make sure your device is connected properly. Your device name should be listed in the PowerShell whenever you execute the command “fastboot devices”.
Then we’re going to type out the command “fastboot flash boot (name of the image file)”.
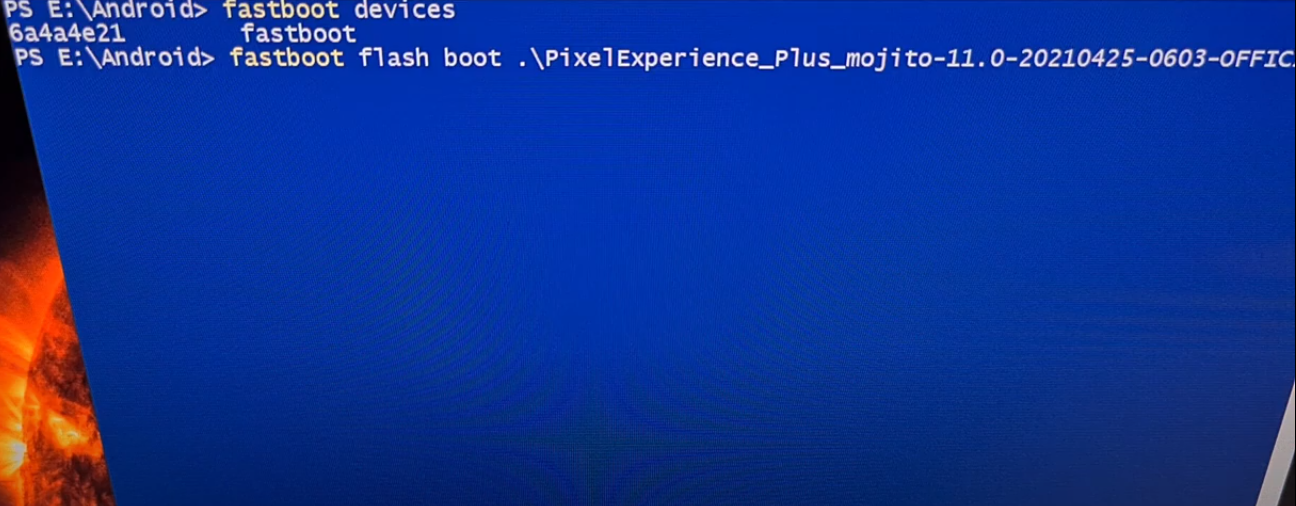
The name of the image file is the name of the recovery file that you would have downloaded.
You can also rename this file to something easier to type out if you want. To enter it quick, just type the first few letters of the file name and then press Tab on your keyboard to autocomplete the name.
Just make sure that the file name matches the recovery image name that you downloaded.
Once you type the complete recovery image file name in PowerShell or Command Prompt then press “enter” on the keyboard.
Then you have to wait for the Fastboot to not only send that image to a particular partition but to also write the contents of that image to that particular partition.
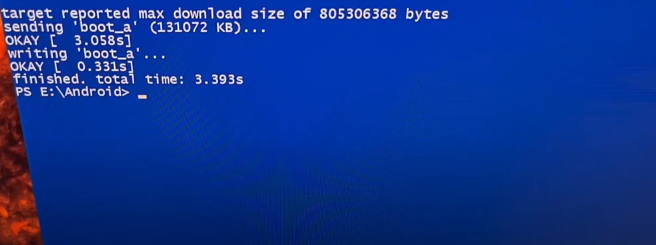
You should get an “okay” message on both of those and after that, it’s going to bring us back into the command prompt where we were at before.
After we have gotten both of those “okay” messages we’re then going to force the phone to reboot by pressing and holding the power button.
Once the phone reboots, we’re going to instantly begin booting into recovery mode by then pressing the power and the volume up buttons.
We will continue holding those two buttons while the phone boots into recovery mode.
Just continue holding those two buttons during that reboot.
When we first boot into Pixel Experience, we are going to have to perform a Factory Data reset.
So, we can tap that option and then tap the format data/factory reset option.
Lastly, we need to confirm the formatting of the data.
Yes, this is required and if you skip this step you are going to get an error when you try to ADB sideload the ROM.
So, after we have formatted the data and done our factory data reset, we can tap the back button to go back to the main screen.
Then we’re going to select the apply update option and then apply from ADB.
This is going to put our phone into ADB sideload mode.
Make sure you have your device connected to the pc via a USB Cable.
Now we’re going to go back to the PC in that same PowerShell to flash the ROM this time.
Since our phone is in ADB sideload mode we’re going to type out ADB sideload space and then whatever is the name of that ROM file we downloaded.
If you renamed it, you can type out whatever the new name is. This time if you press the Tab to autocomplete the file then you have to double press the Tab key to autocomplete the zip file name.
So, the command we type out should be “adb sideload(the file name for the ROM that you downloaded that ends in zip)”.
Once you have all that typed out just press enter on the keyboard.
Just like before it’s going to send that file to the phone via the USB cable but it also needs to write that file.
On our phone, we’re going to be told that we’re in step one or two.
It will take some time so we just have to be patient.
Don’t mess with the USB cable or the phone and try to maintain a stable connection.
It’s fairly common for the percentage counter to stop at 47 percent. This is because that’s usually when step one of two completes but sometimes it does vary.
Once it reaches 47%, then your phone has switched over into step two of the process.
If you got a failed command or a failed message in the command prompt, it’s okay as long as you reach that 47 percent level and as long as you got to step two of two on the phone without an error being displayed on the phone.
Once we’ve reached that 47%, we can the unplug our USB cable.
You can also see that on your device you went from step one of two to step two of two and if there are no errors listed on the phone it should be good to go.
Then we are just going to tap the back button up at the top left corner to go back to the recovery main menu.
Then from there, we’re going to tap the reboot system now option.
It’s going to cause our Xiaomi Redmi Note 10 smartphone to reboot into the Pixel Experience Custom ROM for the first time.
Now since we just did a factory data reset the first boot into Android is likely going to take a little bit longer than normal.
We just need to have a little bit of patience.
You can see that while booting the device in Pixel Rom you will get a new animation logo.
This is how you can install the Google Pixel Experience ROM on the Xiaomi Redmi Note 10 smartphone.
Experiencing difficulties with your Device, check out our “How To” page on how to resolve some of these issues.