Are you facing problems with the HDMI port on your laptop? Don’t worry, you’re not alone. Many users encounter issues when trying to connect their laptops to external displays using an HDMI cable. The good news is that most of these problems can be resolved with a few simple troubleshooting steps. In this comprehensive guide, we will walk you through the process of resolving HDMI port issues on your laptop.
HDMI Port Issues
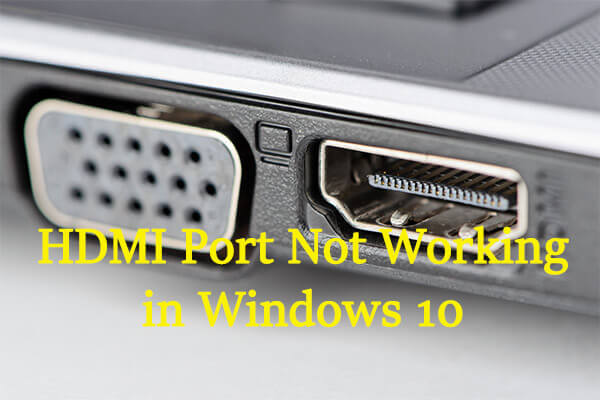
HDMI, or High Definition Multimedia Interface, is a widely used port for connecting devices such as laptops, TVs, and projectors. It allows for the transmission of high-quality audio and video signals. However, there are several factors that can cause HDMI port issues on your laptop. These include incompatible or faulty drivers, corrupted registry files, incompatible apps, and temporary files. By understanding the possible causes, you can better troubleshoot and resolve the problem.
Checking the HDMI Cable
One of the most common reasons for HDMI port issues is a faulty cable. Before diving into software solutions, it’s important to rule out any hardware problems. Start by checking the HDMI cable for any visible damage or loose connections. If possible, try using a different HDMI cable to see if the problem persists. This simple step can often solve the issue and save you from unnecessary troubleshooting.
Examining the HDMI Port
If the HDMI cable is not the culprit, the next step is to examine the HDMI port on your laptop. Dust and debris can accumulate in the port over time, causing connectivity problems. Use a can of compressed air or gently blow into the port to clear any obstructions. You can also use a cotton ball dipped in isopropyl alcohol to clean the port. Once the port is clean, reconnect the HDMI cable and check if the issue is resolved.
Trying a Different HDMI Port
In some cases, the HDMI port itself may be faulty. If your laptop has multiple HDMI ports, try connecting the cable to a different port and see if it works. This will help you determine if the issue is specific to a particular port or if it’s a more widespread problem. If the HDMI port is indeed the problem, you may need to contact the manufacturer for further assistance or consider getting it repaired.
Adjusting the Projection Mode
Sometimes, the HDMI port may be working fine, but your laptop is not switching to the correct projection mode. This can result in a blank screen or distorted display on the external monitor. To adjust the projection mode, press the Windows key + P on your keyboard to bring up the projection options. Make sure you select the appropriate mode, such as Duplicate, Extend, or Second screen only, depending on your needs.
Ensuring the Right Resolution
Mismatched display resolutions can also cause HDMI port issues. If the resolution on your laptop is not compatible with the external display, you may encounter problems with the HDMI connection. To ensure the right resolution, right-click on an empty part of your desktop and select “Display settings.” Check the display resolution and make sure it is set to the recommended value. This should help resolve any display-related issues.
Running an SFC or DISM Scan
Corrupted or missing system files can disrupt the proper functioning of your HDMI port. To fix this, you can run an SFC (System File Checker) scan or a DISM (Deployment Image Servicing and Management) scan. These built-in Windows tools scan your system for errors and repair any corrupt files. Open the Command Prompt as an administrator and type “sfc /scannow” to run the SFC scan. If issues persist, run the DISM scan by typing “dism /online /cleanup-image /restorehealth.”
Fixing Display Driver Issues
Outdated or faulty display drivers can cause HDMI port problems. To fix this, you need to update or reinstall the display driver. Open the Device Manager, expand the Display Adapters category, right-click on the display driver, and select “Update driver.” Windows will search for the latest driver version and install it if available. If the issue persists, you can also try rolling back the driver to a previously working version.
Updating Windows
Sometimes, HDMI port issues can be resolved by updating your version of Windows. Microsoft frequently releases updates that address compatibility issues and bug fixes. To check for updates, open the Settings app, go to the Update & Security section, and select “Check for updates.” If updates are available, download and install them. After updating, restart your computer and check if the HDMI port is now working correctly.
Switching User Profiles
If none of the above solutions solve the HDMI port issue, it’s worth trying to switch to a different user profile on your laptop. Sometimes, a corrupted user profile can cause various hardware and software problems. To switch user profiles, right-click on the Start button, select “Shut down or sign out,” and then choose “Sign out.” Sign in with a different user account and check if the HDMI port works in that profile. If it does, you may need to troubleshoot or recreate your original user profile.
Frequently Asked Questions
How do I force detect a second monitor on Windows?
If your system fails to detect the second monitor, right-click on an empty part of the desktop, select “Display settings,” scroll down to the “Multiple displays” section, and click the “Detect” button.
Why is HDMI sound not working on Windows?
Sometimes, Windows may not select the correct audio device when you connect an HDMI cable. To fix this, press Windows key + R to open the Run dialog, type “mmsys.cpl,” and hit Enter. In the Playback tab, right-click the HDMI audio device and select “Set as default device.”
Conclusion
Resolving HDMI port issues on your laptop may require a combination of hardware and software troubleshooting steps. By following the methods outlined in this guide, you can identify and fix the underlying problems that are causing the HDMI port not to work. Remember to check the HDMI cable, clean the port, adjust the projection mode and resolution, update drivers and Windows, and switch user profiles if necessary. With these solutions, you’ll be able to enjoy a seamless connection between your laptop and external displays using the HDMI port.


