
Internet has become a necessity and you need to have access to it on all your devices. Sometimes WiFi is not made available and the mode of internet gets restricted to wired connection only. This means you have access to the internet to your laptop whilst the other devices are without any internet. Windows 10 does let the user turn the laptop into a hotspot and share their internet with other devices. Here is how internet connection sharing on Windows 10 can be done:
Create a Wireless Hotspot in Windows 10
On your keyboard press together Windows logo key + I
This will open the Settings
Next click on Network & Internet
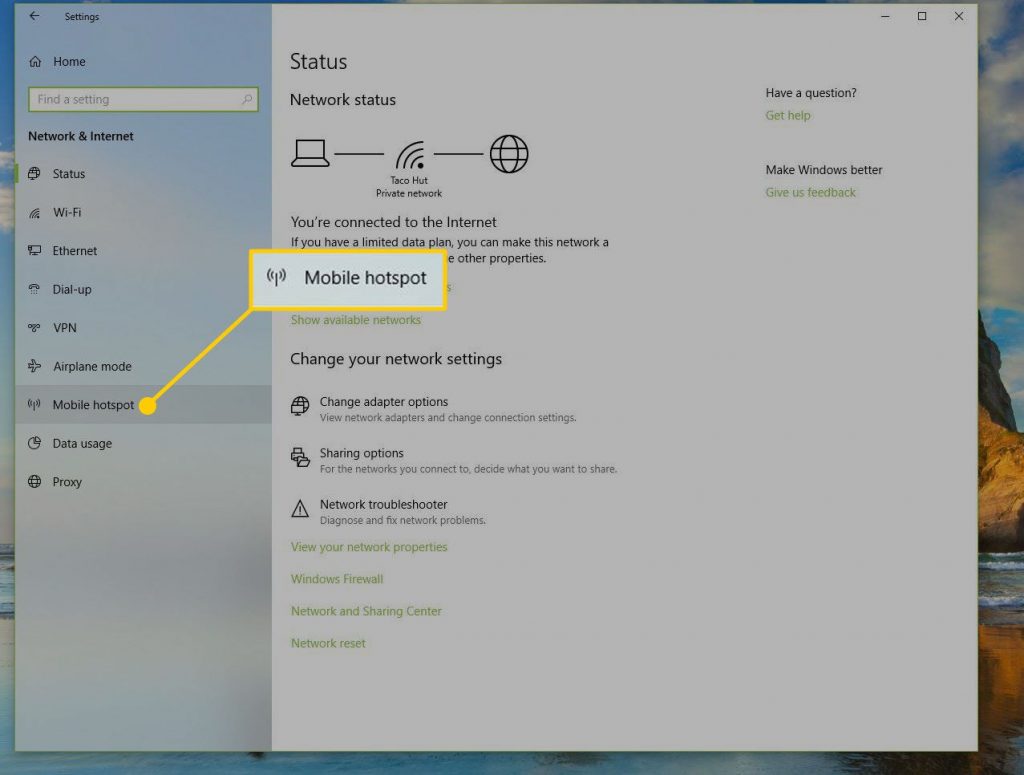
On the left side of the screen look for Mobile hotspot and click on the arrow to get more options
Select the network adapter from which you wish to share your internet
You can select to share from Bluetooth or WiFi – just check the option in the box that you desire
Next view and change the network information – which is name and password
Click on Edit and enter the name that will let the user/users identify the network
Enter a password that the user/users will use to connect to the hotspot of your laptop
When the information is complete click on Save
Scroll up and toggle the Mobile Hotspot (Share my Internet Connection with Other Devices) ON
The other devices will now be able to connect through WiFi or Bluetooth using the id and password that has been set and use the internet from your laptop.
Hosted Network Feature to Share Internet Connection
You can create a software-based access point and virtual wireless adapter on your laptop with Windows Network Shell utility. It is a part of hosted network. However, you must ensure that your device supports hosted network feature before you can set it up.
Check Device for hosted network feature:
In the Search box type cmd, right-click on Command Prompt to run as administrator
Type NETSH WLAN show drivers and hit Enter
If your laptop supports hosted network features it will show as – Hosted Network supported: Yes
Users can then move to create a hosted network for Windows 10, else they can use the other solutions.
Create a Hosted Network on Windows 10:
Since the command prompt is already open continue from there. Just type this command and enter NETSH WLAN set hostednetwork mode=allow ssid=[networkname] key=[password]. In the network name, you must mention the name you wish to give to the virtual WiFi you want to create and in the password section type a password with atleast 8 characters.
This will create the hosted network. You will then have to prompt it to begin the virtual WiFi. For this, in the command prompt type “NETSH WLAN start hostednetwork” and hit Enter
Go to Control Panel and open Advanced Adapter Settings. You will see a new virtual adapter here by the name Local Area Connection*. There will also be a number just beside it.
Share the Internet Connection:
Now that software-based access point and virtual wireless adapter are ready, you can share the internet connection.
Right-click on adapter with an internet connection, you can share internet connection through Ethernet or Wireless and click on Connection Properties
On the Sharing tab, you will find check the box which says Allow other network users to connect through this computer’s Internet Connection
Click on the drop-down of Home networking connection and select your hosted virtual adapter
Finally click on OK to save the changes.
For internet connection sharing on Windows 10 users can use the network id and password that you set earlier to share your internet.
Internet Sharing Feature on Windows
You can also activate the internet sharing feature of your laptop to share your connection with other devices. Here is what you can do:
Go to Control Panel
Click on Network and Sharing Centre
Click on Change Adapter Settings
Locate your internet connection and right-click on it
Now click on Properties
You will get a new pop-up dialogue box. Click on the Sharing tab here and check the box of the Allow Other Network Users to Connect Through This Computer’s Internet Connection
If you are ok with sharing some of your controls with the other users then you can also tick on the second box which says Allow Other Network Users to Control or Disable the Shared Internet Connection – this is completely optional
Once this is done click on OK to save the changes made
Next you need to set up the network so others can connect to the internet from your laptop
Go back to Network and Sharing Centre page and this time click on Change Your Network Settings
On the pop-up wizard that you get click on Manually Connect to a Wireless Network and then click Next
Follow the instructions that you are prompted to complete the setup.
The other users will now be able to use the name and password that you set up for them to login and use your laptop to share its internet.
These are the three ways in which you can share your laptop’s internet with the other users or additional devices.
Experiencing difficulties with your Device, check out our “How To” page on how to resolve some of these issues.


