Are you experiencing issues with your games or graphics programs? It might be time to update DirectX on your Windows 10 or 11 computer. DirectX is a collection of application programming interfaces (APIs) that enables your computer’s hardware, such as the graphics card and sound card, to communicate effectively with the games you play. By keeping DirectX up to date, you can ensure optimal performance and compatibility.
In this comprehensive guide, we’ll walk you through the process of updating DirectX on your Windows 10 or 11 computer. We’ll cover everything from checking your current DirectX version to downloading and installing the latest update. So let’s get started!
1. What is DirectX?
DirectX is a set of components in Windows that allows software, especially games, to interact directly with your computer’s video and audio hardware. It provides multimedia accelerator features that enable games to utilize your hardware efficiently, resulting in an enhanced gaming experience.
2. Why Should You Update DirectX?
Updating DirectX is crucial for several reasons. First and foremost, it ensures compatibility with the latest games and graphics programs. Game developers often optimize their software to work seamlessly with the latest version of DirectX, utilizing advanced features and improving performance.
Additionally, updating DirectX can resolve issues and errors related to outdated or missing DirectX components. It can also provide performance improvements, bug fixes, and security enhancements, allowing you to enjoy a smoother and more secure gaming experience.
3. How to Check Your Current DirectX Version
Before updating DirectX, it’s essential to check which version is currently installed on your computer. Here’s how you can do it:
- Press the Windows logo key on your keyboard to open the Start menu.
- Type dxdiag in the search box and press Enter.
- In the DirectX Diagnostic Tool window, navigate to the System tab.
- Look for the DirectX Version entry at the bottom of the list to determine your current DirectX version.
4. DirectX Compatibility with Windows Versions
DirectX compatibility varies depending on the version of Windows you’re using. Here’s a breakdown of DirectX compatibility with different Windows versions:
DirectX 12 Ultimate
DirectX 12 Ultimate is included with Windows 11 and is exclusively supported in that version of Windows. Updates to DirectX 12-related files are only available through Windows Update, and there is no standalone version of DirectX 12 Ultimate.
DirectX 12
DirectX 12 is included with Windows 10 and is exclusively supported in that version of Windows. Updates for DirectX 12 are provided solely through Windows Update, and no standalone version is available.
DirectX 11.4 & 11.3
DirectX 11.4 and 11.3 are supported only in Windows 10. Similar to DirectX 12, updates for these versions are exclusively provided through Windows Update.
DirectX 11.2
DirectX 11.2 is supported in Windows 10 and Windows 8 (8.1+). Any updates related to DirectX 11.2 are available through Windows Update in these versions of Windows. A standalone download for DirectX 11.2 is not available.
DirectX 11.1
DirectX 11.1 is supported in Windows 10 and Windows 8. However, for Windows 7 (SP1), support is available only after installing the Platform Update for Windows 7.
DirectX 11.0
DirectX 11.0 is supported in Windows 10, Windows 8, and Windows 7. Support for Windows Vista is available, but only after installing the Platform Update for Windows Vista.
DirectX 10
DirectX 10 is supported in Windows 10, Windows 8, Windows 7, and Windows Vista.
DirectX 9
DirectX 9 is supported in Windows 10, Windows 8, Windows 7, Windows Vista, and Windows XP. If you encounter a program that requires DirectX 9 in Windows 10 or Windows 8, installing the downloadable version will not downgrade your DirectX 10/11/12 installation. DirectX 9 is also the latest version compatible with Windows XP.
5. How to Download DirectX
To download DirectX, follow these steps:
- Visit the DirectX download page on Microsoft’s website.
- Select your preferred language from the drop-down menu.
- Click on the Download button to save the setup file to your computer.
6. Installing DirectX on Windows 10/11
Once you’ve downloaded the DirectX setup file, you can proceed with the installation:
- Locate the downloaded dxwebsetup.exe file on your computer.
- Double-click the file to launch the installation wizard.
- Follow the on-screen instructions provided by Microsoft’s installation program.
- Read the terms of the license agreement and accept them.
- Customize the installation settings if desired.
- Click Install to begin the installation process.
The installation process may take a few minutes. Allow the process to complete.
Once the installation is finished, restart your computer to ensure the changes take effect.
7. Verifying the DirectX Installation
After restarting your computer, it’s important to verify that the DirectX update was successful. Here’s how you can do it:
- Press the Windows logo key and type dxdiag.
- Select dxdiag from the search results to open the DirectX Diagnostic Tool.
- Go to the System tab and check the DirectX Version entry.
- The version number should match the one you downloaded and installed.
8. Troubleshooting DirectX Update Issues
If you encounter any issues during the DirectX update process, here are a few troubleshooting steps you can try:
- Ensure that you have administrative privileges on your computer to install software.
- Disable any antivirus or security software temporarily, as they may interfere with the installation process.
- Download the DirectX setup file from a reliable source, such as Microsoft’s official website, to avoid any potential issues with corrupted files.
- Check for any pending Windows updates and install them before updating DirectX.
- Restart your computer and try the installation process again.
If you continue to experience difficulties with updating DirectX, you may consider seeking assistance from Microsoft support or consulting online forums and communities for further guidance.
9. Frequently Asked Questions
What does DirectX do?
DirectX is a collection of APIs that enable video games to communicate with your computer’s hardware, such as the graphics card, sound card, and memory. It enhances the gaming experience by providing optimized performance and compatibility.
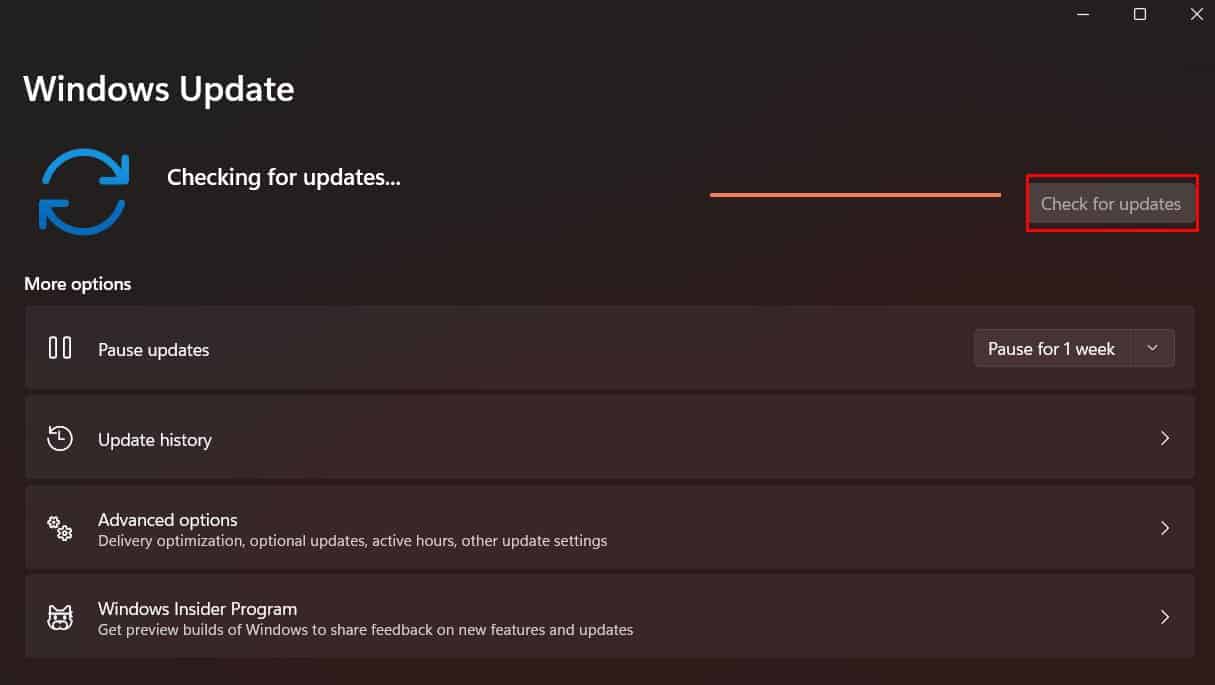
How do you update DirectX?
You can update DirectX through the Windows Update feature. Simply go to Start > Settings > Windows Update > Check for updates. If a new version of DirectX is available, you can download and install it from there.
How do you uninstall DirectX?
DirectX is an integral part of the Windows operating system, and there is no official way to uninstall it. However, you may be able to roll back to a previous version using the System Restore feature.
Where do you install DirectX end-user runtimes?
If you download Microsoft’s DirectX End-User Runtime Web Installer, it automatically installs runtime libraries from the legacy DirectX SDK. These libraries are required for running certain video games that utilize specific DirectX components.
Additional Tips for Optimal Gaming Performance
To enhance your gaming performance and ensure a smooth experience, consider implementing the following tips:
- Keep your graphics drivers up to date. Visit the website of your graphics card manufacturer (e.g., NVIDIA, AMD, Intel) and download the latest drivers for your specific graphics card model.
- Optimize your game settings. Adjust graphics settings within games to find a balance between visual quality and performance.
- Close unnecessary background applications. Free up system resources by closing any unnecessary programs running in the background.
- Regularly clean your computer. Remove dust from your computer’s components, especially the cooling system, to prevent overheating and maintain optimal performance.
- Monitor your system temperature. Use monitoring software to keep an eye on your computer’s temperature and ensure it stays within safe limits.
- Install the latest Windows updates. Keeping your operating system up to date ensures you have the latest bug fixes, security patches, and performance improvements.
Conclusion
Updating DirectX on your Windows 10 or 11 computer is essential for optimal gaming performance and compatibility. By following the steps outlined in this guide, you can easily check your current DirectX version, download the latest update, and install it on your system. Keeping DirectX up to date ensures that you can enjoy the latest games and graphics programs without any compatibility issues.
Remember to regularly check for Windows updates and keep your graphics drivers updated to further enhance your gaming experience. By following these best practices, you can ensure a smooth and immersive gaming experience on your Windows computer.
If you have any further questions or encounter any issues during the DirectX update process, don’t hesitate to seek assistance from Microsoft support or consult online forums and communities. Happy gaming!
Experiencing difficulties with your Device, check out our “How To” page on how to resolve some of these issues.