There can be no other easy or simple way to provide technical support to your mac friends other than detailed screen-sharing guidance. Solving your friends or family tech issues through an audio call can be real trouble. So, using a screen sharing option to mac friends and family to explain their technical issues can be the best possible option. This Messages screen-sharing feature in macOS is simple to use and doesn’t require any installations or unnecessary extensions to use it.
What is the use of the Messages screen-sharing feature?
- Live Video Feed: The screen sharing feature of the messages allows users to share their screens. Here one person gets to control the screen, and the other person will be providing the screen to control it. This allows the Mac user to look at the controlled screen of the other user.
- Facetime Audio: Facetime Audio Call allows the users to share their audio, thus improving the quality of their conversation. This will help the users clearly share their advice during the conversation, making it much more meaningful.
Note: Screen sharing through messages on macOS is a very helpful feature. But it can sometimes get you into trouble if you are not using it with the right person. So, remember to share the screen with the person you trust. If you need to share it with a stranger, it’s better to use ‘observe my screen’ mode as it only allows the other user to share the screen but not do any other modifications to your device. If you see something unusual, immediately end the conversation to ensure your online safety.
How to use the Messages screen-sharing feature in macOS through the request process?
Method 1
This is the first method to share your screen in macOS through the request process.
To start, click on the messages tab on your mac.
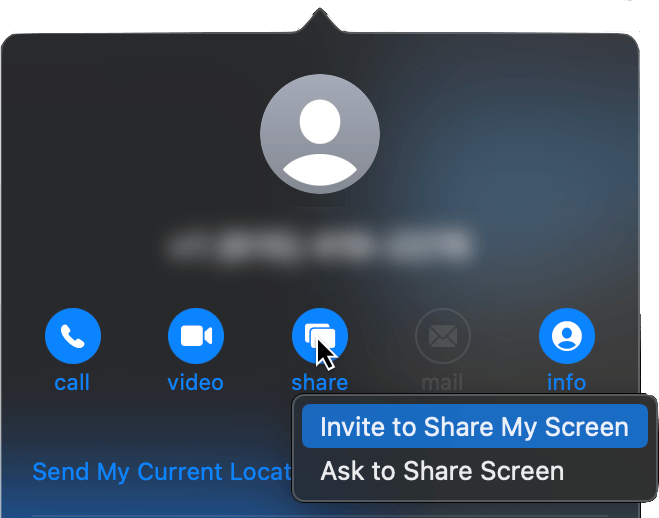
Now click on the Details button or the “i” button icon present at the top-right corner of the page.
Tab on the share button.
Now, tap on the share option on your device.
Then, click on invite to share my screen opinion from all the available options out there.
Now you will be able to share your screen after the user accepts your request.
Method 2
This is the second method to request a share screen in macOS.
To follow this method, click on the first open messages tab.
Tab on the conversation option with the person you want to talk with.
Now tab on the invite to share my screen option.
Wait till the user accepts your request, and then you will be able to share your screen.
Share your screen with the user in macOS through an invitation
Sharing your screen with the help of an invitation is way easier than sending a request.
To share the screen through this method, accept the request of sharing the screen when the invitation appears.
Then click on the control my screen option if you wish your friend to take full control of your screen.
If you want them to view your screen, click on observe my screen. This will prevent users from making any modifications to your device.
Then click on the accept button on the screen. And you will be able to share your screen with your friend now.
These are the various ways to share your screen with the user in macOS through an invitation. If you want to share your screen, go to the menu bar. Next, go to the screen sharing tab and click on end screen sharing. This will allow you to end screen sharing.
What if the screen sharing isn’t working properly?
If you are facing trouble sharing the screen, check the following criteria before proceeding further.
Check that the user you are having the conversation with has used the same AppleID for messages that have been used to sign in to iCloud. Any other IDs used can prevent you from sharing the screen.
Check the screen time limit of the other user you are conversing with. Ensure that both of you have set the same screen time limit before starting the conversation.
This is the entire process of using Messages to share your screen in macOS. If someone is sending you too many invitations, you can block the user too.
Experiencing difficulties with your Device, check out our “How To” page on how to resolve some of these issues.


