
Images are very important in many ways. Many individuals need images to achieve their needs which may be personal or for commercial use such as for making ads. Photos play an important role as memory aids or for future reference. Some may want to make the background transparent or delete it completely. You can make the image background transparent using Gimp.
To achieve the most appropriate image you need to harmonize the image to attain your most preferable outcome. There are many ways you can harmonize your images to provide the most out of them. You can accomplish making the image background transparent using Gimp. The steps are discussed below for your convenience.
This is an avenue that provides an awesome experience to the user and it’s easy to use. You may have a set of reasons for removing the background and attain the most out of your graphics. Below are some ways that will help you to make the image background transparent using Gimp.
Remove multiple color backgrounds
Removing multiple colors using GIMP is an effective and easy to use method to get the best background. To perform this operation, there are a set of methods and we opt for Mask. In our guide to make the most out of your photo experience, this is the method commonly used to remove multiple color background from the image.
Step 1: Load the image and add the alpha channel.
To load the image, click on the File option and then click on the open option. Select the image you want in the GIMP. Then, add the alpha channel.
To add the Alpha channel, right-click on the layer in the right sidebar and select Add alpha channel. This will make the title of the layer change from bold to normal.
Step 2: Right-click the same layer (layer in the right sidebar) and select the option Duplicate layer to create its copy. It is important to check whether the image is the one you intended to remove multiple color backgrounds from.
Step 3: Select the duplicate layer by clicking on it two times. Then, click on the colors and Desaturate and press the OK button. The option is available on the toolbar of your computer.
Step 4: Click on the colors selected and indicate contrast from the menu. Let the contrast be at maximum and adjust the brightness to almost white and black and then press the ok button to save the changes.
Step 5: To color the areas and to invert colors, select the pencil tool and make sure the hardness strength is set to 100 in the brushes toolbox. Color the areas that you want to keep with black color and remove the rest of the image with a white pencil, according to the outcome you want. Go to the color option and press the invert option or button from the menu.
Step 6: You need to copy the layer and turn it off.
The most convenient way to do it is by use of Ctrl + C on the keyboard which will turn the duplicate layer off.
Step 7: Add a layer mask by selecting the layer and not the main layer. Go to the layer option, click on the mask and then, select add layer mask option. A dialogue box will prompt open. Select the white option and hit the add button.
Step 8: Paste the layer that you copied. Go to Edit and select Paste or use Ctrl + V.
Step 9: Save the image by clicking on the save button which you can locate under the file option and then Export the file with the png extension.
From the set of guidelines, you can make any image background transparent in a way that suits your preferences.
USING PATH TOOL IN GIMP
There is another way to make your image transparent by the use of the path tool. It’s an effective way and has a track record of providing the most of your image needs.
Step 1: Open the alpha channel and load the image .indicate the image you need from the alpha channel menu. There are many selection options you can choose from the menu bar. If your image requires a logo you can load it from the bar.
Step 2: From the taskbar, you need to outline the image that you are interested in. You drag the outline by using your mouse or if you are using a laptop, use the touchpad. Draw the path inside the main boundary or you can also use the Ctrl + Z for faster access.
Step 3: Make an inversion in the selection. You can click the side menu and select the invert option and click it. This is to ensure that the image you need is retained once the image background is made transparent.
Step 4: Now you need to eliminate the background. This is done by selecting the delete key. This will make your image to stay with a transparent background. This can be undone in case the image disappears in the process of eliminating the background.
Step 5: Save the image and share it with your correspondents or use it for the reason you were making the image transparent.
How to remove the solid color from the background.
This means that your image has one color in the background. The steps provided will guide you towards achieving the outcome you are looking forward to.
Step 1: Upload the image on the GIMP. To upload the image, launch the GIMP on your computer and upload the image whose background you want to remove.
Step 2: Then, open the alpha channel. To open the alpha channel you need to click on the layer option at the top and click on the transparency and then, select add alpha channel option. It will then appear on the screen. You can also use an alternative method to open the alpha channel. Simply, click the tab in the right sidebar and select the alpha channel.
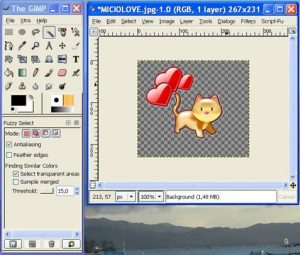
Step 3: From the left sidebar, select the color or fuzzy selection tool. Click on the color that you are interested in and apply it in the background of the image you want to remove.
Step 4: This step includes deleting the background. After selecting the background hit the clear button from the edit option. You can also use the delete button from your keyboard. In case you want to deselect the area you selected, click on the top and choose none from the menu. This will deselect the current selection.
Step 5: Save the image. To save the image, click the file option at the top and select Export from the menu. Type the name or title you need for your image. Use the png extension since it’s the most convenient. You will realize that your image will appear exactly the way you indicated it.
USING SELECT BY COLOR TOOL
A much less difficult technique — like the Fuzzy Select Tool — is the Select by Color tool. When you click on a particular pixel with this tool, it will make a selection around it and each other pixel with a similar color. This device works incredibly if you have a picture where your background consists of only a single shade or a couple of shades.
Click on the Select by Color tool by selecting the symbol featured above, or by basically pressing Shift + O on your console.
As I discussed above, you simply need to click on a fragment of the picture that contains the shading you’d prefer to erase. You can increase the size of the choice by clicking and dragging to the one side, or diminishing it by clicking and dragging to the one side. You can likewise choose extra shades of a similar shading by holding Shift and clicking on them also.
When you have made a selection from your image background, press Delete on your console or go to Edit and click on the Clear button if in case you are using Mac.
WRAPPING UP
Making the image background transparent using Gimp is easy if done the right way. It’s not like everyone uses Adobe Photoshop to edit their pictures. No doubt that Adobe Photoshop is the most popular and the best Photo editor tool, but it’s a fact that it’s quite complicated.
GIMP makes editing easier and is one of the best alternatives to Adobe Photoshop. The best thing about using GIMP is that it does not slow your computer.
Images are used for many reasons. Many people use images for commercial purpose such as an advertisement for social media sharing with friends. Regardless of your use, you can use any of the methods indicated to create your image.
We hope the information provided was useful and you enjoy making images transparent using GIMP.
Experiencing difficulties with your Device, check out our “How To” page on how to resolve some of these issues.


