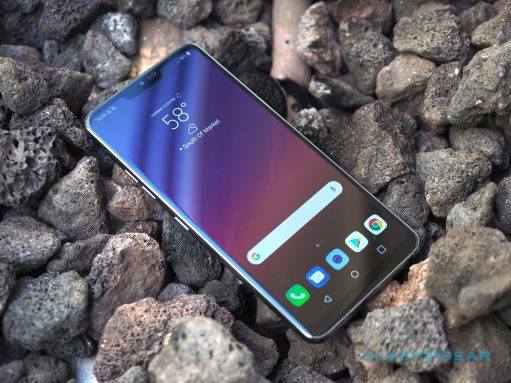
In case you missed the news, Google just released Android 6.0 Marshmallow and today I wanted to show you how to install it on your Nexus 6.
Older Nexus owners have normally had to wait until after Google releases their new Nexus device before we can install the latest version of Android. This year is a little different though since Google plans on releasing the Nexus 5X and the Nexus 6P around the end of the month. This means that anyone with the Nexus 5, Nexus 6, 2013 Nexus 7, Nexus 9 and the Nexus Player can install Android 6.0 Marshmallow on their devices right now.
The easiest way to get the latest update is to simply wait for the OTA update to be pushed to your device. I’ve had to wait ~2 months before an update was pushed to my 2012 Nexus 7 and that was a painful wait.
Not everyone wants to wait for this OTA update to be pushed to their device though and that is what today’s tutorial is for. If you have the Nexus 6 and you want to manually install Android 6.0 Marshmallow on it right now then follow the instructions below. The process might seem long, but I’m just breaking it down in a step by step process so it is easy to follow.
Nexus 6 Manually Install Android 6.0
- Download and Install the Google USB Drivers
- Reboot Your Computer
- Enable Developer Mode on the Nexus 6
- Go Back to the Main Settings Page
- Scroll Down and Tap on the ‘Developer Options’ Menu
- Enable the ‘USB Debugging’ Feature
- If Available, Enable the ‘OEM Unlock’ Option Too
- Download and Install ADB & Fastboot Tools
- Launch the ADB & Fasboot Tools Shortcut
- Type the Following Command. . .
- adb devices
- . . .and Press Enter
- Connect the Nexus 6 to the PC
- Tap the ‘OK’ Option to Allow USB Debugging if Prompted
- Boot the Nexus 6 into Fastboot Mode
- Reconnect the Nexus 6 to the PC and Type the Following Command. . .
- fastboot oem unlock
- . . .and Press Enter
- On the Nexus 6, Confirm That You Want to Unlock the Bootloader
- When the Nexus 6 Bootloader is Unlocked, Reboot Back into Fastboot Mode(like in step #15)
- Download the Android 6.0 Marshmallow Factory Images
- Extract the Contents of the .tgz File
- Copy the Contents(all 6 files) of the .tgz File into the Minimal ADB & Fastboot Installation Directory
- For Me, that was “C:\Program Files (x86)\Minimal ADB and Fastboot”
- Type the Following Command. . .
- flash-all.bat
- . . .and Press Enter
- Wait for the Installation to Complete
- Then Press Any Key to Exit the Command Prompt
- Wait for the Nexus 6 to Reboot on its Own
- Be Patient Because the First Boot Can Take a While
Explanation
As mentioned, this guide is for those who have never done any type of firmware flashing on their Nexus 6 before. If you have done this in the past then you might already have the USB drivers installed, you might already have ADB & Fastboot tools installed, etc. If you’ve already done some of these steps before, then you can skip past them and just use the tutorial as a rough guide. If you haven’t done these steps yet, or you aren’t sure, then I recommend following each step just to make sure you have everything done properly.
So go ahead and grab the Google USB drivers and install them onto your computer. Once installed, it’s probably best to reboot the PC so that we can make sure the drivers have been installed properly. Then you can enable USB debugging on the Nexus 6 by enabling Developer Mode and all of that(follow the links if you are confused here). It is also recommended that you enable the OEM Unlock option as well(if you haven’t previously unlocked the bootloader). You’ll then need to boot the Nexus 6 into fastboot mode so that you can unlock the bootloader.
Even if you have already unlocked the bootloader, you need to be in Fastboot Mode so that you can flash the Android 6.0 Marshmallow firmware files. Once the bootloader is unlocked and you’re in Fastboot Mode, shift your attention back to the PC and install the Minimal ADB & Fastboot tools that are linked in the tutorial. These tools ask if you want to create a shortcut to them. I say yes so they are easy to access for future reference. Once installed, double-click on that shortcut and it should launch a command prompt right where the ADB & Fastboot tools are located.
Run the ‘adb devices’ command so that you can go ahead start the adb services and then connect the Nexus 6 to the PC with a micro USB cable. You might be prompted to allow USB Debugging access from the PC when you connect it(if you haven’t previously done this in the past). Allow your PC access and then run the ‘adb devices’ command again to make sure you see your device listed there(it should be listed as random letters/numbers). Once you can see that ADB recognizes your Nexus 6, you can download and extract the Android 6.0 Marshmallow factory images to your computer.
You should then copy/paste those six files that were extracted here and move them into the same directory that the ADB & Fastboot tools were installed to. Once all of that is done, go back to the command prompt that was opened when you double-clicked on the ADB & Fastboot shortcut and type execute the flash-all.bat file to start the process. If done properly, you should see the computer copying and writing the images directly to your Nexus 6 over the micro USB cable. This process can take a while so be patient while it installs.
After it is installed, your Nexus 6 will reboot twice before it takes you into the Android 6.0 activation screen. The first boot up(where you see the Android boot animation) will take a long, long time. It took my Nexus 5 at least 10-15 minutes to complete this first boot. Each boot after the first will not take this long. This first boot process just takes a while because Android needs to set everything up.


