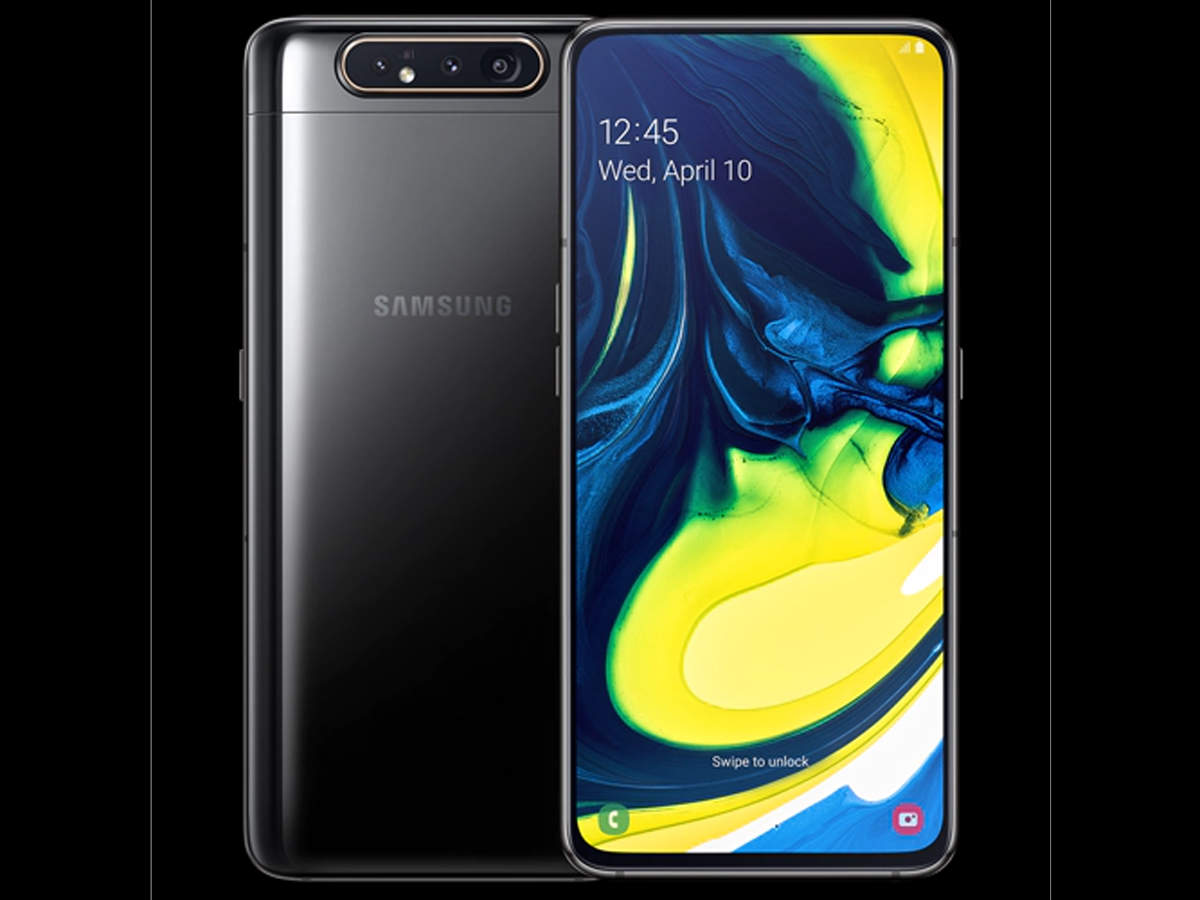
The Samsung Galaxy A80 is a feature-packed smartphone that offers a seamless user experience. Whether you’re new to the device or a long-time user, there are several tips and tricks that can help you make the most of its capabilities. In this comprehensive guide, we’ll explore various aspects of the Samsung Galaxy A80, including helpful tips for installing apps, managing storage space, troubleshooting common issues, and more. So, let’s dive in and unlock the full potential of your Samsung Galaxy A80!
Installing Apps
One of the most exciting aspects of owning a Samsung Galaxy A80 is the ability to install a wide range of apps that enhance your smartphone experience. Whether you’re looking for productivity tools, entertainment apps, or social media platforms, the Galaxy A80 has you covered. Here’s a step-by-step guide on how to install apps on your device:
- Open the Google Play Store on your Samsung Galaxy A80.
- Use the search bar at the top of the screen to search for the app you want to install.
- Select the desired app from the search results.
- Tap on the Install button to begin the installation process.
- Once the app is installed, you can find it on your home screen or in the app drawer.
Managing App Updates
Regular app updates are essential for maintaining the security and functionality of your Samsung Galaxy A80. Here’s how you can manage app updates on your device:
- Open the Google Play Store on your Samsung Galaxy A80.
- Tap on the Menu icon (three horizontal lines) in the top-left corner of the screen.
- Select My apps & games from the menu.
- You’ll see a list of apps that have updates available. Tap on the Update button next to each app to update them individually.
- To update all apps at once, tap on the Update all button at the top of the screen.
Creating Backups
Creating regular backups of your Samsung Galaxy A80 is crucial to ensure that your data is safe and easily recoverable in case of device loss or damage. Here’s how you can create backups on your device:
- Go to the Settings app on your Samsung Galaxy A80.
- Scroll down and tap on Accounts and backup.
- Select Backup and restore.
- Toggle on the Back up my data option to enable automatic backups.
- You can also tap on Google Account to choose which data to include in the backup.
Bluetooth Pairing
Bluetooth pairing allows you to connect your Samsung Galaxy A80 with other Bluetooth-enabled devices, such as headphones, speakers, or car audio systems. Here’s how you can pair your device with Bluetooth accessories:
- Enable Bluetooth on both your Samsung Galaxy A80 and the Bluetooth accessory you want to connect.
- On your Samsung Galaxy A80, go to the Settings app.
- Tap on Connections.
- Select Bluetooth.
- Your device will start scanning for available Bluetooth devices. Tap on the desired device from the list.
- Follow any on-screen prompts to complete the pairing process.
Adding Contacts
Adding contacts to your Samsung Galaxy A80 allows you to easily reach out to your friends, family, and colleagues. Here’s how you can add contacts to your device:
- Open the Contacts app on your Samsung Galaxy A80.
- Tap on the + (plus) icon to add a new contact.
- Enter the contact’s name, phone number, and any additional details you want to include.
- Tap on the Save button to save the contact.
Transferring Contacts
If you’re switching from another device to the Samsung Galaxy A80, you may want to transfer your existing contacts to ensure a seamless transition. Here are a few methods you can use to transfer contacts to your Samsung Galaxy A80:
- Syncing with Google: If your contacts are already synced with a Google account on your previous device, you can simply sign in to the same Google account on your Samsung Galaxy A80 to automatically sync your contacts.
- Importing from SIM card: If your contacts are stored on a SIM card, you can import them to your Samsung Galaxy A80 by going to the Contacts app, tapping on the Menu icon, selecting Settings, and then choosing Import/Export. Follow the on-screen instructions to import contacts from the SIM card.
- Bluetooth Transfer: If your previous device supports Bluetooth, you can pair it with your Samsung Galaxy A80 and use the Bluetooth file transfer feature to send contacts from one device to another.
Setting up Date and Time
Setting up the correct date and time on your Samsung Galaxy A80 is essential for accurate timekeeping and synchronization with various apps and services. Here’s how you can set the date and time on your device:
- Go to the Settings app on your Samsung Galaxy A80.
- Scroll down and tap on General management.
- Select Date and time.
- Toggle on the Automatic date and time option to allow your device to automatically set the date and time based on your location. Alternatively, you can manually set the date and time by toggling off the automatic option and selecting the desired date and time.
Setting up Email
Setting up email accounts on your Samsung Galaxy A80 allows you to access your emails on the go. Whether you use Gmail, Outlook, or another email provider, here’s how you can set up email accounts on your device:
- Open the Email app on your Samsung Galaxy A80.
- Tap on the Menu icon (three horizontal lines) in the top-left corner of the screen.
- Select Settings.
- Tap on Add account.
- Choose your email provider from the list, or select Other if your provider is not listed.
- Enter your email address and password, and follow any on-screen prompts to complete the setup process.
Setting up Internet
Setting up internet connectivity on your Samsung Galaxy A80 allows you to browse the web, access online services, and stay connected wherever you go. Here’s how you can set up internet on your device:
- Go to the Settings app on your Samsung Galaxy A80.
- Scroll down and tap on Connections.
- Select Mobile networks.
- Tap on Access Point Names.
- Tap on the + (plus) icon to add a new APN.
- Enter the required APN settings provided by your mobile network operator. If you’re unsure about the settings, you can contact your operator for assistance.
Switching off Roaming
When traveling abroad, it’s important to switch off roaming on your Samsung Galaxy A80 to avoid excessive mobile data charges. Here’s how you can disable roaming on your device:
- Open the Settings app on your Samsung Galaxy A80.
- Scroll down and tap on Connections.
- Select Mobile networks.
- Toggle off the Data roaming option to disable roaming.
Software Updates
Keeping your Samsung Galaxy A80 up to date with the latest software updates is crucial for optimal performance and security. Here’s how you can check for and install software updates on your device:
- Go to the Settings app on your Samsung Galaxy A80.
- Scroll down and tap on Software update.
- Tap on Download and install to check for updates.
- If an update is available, follow the on-screen prompts to download and install it.
Setting up Language
Customizing the language settings on your Samsung Galaxy A80 allows you to use the device in your preferred language. Here’s how you can set up the language on your device:
- Open the Settings app on your Samsung Galaxy A80.
- Scroll down and tap on General management.
- Select Language and input.
- Tap on Language.
- Choose your desired language from the list.
Resetting Your Phone
If you’re experiencing persistent issues with your Samsung Galaxy A80 or want to erase all data and start fresh, you can perform a factory reset. Here’s how you can reset your device:
- Go to the Settings app on your Samsung Galaxy A80.
- Scroll down and tap on General management.
- Select Reset.
- Tap on Factory data reset.
- Read the on-screen warnings and tap on Reset to confirm the reset process.
- Your device will restart and erase all data, returning it to its original factory settings.
Connecting to Wi-Fi
Connecting your Samsung Galaxy A80 to a Wi-Fi network allows you to access the internet and download large files without using your mobile data. Here’s how you can connect to a Wi-Fi network on your device:
- Go to the Settings app on your Samsung Galaxy A80.
- Scroll down and tap on Connections.
- Select Wi-Fi.
- Toggle on the Wi-Fi option to enable Wi-Fi.
- Your device will start scanning for available Wi-Fi networks. Tap on the desired network from the list.
- If the network is secured, enter the correct Wi-Fi password and tap on Connect.
TalkBack
TalkBack is an accessibility feature on the Samsung Galaxy A80 that provides spoken feedback for users with visual impairments. Here’s how you can enable and use TalkBack on your device:
- Go to the Settings app on your Samsung Galaxy A80.
- Scroll down and tap on Accessibility.
- Select Visibility enhancements.
- Toggle on the TalkBack option to enable it.
- Your device will start providing spoken feedback for various actions, such as tapping on icons or navigating through menus. Follow the spoken instructions to interact with your device.
Applying a Screen Protector
Protecting the display of your Samsung Galaxy A80 with a screen protector can help prevent scratches and damage. Here’s how you can apply a screen protector on your device:
- Clean the screen of your Samsung Galaxy A80 using a microfiber cloth to remove any dust or fingerprints.
- Peel off the protective film from the screen protector.
- Align the screen protector with the display of your device, making sure it fits perfectly.
- Gently press the screen protector onto the display, starting from the center and working your way outwards to remove any air bubbles.
APN Settings
Correct APN (Access Point Name) settings are essential for accessing mobile data on your Samsung Galaxy A80. Here’s how you can configure APN settings on your device:
- Go to the Settings app on your Samsung Galaxy A80.
- Scroll down and tap on Connections.
- Select Mobile networks.
- Tap on Access Point Names.
- Tap on your mobile network operator’s APN to edit the settings.
- Enter the correct APN settings provided by your mobile network operator. If you’re unsure about the settings, you can contact your operator for assistance.
Resetting via Recovery Mode
If your Samsung Galaxy A80 is experiencing severe software issues or won’t boot up, you can try resetting it via recovery mode. Here’s how you can perform a reset via recovery mode on your device:
- Power off your Samsung Galaxy A80.
- Press and hold the Volume Up and Power buttons simultaneously until the Samsung logo appears.
- Release the Power button but continue holding the Volume Up button until the recovery mode menu appears.
- Use the volume buttons to navigate to the Wipe data/factory reset option and press the Power button to select it.
- Navigate to the Yes option and press the Power button to confirm.
- Once the reset process is complete, select the Reboot system now option to restart your device.
Transferring from Android
If you’re switching from an Android device to the Samsung Galaxy A80, you can easily transfer your apps, settings, and data using the Samsung Smart Switch app. Here’s how you can transfer data from your old Android device to your Samsung Galaxy A80:
- Download and install the Samsung Smart Switch app on both your old Android device and the Samsung Galaxy A80 from the Google Play Store.
- Open the app on your old Android device and follow the on-screen instructions to select the data you want to transfer.
- On your Samsung Galaxy A80, open the Smart Switch app and choose the Wireless transfer option.
- Follow the on-screen instructions to connect both devices and complete the data transfer.
Transferring from iOS
If you’re switching from an iPhone to the Samsung Galaxy A80, you can use the Samsung Smart Switch app to transfer your apps, settings, and data. Here’s how you can transfer data from your iPhone to your Samsung Galaxy A80:
- Download and install the Samsung Smart Switch app on both your iPhone and the Samsung Galaxy A80 from the App Store and Google Play Store, respectively.
- Open the app on your iPhone and follow the on-screen instructions to select the data you want to transfer.
- On your Samsung Galaxy A80, open the Smart Switch app and choose the Wireless transfer option.
- Follow the on-screen instructions to connect both devices and complete the data transfer.
Recovering a Forgotten Access Code
If you’ve forgotten the access code to unlock your Samsung Galaxy A80, you can use the following steps to regain access to your device:
- Enter an incorrect access code several times until you see a prompt that says Forgot pattern or Forgot password.
- Tap on the Forgot pattern or Forgot password option.
- Follow the on-screen instructions to reset your access code using your Google account credentials or your device’s registered email address.
Placing a SIM Card
Inserting a SIM card into your Samsung Galaxy A80 allows you to make calls, send messages, and access mobile data. Here’s how you can place a SIM card in your device:
- Power off your Samsung Galaxy A80.
- Locate the SIM card tray on the top or side of your device. You may need to use the SIM card ejection tool provided with your device or a paperclip to access the tray.
- Insert the SIM card into the tray, ensuring that the gold contacts are facing down.
- Gently push the SIM card tray back into the device until it clicks into place.
- Power on your Samsung Galaxy A80.
Frequently Asked Questions
How to Delete the Samsung Region Lock
The Samsung Galaxy A80 comes with a region lock to prevent phones from being used outside their intended region. However, you can easily remove the region lock by following these steps:
Answer: Samsung uses a Region Lock to prevent phones from being traded outside the intended region. You can recognize a Samsung smartphone with a Region Lock by the sticker on the box with “EUROPEAN SIM CARD ONLY”. To remove the region lock, make calls for a total of five minutes with a European SIM card. After that, you can use any SIM card you want in any place you want. It’s essential to do this before going abroad and using a foreign SIM card. The European region includes all countries within the EU, as well as additional countries such as Lichtenstein, Iceland, Norway, Switzerland, Albania, Andorra, Bosnia and Herzegovina, Macedonia (F.Y.R.O.M.), Monaco, Montenegro, San Marino, Serbia, and Vatican City.
Resolving ‘Camera Error’ Notifications
If you encounter a ‘camera error’ notification on your Samsung Galaxy A80, follow these steps to resolve the issue:
Answer: To fix the ‘camera error’, start by removing the data from the camera application and performing a software update. Here’s how:
- Go to Settings and then to Applications/Application management.
- Search for the camera app and click on it.
- Click on ‘Forced stop’, then on ‘Empty cache’, and finally on ‘Erase data’.
- Connect to a Wi-Fi network.
- Go to Settings, then to Device info, and perform a software update.
If these steps don’t resolve the issue, you can try resetting your device to factory settings. Note that a reset will erase your applications and data, so make sure to create a backup first. Here’s how to reset your Samsung Galaxy A80:
- Go to Settings.
- Go to Accounts/User and backup.
- Click ‘Make a backup and restore’.
- Click ‘Restore default data’ and follow the instructions.
Managing Storage Space
If your Samsung Galaxy A80’s storage space is full, it can slow down your device and prevent you from downloading new apps or taking more photos. While the device’s memory cannot be expanded with a memory card, you can utilize cloud storage to free up space. Here’s how:
Answer: If your phone’s storage space is full, you can use cloud storage to upload photos and videos, freeing up space on your Samsung Galaxy A80. Examples of cloud storage services include iCloud, Dropbox, Google Drive, and Microsoft OneDrive. By uploading your files to the cloud, you can delete them from your device while still being able to access them via the cloud. This way, your phone stays fast, and you have room for new apps and content.
Removing a Google Account
If you need to remove a Google Account from your Samsung Galaxy A80, follow these steps:
Answer: To remove a Google Account from your device, go to Settings, click on Accounts, and check if there are any Google Accounts listed. Select the Google Account you want to remove and choose Delete. It’s important to note that deleting a Google Account from your device will only disconnect it from your device and not delete the account itself.
The Blinking Pixel
If you notice a blinking white pixel on your Samsung Galaxy A80’s display while making a call, don’t worry. It’s not a dead pixel but the proximity sensor doing its job to prevent unintended touches. When you bring the phone closer to your ear, the proximity sensor flashes, creating the illusion of a dead pixel.
Answer: The blinking white pixel you see on your Samsung Galaxy A80’s display during a call is not a dead pixel. It’s actually the proximity sensor at work. The proximity sensor is responsible for turning off the screen while making a call to prevent unintended touches. So, rest assured that the blinking pixel is a normal behavior and not a display defect.
Conclusion
By following these tips and tricks, you can make the most of your Samsung Galaxy A80 and enhance your overall smartphone experience. From installing apps to troubleshooting common issues, this guide has covered a wide range of topics to ensure that you’re equipped with the knowledge to optimize your device. Enjoy exploring the features and functionalities of your Samsung Galaxy A80!
Experiencing difficulties with your Device, check out our “How To” page on how to resolve some of these issues.


