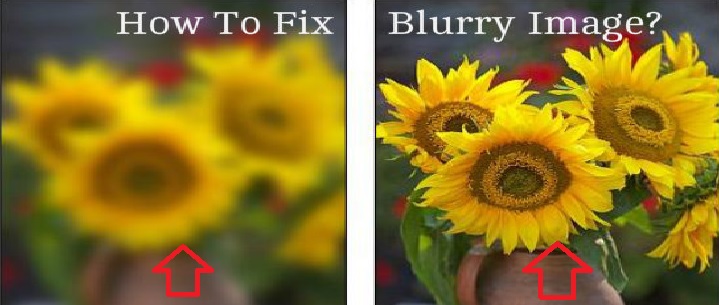
Have you ever captured a memorable moment or taken a photo for an important purpose, only to find it turns out blurry when you review it later? Blurry images can be frustrating, whether they are caused by camera movement, vibration, or lack of focus. Fortunately, there are various software tools available that can help you unblur your photos and enhance their quality.
In this comprehensive guide, we will explore different methods and techniques to unblur a photo or image. From using popular software like Photoshop and GIMP to utilizing mobile apps like Snapseed, we will walk you through step-by-step instructions on how to refine your images and achieve clearer results. So, let’s dive in and discover how you can rescue your blurry photos!
Before we dive into the methods of unblurring photos, it’s important to understand the common causes of blurry images. By identifying the root cause, you can implement preventive measures while capturing photos to minimize the chances of blurriness. Here are some factors that can contribute to blurry images:
Camera Movement and Vibration
One of the most common causes of blurry images is camera movement or vibration during the time of capture. This can occur when you don’t hold the camera steady enough or when shooting in low-light conditions, resulting in longer exposure times. Even the slightest movement can cause blurriness in the final image.
Lack of Focus
Another factor that can lead to blurry images is a lack of focus. If your camera fails to focus properly on the subject, the resulting photo may appear blurry. This can happen when shooting in low-light conditions or when the autofocus feature of your camera struggles to lock onto the subject.
Other Factors
Apart from camera movement and lack of focus, there are other factors that can contribute to blurry images. These include motion blur caused by moving subjects, camera shake due to handheld shooting, and even lens quality or settings. Understanding these factors can help you identify the specific issue with your blurry photos and choose the appropriate method to unblur them.
1. Unblurring Photos with Photoshop
Photoshop is a powerful and widely-used software for photo editing and manipulation. It offers various tools and techniques that can help you unblur your photos and enhance their overall quality. Here are three methods you can try using Photoshop:
Adjusting Blur using Photoshop
To adjust blur using Photoshop, follow these steps:
- Open your photo in Photoshop.
- Go to the Filters menu and select Customize.
- Choose the Shape Mask option.
- Adjust the radius and volume settings until your image becomes clear.
- Fine-tune the settings as needed to achieve the desired result.
Blur Correction using Photoshop Only
If you prefer using only Photoshop to correct blur in your photos, follow these steps:
- Open your photo in Photoshop.
- Duplicate the background layer and select it.
- Go to Filter > Second > High Pass and set it to 10%.
- Choose the layer blending mode to Overlay and adjust the opacity until the image becomes clear.
Using Camera Shake Reduction in Photoshop
If you are using the latest version of Photoshop, you can also utilize the camera shake reduction feature to reduce blur in your photos. Here’s how:
- Open your photo in Photoshop.
- Go to Filter > Sharpen > Shake Reduction.
- Let Photoshop analyze the image and make the necessary adjustments.
- Review the changes and fine-tune if required.
2. Unblurring Photos with GIMP
If you don’t have access to Photoshop, don’t worry! You can still unblur your photos using GIMP, a free and powerful image editor. Although the user interface may be slightly different from Photoshop, GIMP offers similar capabilities for unblurring photos. Here’s how you can use GIMP to unblur an image:
- Open the desired photo in GIMP.
- Select the Blur/Sharpness tool from the toolbox.
- Use the tool to refine and drag your mouse over the image, or select a specific portion for targeted sharpening.
- GIMP will automatically perform the necessary adjustments to unblur the image.
- Fine-tune the settings as needed to achieve the optimal result.
3. Unblurring Photos with Snapseed
Snapseed is a popular image editing app developed by Google. It is available for both Android and iPhone devices and offers a wide range of editing tools, including options to enhance sharpness and reduce blurriness. Here’s how you can unblur a photo using Snapseed:
- Open your photo in Snapseed.
- Select the Details menu option.
- Choose the Sharp or Textured image tool and adjust the settings to increase sharpness.
- Combine the sharpness and texture adjustments to significantly reduce blurriness.
- Experiment with different settings until you achieve the desired level of sharpness.
4. Alternative Methods for Unblurring Photos
In addition to the software tools mentioned above, there are other alternative methods you can try to unblur your photos. These methods may not offer the same level of control and precision as professional editing software but can still yield satisfactory results, especially for minor blurriness. Here are a few alternative methods:
Online Unblur Tools
There are numerous online tools available that claim to unblur photos instantly. These tools utilize algorithms and image processing techniques to enhance clarity and reduce blurriness. Simply upload your photo to the online tool, and it will apply the necessary adjustments to unblur the image. However, keep in mind that the results may vary depending on the complexity of the blurriness and the specific tool used.
Smart Deblur Apps
Smart deblur apps are available for both desktop and mobile devices. These apps use advanced algorithms to analyze the blur patterns in your photo and apply the necessary corrections to unblur the image. Some smart deblur apps even offer additional features like motion deblur and object tracking, allowing you to fix more complex blurriness issues.
Manual Sharpening
If you prefer a more hands-on approach, you can try manually sharpening your photos using editing software. This method involves selectively enhancing the edges and details in your image to make it appear sharper. While it may require more time and effort compared to automated tools, manual sharpening allows for precise control over the sharpening process and can yield excellent results.
Tips and Tricks for Better Photography
While it’s essential to know how to unblur photos, preventing blurriness in the first place is even better. Here are some tips and tricks to help you capture sharper and clearer photos:
Use a Tripod or Stable Surface
To minimize camera movement and vibration, use a tripod or place your camera on a stable surface whenever possible. This will ensure steady shots and reduce the chances of blurriness caused by camera shake.
Optimize Focus Settings
Understanding your camera’s autofocus settings and modes can significantly improve the sharpness of your photos. Experiment with different focus modes, such as single-point autofocus or continuous autofocus, to find the one that works best for your shooting situation.
Increase Shutter Speed
When shooting handheld or capturing fast-moving subjects, try increasing your shutter speed to minimize motion blur. A faster shutter speed freezes the action, resulting in sharper images.
Use Image Stabilization
If your camera or lens has built-in image stabilization, make sure it is enabled. Image stabilization helps compensate for camera shake and can significantly reduce blurriness in your photos.
Avoid Digital Zoom
Digital zoom can degrade image quality and introduce blurriness. Instead of relying on digital zoom, try to get closer to your subject physically or use optical zoom if your camera has that capability.
Capture in Good Lighting Conditions
Proper lighting plays a crucial role in capturing sharp photos. Whenever possible, choose well-lit environments or use additional lighting sources to ensure sufficient illumination. Good lighting reduces the need for longer exposure times, minimizing the chances of blurriness.
Conclusion
In conclusion, blurry photos can be frustrating, but there are various methods and tools available to help you unblur them and enhance their quality. Whether you have access to professional software like Photoshop and GIMP or prefer using mobile apps like Snapseed, you can follow the step-by-step instructions provided in this guide to rescue your blurry photos.
Additionally, implementing preventive measures like using tripods, optimizing focus settings, and capturing images in good lighting conditions can significantly reduce the chances of blurriness in your photos. By combining these techniques with the knowledge gained from this guide, you’ll be well-equipped to capture and unblur photos with confidence.
Remember, practice makes perfect. Keep experimenting with different methods, tools, and shooting techniques to improve your photography skills and achieve sharper, clearer images. Happy unblurring!
Additional Information:
- Always make sure to create a backup copy of your original photo before making any edits to avoid permanent loss of the original image.
- Experiment with different editing techniques and settings to find the ones that best suit your style and desired results.
- Don’t be afraid to explore other photo editing software and apps besides the ones mentioned in this guide. There are numerous options available, each with its unique features and capabilities.
- Constantly update your editing software and apps to take advantage of the latest tools and enhancements.
- Seek inspiration and learn from professional photographers and online tutorials to further improve your editing skills.
Experiencing difficulties with your Device, check out our “How To” page on how to resolve some of these issues.