Are you looking for a reliable way to backup your Facebook Messenger conversations? Whether you want to preserve precious memories or ensure you have a backup in case of a device switch or reset, having a backup of your Facebook Messenger messages is a smart move. In this comprehensive guide, we will explore various methods to backup your Facebook Messenger conversations on both Android and iPhone devices. From using built-in features to third-party solutions, we’ve got you covered. So let’s dive in and discover the best ways to backup your Facebook Messenger messages!
Facebook Messenger has become a popular communication tool for both personal and professional purposes. With its extensive range of features, users can engage in text chats, voice calls, video calls, and share photos, videos, and documents. However, it’s essential to have a backup of your Messenger conversations to safeguard your valuable memories and important information. In the following sections, we will explore various methods to backup your Facebook Messenger conversations on both Android and iPhone devices.
Why Backup Facebook Messenger Conversations?
There are several reasons why you might want to backup your Facebook Messenger conversations. Here are a few common scenarios where having a backup can come in handy:
- Preserving Memories: Facebook Messenger conversations often contain cherished memories, from heartfelt conversations with loved ones to funny exchanges with friends. By backing up your conversations, you can ensure these memories are safely stored for future reference.
- Device Switch or Reset: If you’re switching to a new device or planning to reset your current device, having a backup of your Messenger conversations allows you to seamlessly transfer your messages to the new device or restore them after the reset.
- Data Loss Prevention: Accidental deletion, device damage, or software issues can result in the loss of your Messenger conversations. By regularly backing up your conversations, you can protect yourself from data loss and easily restore your messages if needed.
Now that we understand the importance of backing up Facebook Messenger conversations, let’s explore the different methods available for Android and iPhone devices.
How to Backup Messenger Conversations on Android/iPhone
Method 1: Downloading from Messenger (Official Method)
The official method provided by Facebook allows you to download a copy of your Messenger conversations directly from the Messenger app itself. Here’s how you can do it:
- Open the Messenger app on your Android or iPhone device and log in to your Facebook account.
- Tap on your profile picture or avatar in the top left corner to access your profile settings.
- Scroll down and tap on “Privacy & Settings”.
- In the “Your Facebook Information” section, tap on “Download Your Information”.
- Select the data you want to download. To backup Messenger conversations, make sure to check the “Messages” option.
- Choose the date range for the conversations you want to backup.
- Select the file format for the backup, either HTML or JSON.
- Tap on “Create File” to initiate the backup process.
- Wait for the backup file to be created. You will receive a notification when it’s ready.
- Once the file is ready, tap on “Download” to save the backup file to your device.
The downloaded backup file will contain your Messenger conversations in the chosen file format (HTML or JSON). You can now safely store this file on your device or transfer it to another device for future reference.
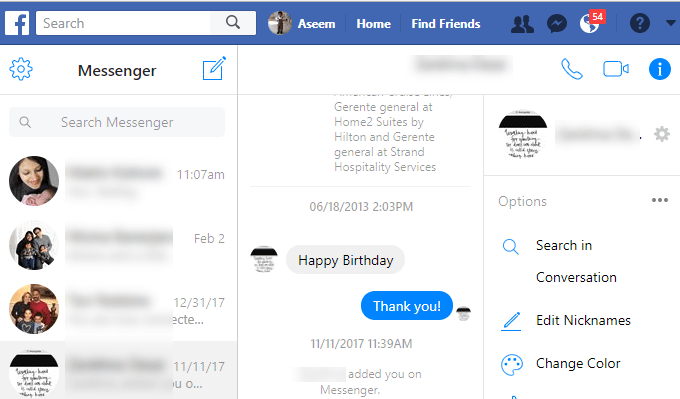
Method 2: Saving from Facebook.com
If you prefer to backup specific conversations rather than downloading all your Messenger messages, you can use the Facebook website to manually save your conversations. Follow these steps:
- Open a web browser and go to https://www.facebook.com/messages/t/.
- Navigate to the chat conversation you want to save.
- Scroll up to load older messages if necessary.
- Select and copy the text of the conversation. You can do this by clicking on a word in the conversation, then pressing Ctrl+A (Windows) or Command+A (Mac) to select all the text. Alternatively, you can select a specific portion of the conversation by clicking and dragging with your mouse.
- Open a text document or word processor and paste the copied conversation.
- Save the document to your desired location on your device.
By following these steps, you can manually save your Facebook Messenger conversations from the Facebook website. This method allows you to save specific conversations without the need to download all your Messenger messages.
Method 3: Taking Screenshots
Taking screenshots is a convenient method to backup shorter Messenger conversations or specific messages within a conversation. Here’s how you can do it:
Taking Screenshots on Android:
- Open the Facebook Messenger app on your Android device.
- Navigate to the conversation you want to backup.
- Scroll through the conversation and capture screenshots of the messages section by section.
- Organize and save these screenshots in a secure location on your device.
To take a screenshot on most Android devices, simultaneously press the “Power” and “Volume Down” buttons. However, the exact method may vary depending on your device model. Refer to your device’s manual or search online for the specific instructions.
Taking Screenshots on iPhone:
- Open the Facebook Messenger app on your iPhone.
- Go to the conversation you want to backup.
- Scroll through the conversation and capture screenshots as you go.
- Organize and save these screenshots in a secure location on your device.
On iPhones with Face ID, press the “Side” and “Volume Up” buttons at the same time to take a screenshot. On iPhones with Touch ID, press and hold both the “Side” button and the “Home” button simultaneously, then release them swiftly.
While taking screenshots is a practical method for backing up shorter conversations, it may not be suitable for longer conversations due to the manual effort involved.
Method 4: Backup via Google Drive (Android Only)
Android users have the option to back up their Facebook Messenger conversations to Google Drive, a cloud storage service provided by Google. Follow these steps to backup your messages via Google Drive:
- Ensure you have the Google Drive app installed on your Android device.
- Use one of the above methods (Method 1 or Method 3) to download your Messenger conversations as an HTML file.
- Open the Google Drive app and sign in with your Google account.
- Tap on the “+” icon to create a new folder or select an existing folder where you want to store your backup.
- Tap on “Upload” or “Upload Files”.
- Locate the downloaded HTML backup file on your device and select it.
- Tap on “Upload” to begin the backup process.
Once the backup is complete, your Messenger conversations will be safely stored in your Google Drive account. You can access and restore them whenever needed.
Method 5: Expert Backup with iOS Data Backup & Restore (iPhone Only)
For iPhone users, a reliable and efficient method to backup Facebook Messenger conversations is by using a third-party tool called iOS Data Backup & Restore. This tool offers advanced features and ensures the safety of your data during the backup process. Here’s how you can use it:
- Download and install iOS Data Backup & Restore software on your computer.
- Launch the software and select the “iOS Data Backup & Restore” option from the main interface.
- Connect your iPhone to your computer using a USB cable.
- Follow the on-screen instructions to trust the computer and unlock your iPhone.
- In the software, choose the “iOS Data Backup” option.
- Select the desired backup mode: Standard backup or Encrypted backup. Encrypted backup requires a password for added security.
- Choose the types of data you want to backup. Make sure to select “Messages & Attachments” to backup your Facebook Messenger conversations.
- Click on “Next” and choose the backup destination on your computer.
- Click on “Backup” to start the backup process.
iOS Data Backup & Restore will now create a backup of your Facebook Messenger conversations and save them to the specified destination on your computer. You can restore this backup to your iPhone in the future if needed.
4. Extra: Checking Archived Facebook Messages
Facebook allows users to archive their conversations, hiding them from their main inbox. If you suspect that a conversation has been archived rather than deleted, you can follow these steps to check and unarchive archived Facebook messages:
- Log in to your Facebook account on a web browser.
- Click on your profile picture or avatar in the top right corner to access your profile.
- Select “Archived Chats” from the options.
- Scroll through the archived conversations to find the one you want to unarchive.
- Swipe left on the chat and click on “Unarchive” to restore the conversation to your main inbox.
By unarchiving the conversation, you can make it visible in your main Facebook Messenger inbox again.
Conclusion
Backing up your Facebook Messenger conversations is a wise decision to protect your valuable memories and important information. In this guide, we explored various methods to backup your Facebook Messenger conversations on both Android and iPhone devices. From using the official method provided by Facebook to third-party solutions like iOS Data Backup & Restore, you now have the tools and knowledge to safeguard your Messenger conversations. Choose the method that suits your needs and preferences, and never worry about losing your Messenger messages again!
Remember, whether you’re preserving cherished memories or ensuring a smooth device transition, having a backup of your Facebook Messenger conversations puts your mind at ease. So take action today and backup your Messenger messages to enjoy peace of mind in the future.
Experiencing difficulties with your Device, check out our “How To” page on how to resolve some of these issues.