


In today’s digital age, having access to the internet has become a necessity. Whether it’s for work, entertainment, or staying connected with loved ones, the internet plays a crucial role in our daily lives. However, not everyone has the luxury of a stable internet connection or can afford to pay for data bundles. That’s where the command prompt comes in. In this comprehensive guide, we will explore how you can get free internet using the command prompt on both Windows and Mac operating systems.
Before diving into the process of accessing free internet, let’s first understand what the command prompt is and its significance. The command prompt is an operating system feature that allows users to access advanced administrative functions and perform various tasks. It is a command-line interpreter application that executes commands entered into it to interact with the operating system.
The command prompt is a versatile tool, particularly in the Windows operating system, where it serves multiple purposes. One of these purposes is accessing free internet. By utilizing specific commands, you can gain access to the internet without the need for a data bundle or paid Wi-Fi networks.
Getting Free Internet on Windows Operating System
To access free internet using the command prompt on a Windows operating system, follow these steps:
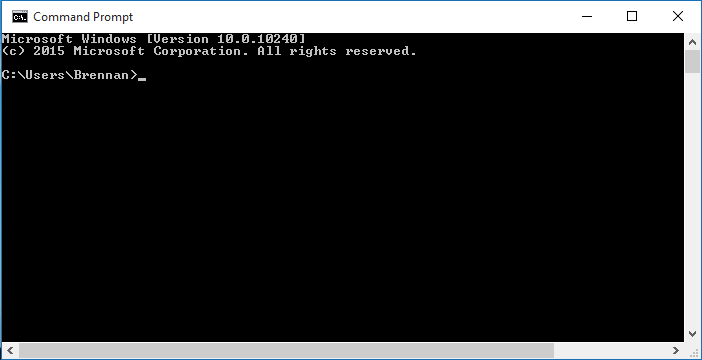
Step 1: Opening the Command Prompt
There are several ways to open the command prompt on your Windows computer. You can use the start menu search and type “cmd” into the search box, press the “Windows icon + R” keyboard shortcut to open the run box and type “cmd,” or type “cmd” into the file explorer address bar and press Enter. Once opened, you will see a blinking underscore icon, indicating where you can start typing your command lines.
Step 2: Finding Available Wi-Fi Networks
To find available Wi-Fi networks, type the following command into the command prompt:
netsh wlan show networks mode=bssid
This command will display a list of all the Wi-Fi networks available in your vicinity. Make a note of their names as you will need them for the next step.
Step 3: Connecting to a Wi-Fi Network
To connect to a specific Wi-Fi network, type the following command into the command prompt:
netsh wlan connect name=(name of Wi-Fi)
Replace “(name of Wi-Fi)” with the actual name of the Wi-Fi network you want to connect to. For example, if the network name is “lexam,” the command would be:
netsh wlan connect name=lexam
Press Enter to connect your PC to the Wi-Fi network and enjoy free internet on your system.
Step 4: Disconnecting from the Internet
To disconnect from the internet, you can type the following command into the command prompt:
netsh wlan disconnect
This command will disconnect your PC from the Wi-Fi network.
Step 5: Saving Wi-Fi Network Profiles
If you want to save a Wi-Fi network profile on your PC for future use, you can do so by typing the following command into the command prompt:
netsh wlan export profile name=(name of Wi-Fi)
Replace “(name of Wi-Fi)” with the actual name of the Wi-Fi network you want to save. For example, if the network name is “Adrex,” the command would be:
netsh wlan export profile name=Adrex
This command will save the Wi-Fi network profile on your PC.
Getting Free Internet on Mac Operating System
On a Mac operating system, the command prompt is known as Terminal. It provides access to the Unix part of the Mac operating system. To access Terminal and get free internet, follow these steps:
- Open the Launchpad by clicking on the silver icon in the Dock that looks like a rocket.
- Click on the “Other” folder and then click on Terminal.
- Alternatively, you can use the “Spotlight icon” (magnifying glass at the upper right corner of the screen) and type “Terminal” into the search box.
- Type the following command into the Terminal:
defaults read /Library/Preferences/SystemConfiguration/com.apple.airport.preferences | grep SSIDString
This command will display a list of the Wi-Fi networks you have previously connected to.
- To find and display the password of a specific network, type the following command into the Terminal:
security find-generic-password -ga "Wi-Fi name" | grep "password:"
Replace “Wi-Fi name” with the actual name of the Wi-Fi network you want to connect to. The password will be displayed, allowing you to connect to the network and enjoy free internet on your Mac computer.
Wrapping Up
Having access to the internet is essential in today’s digital world, and not everyone can afford paid Wi-Fi networks or data bundles. By utilizing the command prompt on your Windows or Mac operating system, you can access free internet without any additional costs. Whether you’re using Windows or Mac, following the steps outlined in this guide will enable you to enjoy the benefits of free internet access. Stay connected, stay informed, and make the most of your online experience.
Experiencing difficulties with your Device, check out our “How To” page on how to resolve some of these issues.


It is a very good article, but I am not able to connect to the wi-fi networks nearby. I have typed all the commands correctly but it is not connecting to the wi-fi. It is showing in the command that ”the following command was not found”. Please help me .Thank you
Nenhum desses métodos funciona