A lot of us enjoy tinkering with our Android smartphones but before we can do any of that, we need a way to create backups. So today I am going to show you how to install a custom recovery, Clockwork Mod(CWM), onto your Sony Xperia Z3 Compact(D58XX).
Just like with the Sony Xperia Z3 custom recovery tutorial that I wrote the other week, this modification is brought to us by DooMLoRD. He posted this in the XDA Developers forum and I am simply creating a step by step guide for it. All of the credit goes to him and I will link to the source thread at the bottom of this article.
Just like with the Xperia Z3 guide, this also comes with a few requirements before you can get a custom recovery onto your Xperia Z3 Compact.
The first requirement here is an unlocked bootloader. If the bootloader on your Sony Xperia Z3 Compact isn’t unlocked yet then please refer to this guide for instructions on how to do so. Once you have unlocked the bootloader on your Xperia Z3 Compact, then you will need to reboot your device into Fastboot mode. I have also written a guide on how to do this so please refer to that article if you need help there. This custom recovery was made for the Android 4.4.4 KitKat firmware and it has only been tested on ROMs based on software version number 23.0.A.2.105 – v01 so far.
The last thing you need is the basic Android SDK installed/extracted onto your computer. This comes with a couple of files that we are going to need and they are located in the /sdk/platform-tools/ directory. If you need help getting the Android SDK setup then leave a comment below or send an email to me via the Contact page at the very top of this website. So, once you have everything you need you can begin this tutorial. As a basic test, I connect the device to my computer and then pull up the command prompt from within this /sdk/platform-tools/ directory. Then I type ‘adb devices’ and make sure the Sony Xperia Z3 Compact is detected.
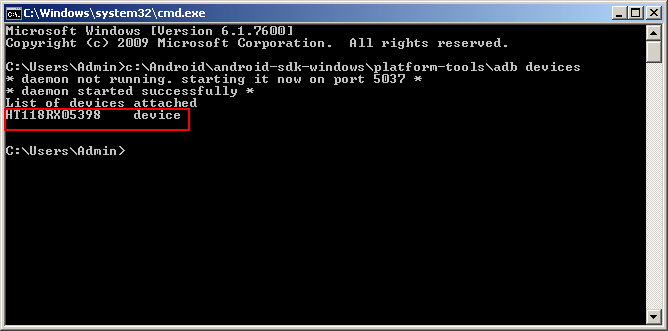
You might need to go into Developer Options from within the Settings of your smartphone and enable USB debugging before it is recognized by ADB. After you activate USB debugging be sure to allow your PC access to the device. If you do not get a prompt to allow this then simply reboot your smartphone and then you should get the prompt. So, now that your Sony Xperia Z3 Compact is recognized via the ‘adb devices’ command, you can finally start on this tutorial. It should look somewhat similar to the image you see above. The numbers and letters that appear on the left side will be different but that is listing the devices that are connected
Xperia Z3 Compact Custom Recovery
- Download the Kernel Image
- Move the Kernel Image to the Directory with Fastboot.exe
- Rename the Kernel Image to ‘boot.img’
- Open the Command Prompt
- Browse to the Kernel Image/Fastboot Directory
- Type the Following Command. . .
- fastboot flash boot boot.img
- Once Completed, Type the Following Command. . .
- fastboot reboot
So, this guide instructs you to download the special kernel that has the custom recovery included with it. Not only does this have a custom recovery attached to it, but it also gives us a way to install SuperSU so that we can manage our root privileges. From now on, you can reboot into this custom recovery(CWM) during the typical reboot cycle. When your Sony Xperia Z3 Compact is rebooting, you will need to “keep tapping/pressing” the Volume Up button when you see the Sony logo and when the LED lights turn pink/amber/orange. DooMLoRD’s instructions say to keep tapping, but I think he might mean to ‘hold down’ the button instead. You will simply need to try this out a few different ways until you can see which way works for you.
Like I said above, all thanks need to go to the person who actually created this modification. I am simply writing out a step by step guide for it. If you found this useful in any way, shape or form then please consider donating to DooMLoRD. At the bottom of this article you will find the XDA-Developers source thread and in that original post you should find a PayPal link that will let you donate to this person. Even if you can only donate one dollar, anything is better than nothing and without people like him, these things simply wouldn’t be possible.
[box type=”info”]The link to the kernel image might change as things progress. If you notice the link is dead or if there is a new version of the firmware released, please leave me a comment below to let me know. Failing this, you could follow the source link below and download the new kernel image that he has posted/updated. It would just be helpful to let me know so that I can update the link in this article for the rest of the readers of Android Explained.[/box]Some people have said the recovery process from within this version of CWM can be slow at times. If your device takes over 10 minutes to backup then you might need to perform some additional steps.
- Install ROM Manager from the Play Store
- Open ROM Manager
- Go to ROM Manager Settings
- Enable the ‘Quick Backup & Restore’ Option
[Source: XDA-Developers]