It’s been a while since I dedicated a tutorial to Samsung’s 2019 flagship smartphone, but I delayed this one for long enough. Now that Samsung has Android 10 on it, I wanted to show you how to root the entire Galaxy S10 series with Magisk. The only requirement here is that your bootloader must be unlocked ahead of time.
SuperSU used to be the go-to root solution for Android but now it’s Magisk that has taken the crown. That’s what we’re doing here today, we’re going to root the Galaxy S10, S10+, S10e, and S10 Lite with Magisk. This will let you use many of the popular apps from the enthusiast community which require root access.
I personally use apps like Franco Kernel Manager, Naptime, BetterBatteryStats, Titanium, and others.
Whatever your use case, though, installing Magisk on your Samsung Galaxy S10 smartphone will give you more control over the hardware inside the device. Most will say this tutorial only works for Exynos versions of the device but it will actually work on them all if you can unlock the bootloader.
That is where most people get stuck. The Snapdragon variants sold by major wireless carriers such as AT&T, Verizon Wireless, and T-Mobile are going to prevent you from unlocking the bootloader. Even carriers in Canada are going to stop this from happening. There are, however, Snapdragon variants sold in China and Latin America that can be bootloader unlocked as well.
So, the first thing you need to do is unlock the bootloader of the Galaxy S10 before you can proceed.
Once that is done, let’s root the S10.
Warning: Completing the tutorial below will wipe all data you have stored on the smartphone. This includes photos, videos, SMS messages, apps, games, app/game data, and more. It is advised to backup as much of your data as possible before you continue.
How to Root the Samsung Galaxy S10?
- Download and Extract Odin onto your PC
- Download and install the Magisk Manager APK from GitHub
- Follow this tutorial if you aren’t familiar with sideloading APK files on Android.
- Then start downloading the current firmware you have on your Samsung Galaxy S10
- Make sure details like region, build number, and baseband version of what you download matches your smartphone.
- When the download completes, extract its contents with a program like WinRAR, 7zip, etc.
- Look for the filename that starts with AP_ and copy that 5GB+ file to your smartphone
- Open up the Magisk Manager app
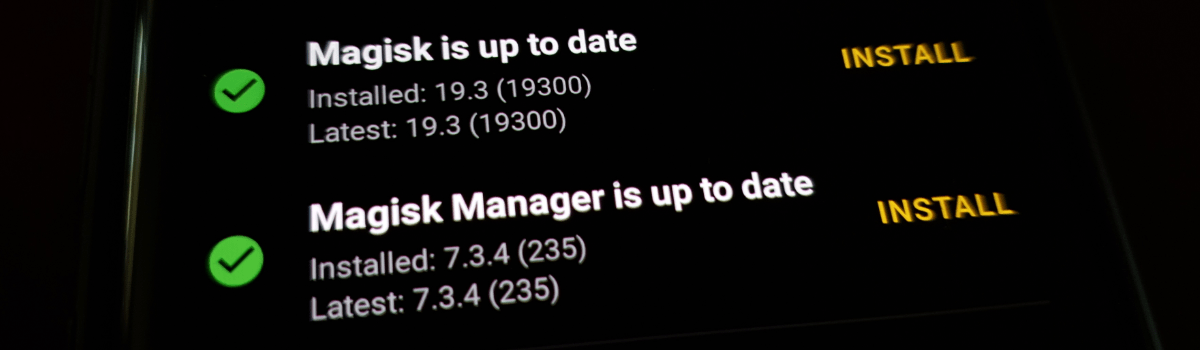
- Tap the “Install” button
- We want to tap the top “Install” button. The one next to the Magisk version information.
- Tap on the “Install” option again
- And select the “Select and Patch a File” option
- Browse to where you copied that AP_ firmware file and choose it
- You’ll see the Magisk Manager app log the changes it is making to select files.
- Copy the output file Magisk Manager creates (
/Download/magisk_patched.tar) back to the PC - Now open up the Odin.exe file
- Some have said they need to right-click this .exe file and open it as an Administrator.
- Boot the Samsung Galaxy S10 into Download Mode
- Then connect it to the PC with a USB cable
- Check to see if Odin detects the S10 when it’s connected. If it doesn’t, there’s like a USB/driver issue.
- Click the BL button in Odin and load the firmware file starting with BL_
- Click the CP button in Odin and load the firmware file starting with CP_
- Click the CSC button in Odin and load the firmware file starting with CSC_
- Click the AP button in Odin and load the magisk_patched.tar file
- Click the Options tab within Odin and uncheck the “Auto Reboot” option
- Now you can click the Start button at the bottom of Odin
- This typically takes me ~2 minutes for Odin to complete, but yours may take more or less time.
- Unplug the USB cable from the Galaxy S10 when Odin displays the green “PASS” message
- Press and hold the Power and Volume Down for 7+ seconds
- Be ready. When the screen goes black immediately let go of these 2 buttons and start the next step
- Start pressing and holding the Power, Bixby, and Volume Up buttons
- You’ll want to watch the embedded video below to time this part right.
- Continue holding these two buttons through the upcoming blue screen and reboot
- During the second boot cycle, let go of these buttons after you see the Recovery Mode menu
- Then press the Volume down button until you highlight the “Wipe Data/Factory Reset” option
- Press the Power button to select this option
- Press the Volume Down button again to highlight the “Factory Data Reset” option
- And press the Power button again to confirm the data reset
- Keep the “Reboot System Now” option highlighted when the factory reset completes
- And finally, press the Power button to select the option and boot back into Android
- Wait patiently as this boot cycle can take longer than normal.
- Shut down the Galaxy S10
- Wait a few seconds after it has turned off
- Then press and hold the Power, Bixby, and Volume Up buttons to turn on the smartphone
- Continue holding these 3 buttons down during the first 3 boot screens
- You will want to let these 3 buttons go 2-3 seconds after the bootloader unlock warning screen disappears.
- Open Magisk Manager when the smartphone boots back up
- Tap the “OK” button when you see the Requires Additional Setup box appears
- And wait for the Galaxy S10 to reboot
- Again, watch the video to get the timing of this process as well.
38 steps may seem like a lot, and it is compared to minor tutorials I do, but the process is rather straight forward. I also advise you to watch through the entire step by step video embedded above to get a grasp of what you’ll be doing to your smartphone. I know it can be off-putting at first, but it’s easy to do.
Samsung has used these tools for years too, so most of it is the same as last year.
It is a lot different than what some Android enthusiasts may be used to, though. I remember it taking a while to learn the system even though I was already familiar with Fastboot and devices like Google’s Pixel and the OnePlus devices. But I have honed my skills and have worked to make sure the process is easy for you to understand.
What if Magisk Manager says Root isn’t Installed?
If you watch through the video, then you may notice that at one point (after finishing the tutorial) I opened up Magisk Manager and was told it wasn’t installed properly. This will happen every single time you boot the Galaxy S10 without pressing and holding the button combination properly.
Read through Steps #34 & #35 again and make sure you’re holding these buttons down long enough.
Even though Magisk is technically installed after following this tutorial, you have to manually load it with each boot. We can install a custom kernel to bypass this requirement, and I’ll show you that later, but not everyone wants to do that. So I cut the guide off to make things easier to complete and only includes things that are required.
So How do I Load Galaxy S10 Magisk at Boot?
First, you need to get the Samsung Galaxy S10, S10+, S10e, or S10 Lite to be powered off. It doesn’t matter how you get to a powered off state (I just use the Power Menu), we just need to shut the smartphone down. Even after the screen goes black, you’ll need to wait another 5-10 seconds for it to completely turn off.
When it’s off, press and hold the Power, Volume Up, and Bixby buttons at the same time.
You’ll see the screen turn on and display a boot image. Keep holding these three buttons down. The screen will then flash over to a bootloader warning screen. Keep holding these three buttons down. Finally, the screen will flash back over to a boot image with text at the bottom that talks about unofficial Samsung software.
1-3 seconds after you see this 3rd screen flash on the display, you can then let go of these three buttons. If you’re unsure of this timing definitely be sure to watch through the video as I demonstrate it a few times to make sure you can get it right. We need to do this because Samsung’s refuses to load the Magisk binary files unless we load it through the Recovery Mode code.
How to Fix a Galaxy S10 Bootloop?
In the past I have mistakenly downloaded the wrong firmware file for the specific region/model smartphone I had. Either that, or a downloaded a wrong mod file, misread something, or simply skipped a step in the tutorial itself. When that happens my smartphone goes into what is known as a bootloop.
This happened to me multiple times with the Galaxy S10 (due to me messing things up) but it is easy to fix.
If this happens to you, simply flash the stock Galaxy S10 firmware images using Odin. The process is similar to what we did here but we aren’t flashing the magisk_patched.tar file. Instead, we’re just sticking to the stock firmware images we download from services like SamFirm, SamMobile, etc.
Again, just make sure you’re downloading the firmware that exactly matches the device you have.
Experiencing difficulties with your Device, check out our “How To” page on how to resolve some of these issues.