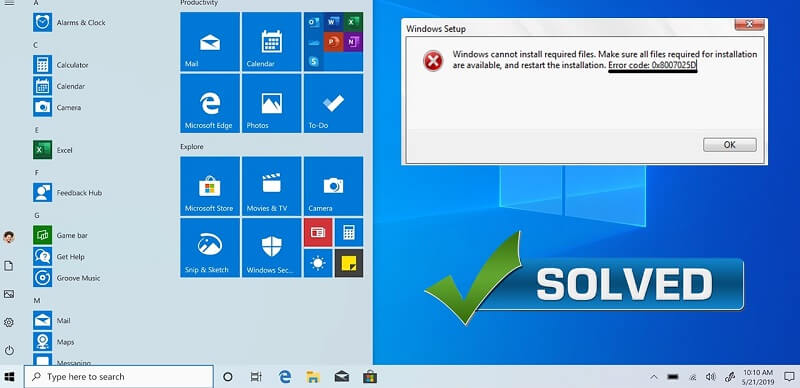
Windows 10 is customized with a lot of features that enable users to access information. In some instances, users can encounter several errors. When such instances emerge users are greatly inconvenienced in one way or another. One of the errors that may occur includes the Error 0x8007025D that appears and prevents the installation after a certain percentage.

What is Error 0x8007025D
According to Windows support Error 0x8007025D = ERROR_BAD_COPRESSION_BUFFER is a specified buffer that contains malformed data. The error is mainly caused by a malfunctioning device. The problem may be caused by corrupt data on the USB drive.
Error code 0x8007025D on Windows 10 means that there are several issues with your system. The error can arise due to the loss of the activation key when you clean install Windows. This error code 0x8007025D is common during the installation of Windows. Whenever you upgrade Windows, the activation key will be linked with the new operating system.
Method 1: Troubleshooting
To fix the error code 0x8007025D, the basic technique that can be carried out is troubleshooting. Troubleshooting can be used when you get any update related issues. To troubleshoot, follow the steps listed down below for easy Windows update troubleshooter:-
Step 1: Press the Windows key and then click on the gear icon.
Step 2: Select Update and security option from the settings menu.
Step 3: Click on the troubleshoot option on the left column and then move it to the adjacent right.
Step 4: Now click on the additional troubleshooters.
Step 5: Now click the option labelled as “run the troubleshooter”.
It will automatically resolve the error. Once the troubleshooting is done, restart your PC to incorporate the above changes.
Method 2: Reset Windows Update Components
Troubleshooting Windows is enough to resolve any bugs or errors. However, if the error persists, then it might be due to Windows components becoming corrupt. To repair these damaged files, one needs to factory reset the system’s factory settings. To reset update components follow these steps listed down below:-
Step 1: Press the shortcut keys Win + R and Run the dialogue.
Step 2: Within the text area, type cmd and then press Ctrl + Shift + enter altogether.
Step 3: When prompted, click the Yes button.
Step 4: Type the below code on the elevated console. Don’t forget to press Enter at the end of each code.
net stop wuauserv
net stop cryptSvc
net stop bits
net stop msiserver
Running the above commands will stop the services such as cryptographic, MSI installer, BITS and Windows update.
Step 5: Rename this software distribution and Catrool2 folders. To do so, type the following command.
ren C:\Windows\SoftwareDistribution SoftwareDistribution.old
ren C:\Windows\System32\catroot2 Catroot2.old
Step 6: Once the above steps are completed successfully, restart Windows so that changes can come into effect.
Method 3: Run SFC and DISM
SFC/SCANNOW command is useful to check whether there are any corrupt system files or not. Missing files or corrupt files can prevent any new installation on the device.
To look for corrupt system files, follow the steps listed down below:-
Step 1: Launch the command prompt.
Step 2: Type in sfc/scannow command in the command prompt and hit Enter.
Step 3: The process takes 15-20 minutes to finish the scanning and repairing process.
Step 4: Once the process is completed, reboot the computer.
The sfc/scannow command will look for the corrupt files. But, there are chances when the Windows image itself gets corrupt or damaged. To resolve this issue, you will be required to use the DISM tool. To run the DISM codes, use the below-listed steps:-
Step 1: Launch Command prompt.
Step 2: Use commands Win + R to run.
Step 3: Within the text area, type in cmd and then press Ctrl + Shift + Enter keys altogether.
Step 4: On the elevated console, run the codes mentioned below:
Dism /Online /Cleanup-Image /ScanHealth
Dism /Online /Cleanup-Image /CheckHealth
Dism /Online /Cleanup-Image /RestoreHealth
Method 4: Change Boot option
Sometimes, to resolve the error, you need to change the primary boot option to your DVD-ROM and restart your system.
Step 1: Change the Boot Priority option to the DVD-ROM or Flash Drive.
Step 2: Change the language settings to English.
Step 3: Choose the preferred setting to keep nothing or keep everything. ( Do not install the new Operating system with the updates).
Step 4: Allow Microsoft to improve the installation.
Sometimes, changing the boot option resolves the error.
Method 5: Disable Third-party Anti-virus
Sometimes, the third-party anti-virus starts interfering with the system files preventing an upgrade which results in an error. The best you can do is remove the third-party anti-virus from your system.
Method 6: Use System Restore
If the error persists, you can revert to the earlier System settings. To do so, follow the steps listed down below:-
Step 1: Within the search bar, search “create a restore point”.
Step 2: Select the best-suited result.
Step 3: Once the System Properties Windows is prompted, click the system restore option and then click Next.
Step 4: Select the most recent restore point.
Step 5: Click the “Scan for affected programs” button.
Step 6: Now, click on the “close” button and then click on the “Next” button.
Step 7: Finally, click on the “Finish” button.
Experiencing difficulties with your Device, check out our “How To” page on how to resolve some of these issues.


