


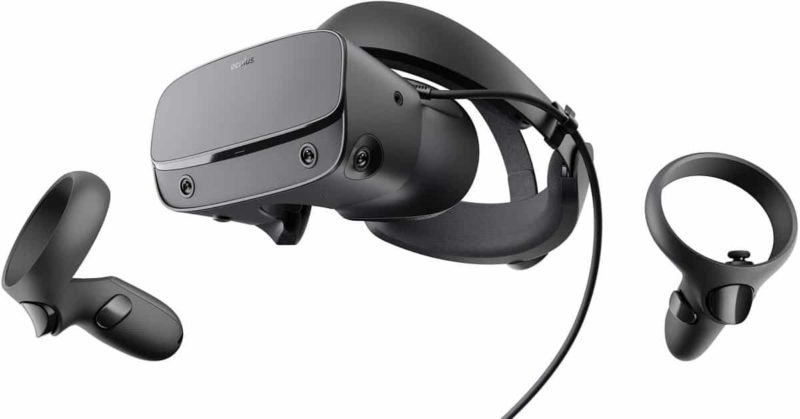
Are you ready to take your virtual reality (VR) experience to the next level? Connecting your Oculus Quest 2 headset to a PC opens up a world of possibilities, allowing you to access PC-only VR experiences and unleash the full power of your computer for enhanced visuals. In this comprehensive guide, we will explore two methods to connect your Oculus Quest 2 to a PC: using Oculus Link and Air Link. Follow the steps below to get started on your VR journey.
System Requirements for Connecting Oculus Quest 2 to a PC
Before diving into the connection methods, let’s ensure that your system meets the necessary requirements:
- Your PC should be running Windows 10 or Windows 11.
- Your PC should have an Intel i5-4590 or AMD Ryzen 5 1500X processor (or greater).
- Your PC should have at least 8GB of RAM.
- For graphics cards, most Nvidia GPUs from the 970-series and higher are compatible, as well as AMD 400-series and higher GPUs. However, some older Nvidia and AMD GPUs may not be compatible. Please refer to the Meta Quest Link compatibility requirements for a complete list.
Now that you have confirmed that your system meets the requirements, let’s explore the two methods to connect your Oculus Quest 2 to a PC.
Method 1: Connecting Oculus Quest 2 to a PC Using Oculus Link
If you prefer a wired connection, Oculus Link is the way to go. This method allows you to connect your Oculus Quest 2 to your PC using a high-quality USB-C cable or the official Oculus Link cable. Here’s how to do it:
- Install the Oculus Quest 2 app on your PC by visiting the official Oculus website and downloading the software.
- Launch the Oculus Quest 2 app on your PC and power on your headset.
- Connect one end of the USB-C cable (or Oculus Link cable) to your PC’s USB 3.0 port and the other end to your Oculus Quest 2 headset.
- In the virtual reality environment, you’ll see a prompt asking for permission to access data. Make sure to select “Deny.”
- When you see the “Enable Oculus Link” prompt, choose “Enable” to start using your Oculus Quest 2 with your PC.
Using Oculus Link, you can enjoy a wide range of PC VR experiences and harness the power of your computer for enhanced visuals.
Method 2: Connecting Oculus Quest 2 to a PC Using Air Link
If you prefer a wireless connection, Air Link is the way to go. Note that this method is only available for Quest 2 headsets and requires both your Quest 2 and PC to be updated to version 28 (v28) or later. Here’s how to connect your Oculus Quest 2 to a PC using Air Link:
- Ensure that your Oculus Quest 2 and your PC are connected to the same Wi-Fi network, preferably a 5GHz network for optimal performance.
- Open the Oculus app on your PC and navigate to the settings. Look for the “Experimental” section and enable Air Link.
- A pop-up window will appear confirming the Air Link requirement. Click “Continue” to proceed.
- Put on your Oculus Quest 2 headset and access the quick settings menu by selecting the clock icon on the left side of the navigation bar.
- Within the quick settings menu, select the Oculus Air Link option.
- An Air Link window will appear, displaying all available PCs on your network. Choose your PC from the list.
- Click on “Pair” to initiate the pairing process. A unique code will be displayed in your headset.
- Take off your headset and confirm that the code on your PC’s screen matches the code in your headset. Once verified, click “Confirm” on the desktop app.
- To launch Air Link in the future, simply access the quick settings menu on your Oculus Quest 2 headset and select the Air Link option.
With Air Link, you can enjoy a wireless VR experience, giving you the freedom to move around without being tethered to your PC.
Explore the World of PC-Powered Virtual Reality
Congratulations! You have successfully connected your Oculus Quest 2 to a PC using either Oculus Link or Air Link. Now, it’s time to explore the vast library of PC VR games and experiences. From immersive simulations like Microsoft Flight Simulator to captivating adventures like Half-Life: Alyx and Star Wars: Squadrons, the possibilities are endless.
In addition to gaming, you can use your Oculus Quest 2 to access PC applications and control your computer through the headset. Whether it’s launching apps or opening windows, you have the power of your PC at your fingertips.
If you want to share your VR experience with others, you can also learn how to cast your Oculus Quest 2 to a TV, allowing friends and family to join in on the fun.
Remember, as technology advances, new VR headsets and accessories are constantly being released. Stay up to date with the latest developments to enhance your VR experience even further.
Final Thoughts
Connecting your Oculus Quest 2 to a PC opens up a whole new world of virtual reality experiences. Whether you choose to go wired with Oculus Link or wireless with Air Link, you can unlock the full potential of your VR headset. With the ability to access PC-only VR content and leverage the power of your computer, you’ll be immersed in a new level of gaming and exploration.
As technology continues to evolve, the VR landscape will undoubtedly expand, offering even more exciting possibilities. Stay informed and embrace the future of virtual reality. The journey has just begun!
Remember, if you ever encounter any issues during the setup process or need further assistance, consult the official Oculus support documentation or reach out to the Oculus community for guidance. Enjoy your VR adventures!
Experiencing difficulties with your Device, check out our “How To” page on how to resolve some of these issues.