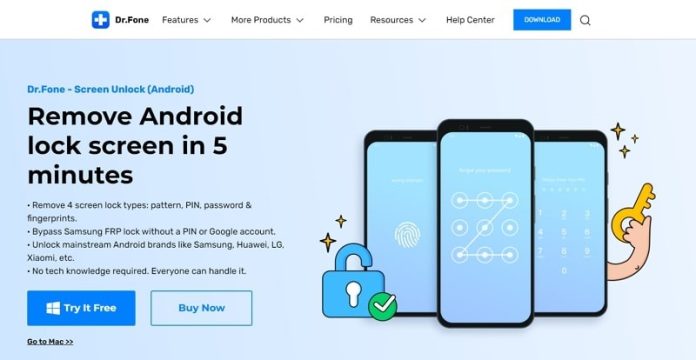
Factory Reset Protection is a security feature on Android devices that protects users’ data from unauthorized access. If FRP is enabled, thieves cannot use your phone after a factory reset that is done using unsafe methods. However, sometimes users forget their login credentials or buy a second-hand device that was not factory reset, so they have to bypass Google account. FRP lock is essential for data security, but in such scenarios, you can use Dr.Fone – Screen Unlock (Android) for Android lock screen removal.
Part 1: What is the Importance of FRP Lock in Android Devices?
Nobody wants a stranger to get access to their device without permission, and that is why the FRP lock is in place. In 2015, Google introduced this built-in feature for Android devices running version 5.1 or later. Without FRP, if someone ever wants to use your phone, they can simply factory reset the device in recovery mode. Factory resetting refers to the act of removing all data from an Android device, and an authorized reset is done via settings.
Other reset routes include forcefully resetting using the recovery mode or new firmware. The FRP is automatically activated when a user sets up a Google account, and the normal backup and reset setting requires the device’s security pin. So, if a thief or a suspicious colleague does not have your Google account ID and password, they can never open your phone. This feature has made Android devices secure, but what would you do if you forgot your device’s login credentials?
Part 2: The Best and Robust Google FRP Unlocker Tool for Samsung Devices
Imagine forgetting your Google account password when you factory reset your Android device to resolve some system issues across it. While it is terrifying to consider, Dr.Fone – Screen Unlock (Android) can help you remove the Google account FRP lock within minutes. Without struggling to recover the Google account, you can get across the home screen of your Android. As it supports Android 11/12 Samsung devices, this makes it an updated tool that makes FRP lock look too simple.
There are multiple reasons you would need to bypass the FRP lock on your Samsung device. However, you won’t need any technical expertise to do this. Bypassing the Samsung FRP is a quick process because the steps are very simple. Do you know what makes Dr.Fone stand out in a pool of competitors? It is the ability to FRP unlock your phone with a high success rate.
Part 3: Simple Steps for Bypassing FRP Lock of Android 11/12 Samsung Devices
Bypassing the FRP lock might seem tedious, but if you follow these simple steps, you will soon understand that it is not complicated at all:
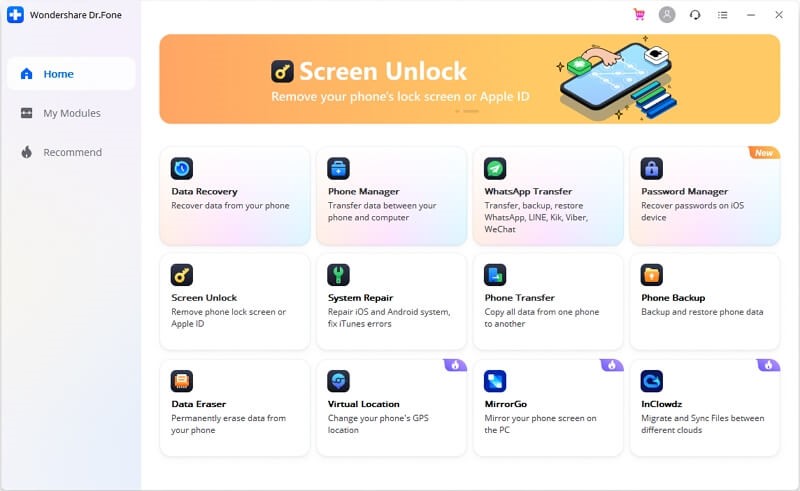
Step 1: Launch Dr.Fone on your computer and select the “Screen Unlock” option from the homepage. Afterward, choose the “Unlock Android Screen/FRP” option from the next screen tools. During this process, your Android 11/12 needs to have a stable internet connection. To begin the bypass, tap “Remove Google FRP Lock.”
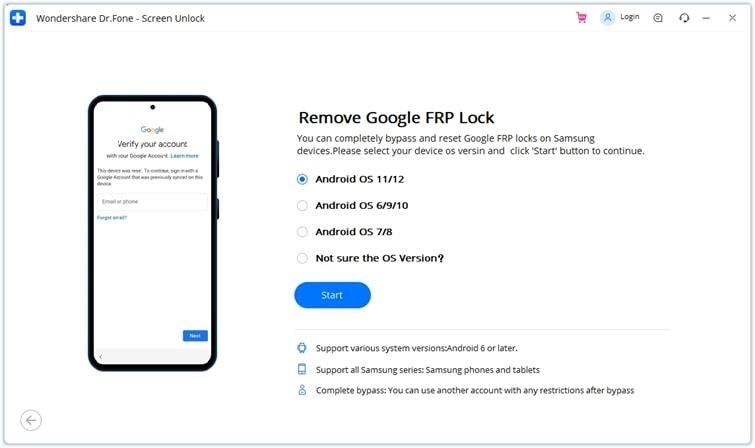
 Step 2: The tool will then present a list of operating systems. Then, enable the “Android 11/12” OS feature and press “Start.” Next, use a USB cable to connect your Samsung device to the computer. You will see a confirmation notification on the phone and computer, so click on “Confirmed!” on your computer to proceed.
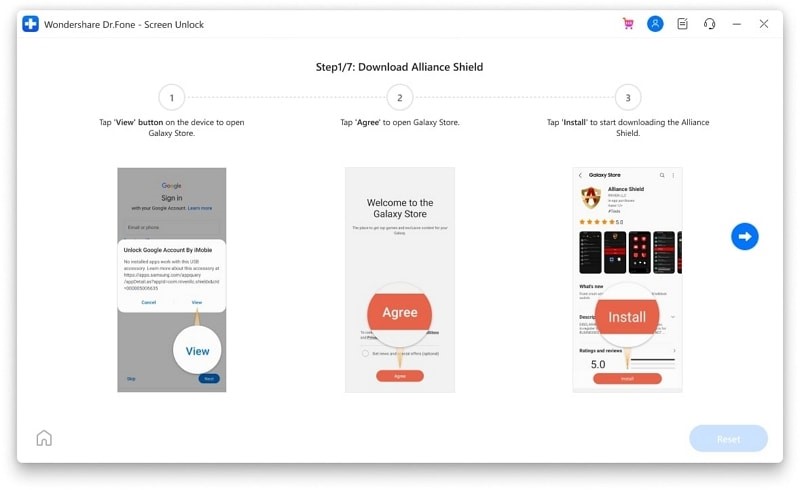
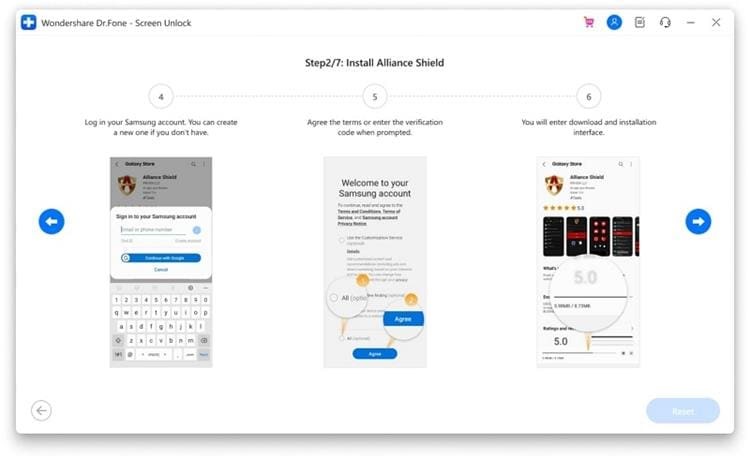
 Step 3: Tap on “View” on the notification you received on your Samsung phone. This will take you to the Galaxy Store, where you have to press “Agree” to install an application on the device. Search “Alliance Shield” on the store and hit the “Install” button.
 Step 4: Next, log into your Samsung account and choose “Agree” to the terms and conditions displayed. Alliance Shield will be installed on your device. Launch the app and tap “Skip” to go straight to the login page. Create a new account from your computer by opening alliancex.org and then log in with the account on your Samsung device.
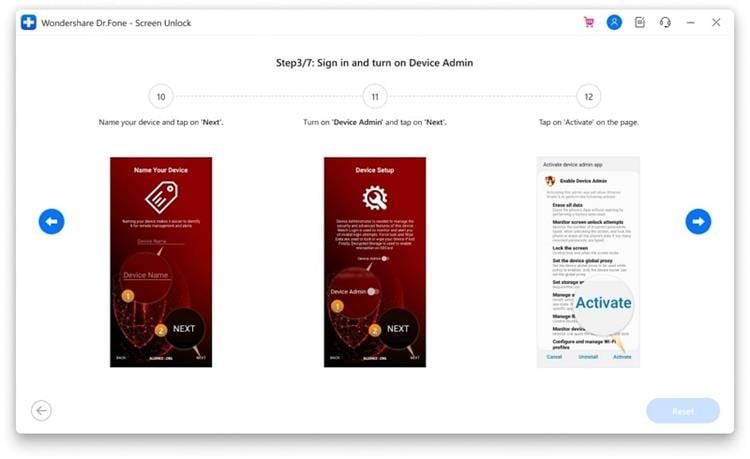
 Step 5: Now, you have to give a name to your device and tap “Next.” Next, turn on the “Device Admin” option on Alliance Shield. Tap on “Next” to move to the confirmation window and choose “Activate” here.
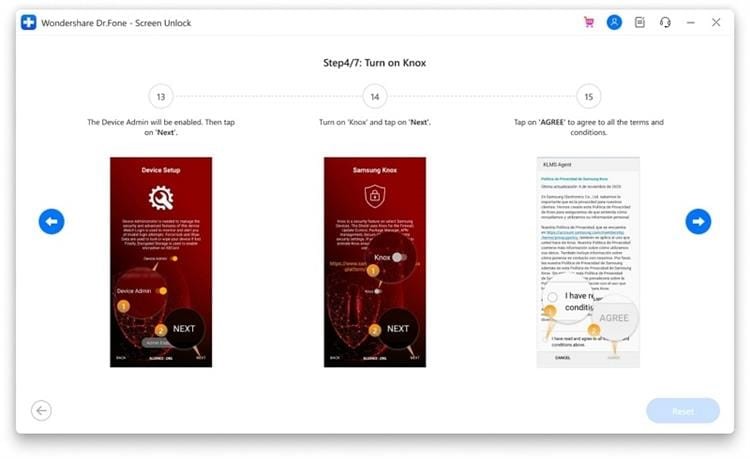
 Step 6: Once the “Device Admin” has been enabled, hit on the “Next” button and turn on “Knox.” The tool will redirect you to a confirmation window. Select “Agree” to agree to the terms and conditions needed to proceed.
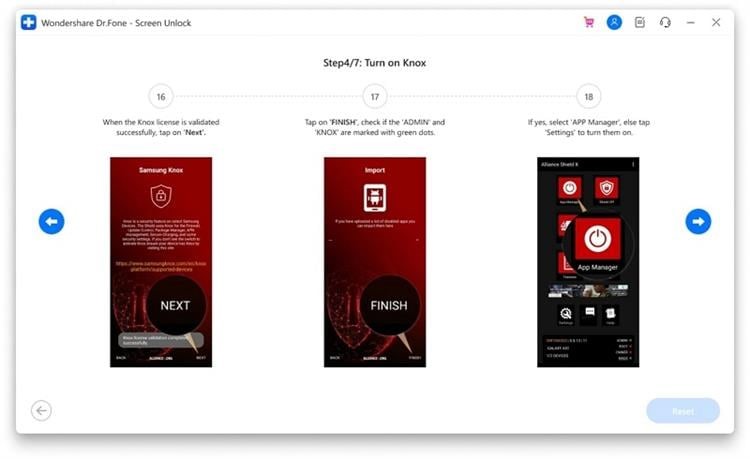
 Step 7: If you have enabled Knox, you can proceed to the next steps. Tap on “Next” and then “Finish.” The configuration procedure is now complete. Afterward, select the “App Manager” option.
 Step 8: In the search bar, search for “Service Mode.” Afterward, access the “Activities” tab from the toolbar the “com.sec.android.app.modemui.activities.USB Settings” option.
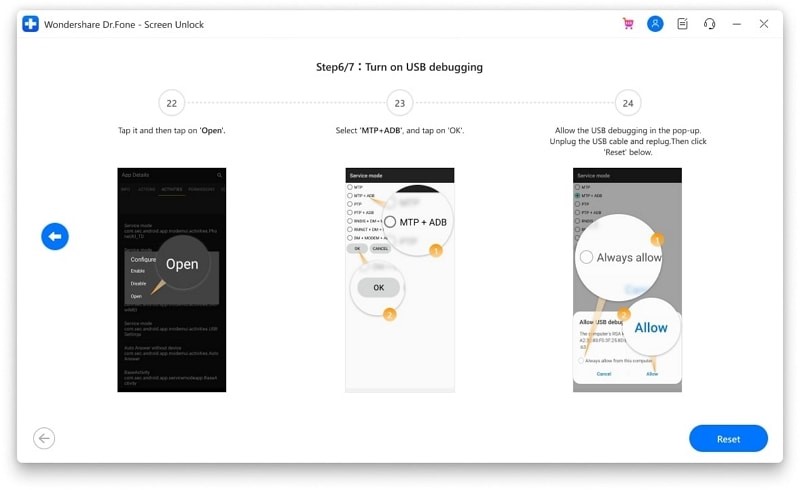
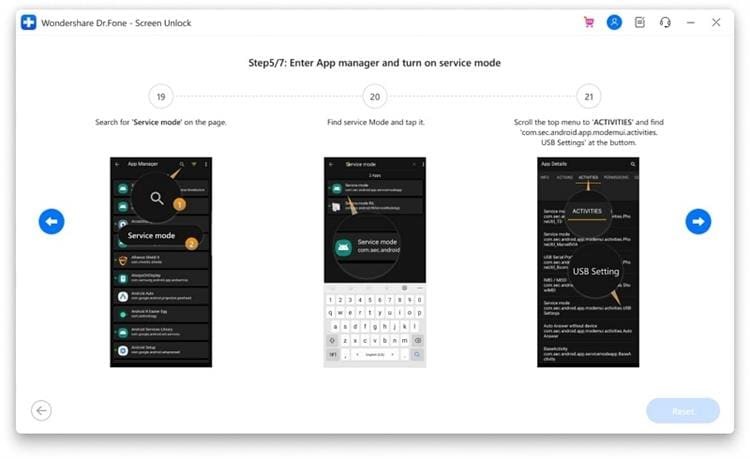 Step 9: Tap on the option when you find it. A pop-up menu will appear, so select “Open,” then enable “MTP + ADB” and select “OK” on the next screen. Another pop-up notification will ask you to enable USB Debugging. Enable the option, then unplug your device from the computer and re-plug the phone and then continue.
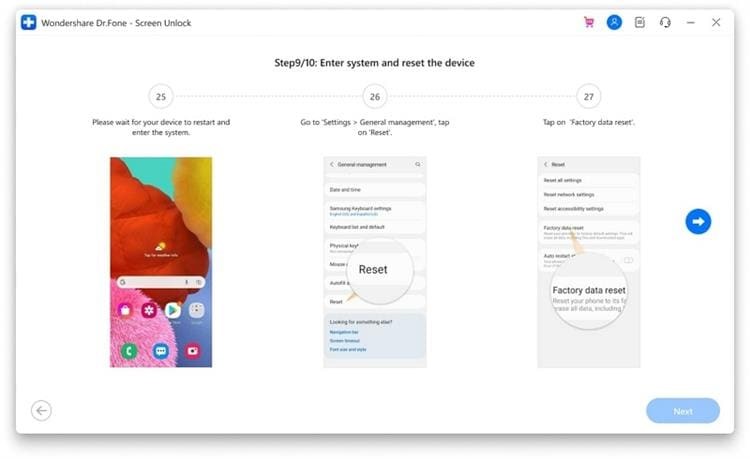
 Step 10: Now, open the Samsung device’s settings and go to the “General Management” settings to select the “Reset” option. Next, select the “Factory data reset” option. Confirm the resetting process, and once your device resets, the FRP bypass will conclude.
 Conclusion
So, the next time you get a second-hand Android device that has not been reset, you can simply use Dr.Fone – Screen Unlock (Android). It is a reliable and professional tool that protects you from data loss. Don’t get overwhelmed by the number of steps for bypassing because they are actually very simple, so try out the tool today.
Other Technical Reviews:- Reviews


