Is your computer’s performance suffering due to frustrating issues like blue screens and unexpected crashes? In today’s fast-paced digital world, a smoothly running operating system is crucial for both personal and professional tasks. One potential solution is DISM.
DISM is one of the tools used to diagnose and address Windows problems. In this article, we’ll guide you on using DISM to repair your Windows image and regain control of your computer’s performance. Let’s dive in and address those troublesome issues together.
Disclaimer: This article provides guidelines for using DISM to enhance your computer’s performance. We do not compel anyone to follow these steps on their devices, and users should exercise their discretion when making system modifications.
What is DISM Command?
DISM, or Deployment Image Servicing and Management, has remained a steadfast tool for scanning and repairing compromised Windows operating systems since its introduction in 2012. It initially debuted with the release of Windows 8 and Windows Server 2012 R2 and has since seamlessly integrated into all subsequent Microsoft operating systems, including Windows 10 and Windows 11. This continuous development and integration underscore its paramount importance in the realm of Windows maintenance and repair, establishing it as an invaluable resource for users across various Windows versions.
Accessing DISM
To execute DISM, access the Windows command-line interface through Command Prompt, PowerShell, or Windows Terminal. Ensure your Windows system is operational.
For scenarios where your computer won’t boot, you can still run DISM by creating a Windows Installation medium on an 8GB thumb drive. To learn how to run DISM in such cases, follow our guide on booting into safe mode, which includes instructions on executing DISM.
Repairing with DISM
DISM typically utilizes Windows Update files for repairing corrupted ones. However, if your Windows Update files are also corrupted or DISM cannot resolve the issue, you’ll need an alternative source. In such cases, a Windows Installation media can be employed as a repair source. Learn how to create a Windows installation USB drive by following the steps outlined in this article.
Online Repairs
When dealing with an operational operating system, DISM proves invaluable. It allows you to address issues without requiring a system reboot. By connecting to Windows online servers, DISM adeptly identifies and rectifies problems, ensuring minimal disruption to your workflow.
Offline Repairs
DISM remains indispensable when working with offline Windows images, stored in formats like .wim, .vhd, or .vhdx files. Whether you’re creating new images or performing maintenance tasks during Windows PE, Windows RE, or Windows Setup, DISM is your reliable companion.
Utilizing DISM Commands
Opening Command Prompt
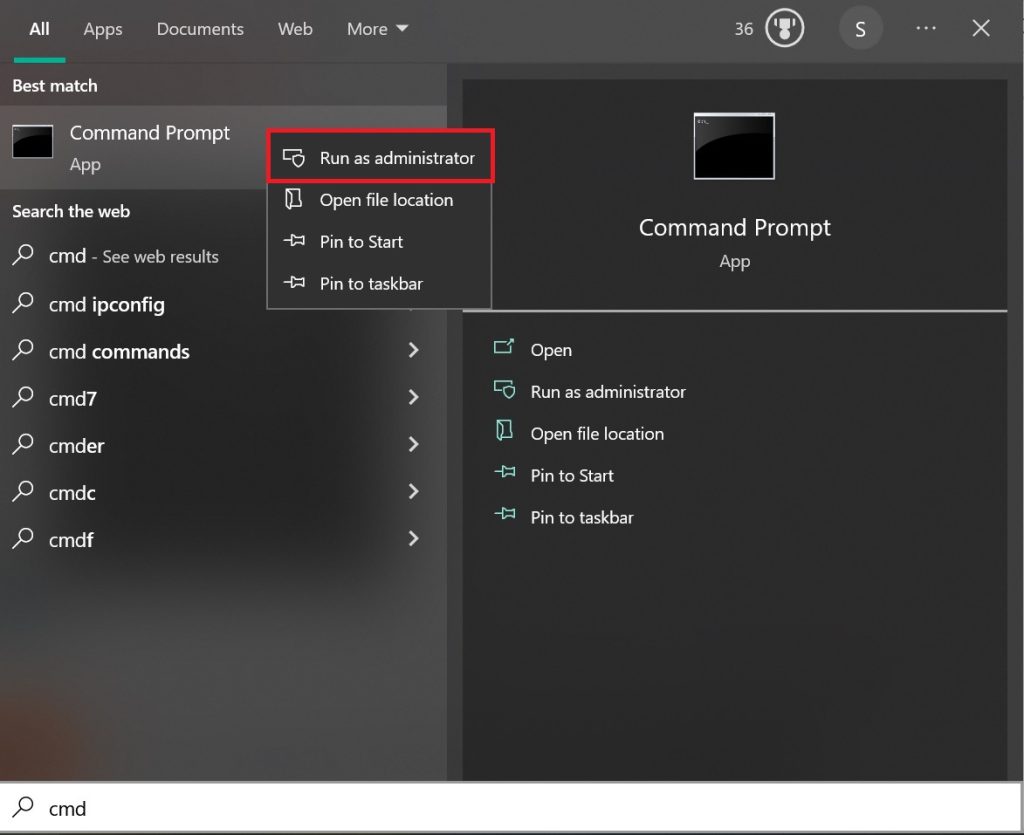
Before delving into DISM commands, ensure you have the necessary privileges. To open Command Prompt as an administrator, follow these steps:
- Type “Command Prompt” in the Windows search bar.
- Right-click on “Command Prompt” in the search results.
- Select “Run as administrator” from the context menu.
To harness the power of DISM effectively, it’s crucial to be familiar with its commands and how to execute them. Here are some pivotal DISM commands and their practical applications:
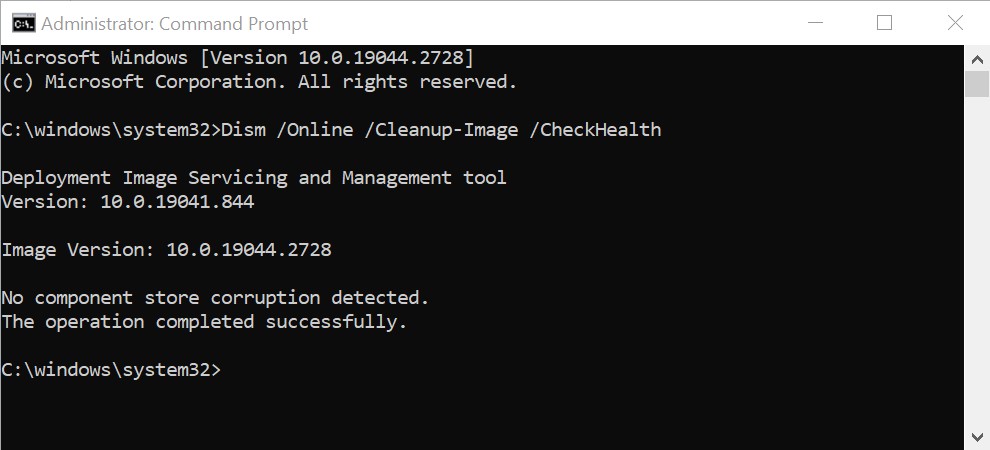
CheckHealth
The CheckHealth parameter conducts a basic check for component store corruption. It swiftly identifies errors that are already logged, making it a rapid diagnostic tool. To perform an online CheckHealth, employ the following command:
Dism /Online /Cleanup-Image /CheckHealth
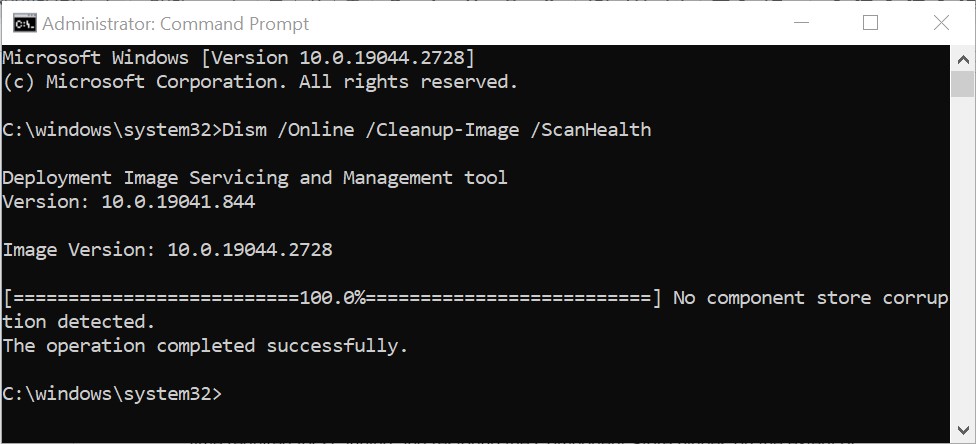
ScanHealth
While CheckHealth is swift, ScanHealth delves deeper as it meticulously examines the component store for corruption. The duration of the scan hinges on the condition of your Windows 10,11 operating system. To initiate a scan, employ this command:
Dism /Online /Cleanup-Image /ScanHealth
RestoreHealth
Following CheckHealth and ScanHealth, RestoreHealth is one of the most pivotal DISM parameters. It is employed to repair the Windows image, be it online or offline, using distinct source files. To mend the online operating system, use the following command:
Dism /Online /Cleanup-image /Restorehealth
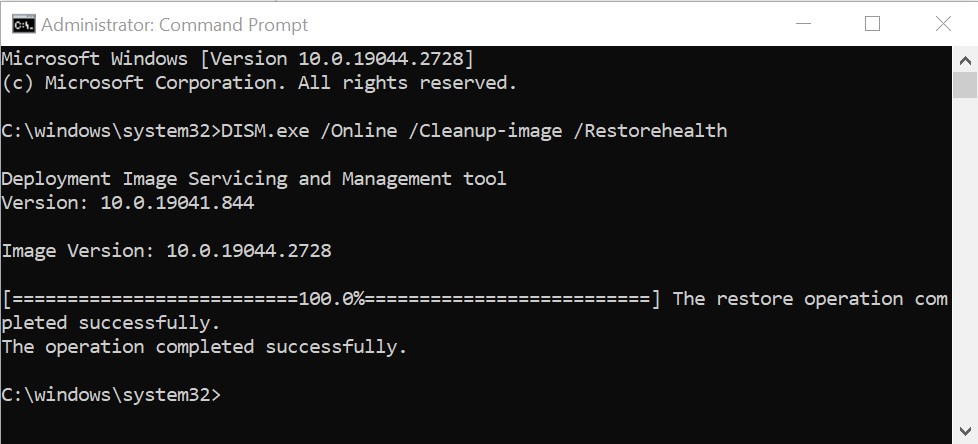
DISM relies on Windows Update to obtain the requisite files for rectifying corruptions. The time required for scanning and restoring the Component Store hinges on the extent of deterioration. During this process, DISM will seek to download and replace any damaged or missing components automatically.
Repairing Offline Image
While our focus has been primarily on online remedies thus far, DISM is equally proficient in managing offline Windows files, whether you’re dealing with Windows 10 or 11. You can undertake these operations by utilizing bootable installation discs, Windows ISO files, or locally stored source files such as “install.wim” or “install.esd” from another device. Ensure that these files align with the version, edition, and language of the Windows version you intend to repair.
Now, let’s look at one example of how to use the DISM command prompt to fix an offline image.
To fix an offline image, run the DISM command listed below from the command prompt:
Dism /Image:C:\offline /Cleanup-Image /RestoreHealth /Source:c:\test\mount\windows /LimitAccess
The source location needs to be changed per your offline image, and it’s usually a WIM, VHD, or VHDX file.
The “/LimitAccess” parameter tells DISM not to check Windows Update or Windows Server Update Services for source files.
Using PowerShell
In addition to the command-line tool, you can leverage PowerShell Cmdlets to execute DISM operations.
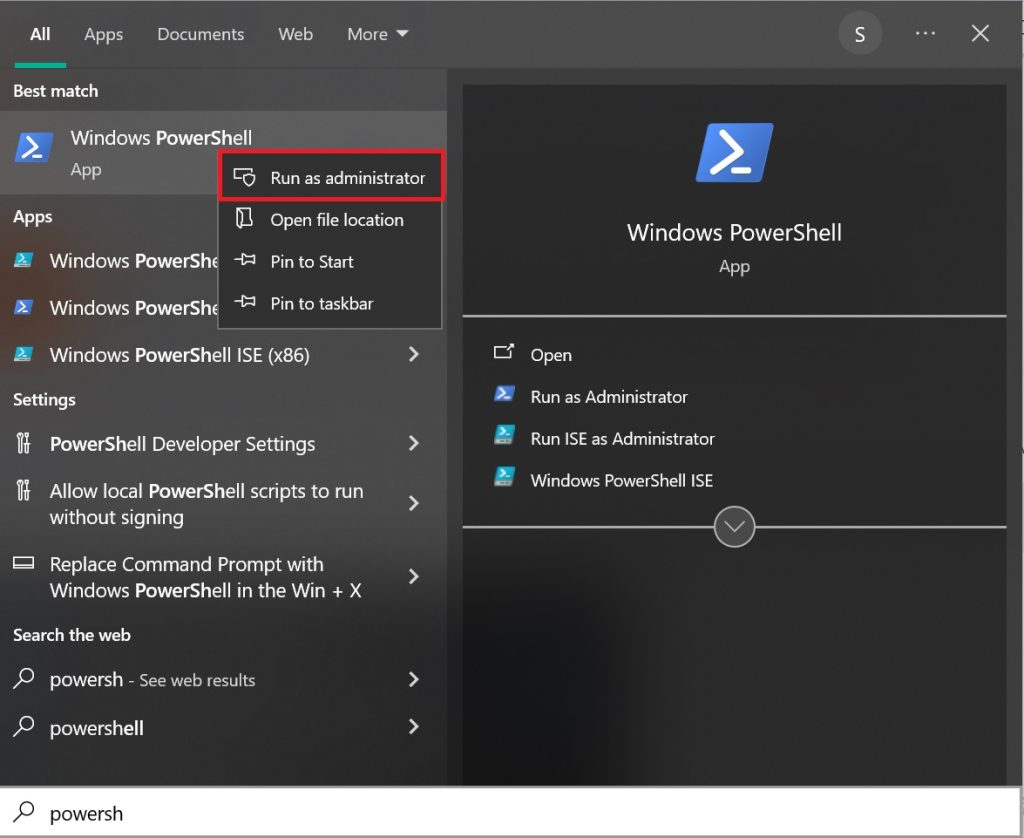
Before we delve into using PowerShell Cmdlets for DISM operations, it’s essential to open PowerShell with administrator privileges. To do this, follow these steps:
- Type “PowerShell” in the Windows search bar.
- Right-click on “Windows PowerShell” in the search results.
- Select “Run as administrator” from the context menu.
The PowerShell commands closely mirror their Dism.exe counterparts. For instance:
- To initiate CheckHealth PowerShell cmdlets, employ the following:
Repair-WindowsImage -online –CheckHealth
- For a comprehensive check and repair using ScanHealth, use the subsequent command:
Repair-WindowsImage -online –ScanHealth
- And for restoring health with the RestoreHealth command, use:
Repair-WindowsImage -online –RestoreHealth
Resolving DISM Challenges
While DISM is a potent tool, it is essential to be aware of potential challenges that may crop up during its utilization. Here are some common issues and their resolutions:
Antivirus Software Interference
At times, third-party antivirus programs can interfere with the smooth operation of DISM. If you encounter issues, consider temporarily disabling your antivirus software. Microsoft Defender, which comes integrated with Windows 10 and Windows 11, offers a built-in security alternative without the need for third-party solutions.
Corrupted Windows Update Components and Registry
Misconfigurations of critical services such as the Background Intelligent Transfer Service (BITS), Cryptographic Services (CryptSvc), and Windows Update Services can result in DISM failures. Ensure that these services possess automated startup types and appropriate start statuses to facilitate seamless Windows updates. In some instances, merely restarting these services can resolve the problem.
Addressing Proxy Issues
If you employ a proxy server for privacy, it might hinder DISM operations. To counter this, temporarily disable the proxy before executing DISM commands.
Tackling Read-Only Access to Install.wim
While working with offline Windows images, it is common to utilize files like “install.wim” from Windows installation ISOs. However, these files often possess read-only permissions, which can lead to issues. To resolve this, remove the read-only permissions by accessing the file properties.
Fixing DISM Error 50
Another common error, DISM error 50, occurs when users attempt to run commands such as:
Dism /Online /Cleanup-Image /CheckHealth
Dism /Online /Cleanup-Image /ScanHealth
Dism /Online /Cleanup-Image /RestoreHealth
This error is often caused by a misplaced registry key. To resolve it, follow these steps:
Access the registry by running Regedit in the command prompt.
Navigate to HKEY_LOCAL_MACHINE\SYSTEM\CurrentControlSet\Control.
Locate and remove the MiniNT folder.
After making these modifications, restart your Windows computer.
Conclusion
In conclusion, DISM emerges as a versatile and advanced tool, particularly for individuals with technical expertise such as system administrators. Its proficiency in resolving complex component store corruption issues surpasses that of tools like SFC and CHKDSK, making it an invaluable asset in the realm of DISM repair image and Windows maintenance.
As you navigate the world of system repair and optimization, consider adding DISM to your arsenal to ensure the seamless operation and dependability of your Windows operating system, especially when it comes to DISM repair image tasks. It stands as a powerful ally, dedicated to preserving your system’s health and enhancing your computing experience.
Other Technical Reviews:- Reviews


