
There are a lot of pros to using Microsoft Outlook, but there is also some cons. One being when you lose access to your data. This often happens when using Exchange Server or IMAP server and the Offline Storage Table (OST) file gets orphaned.
What is OST file?
OST files are offline Outlook data files created by Outlook when you create an Exchange/IMAP email account. Thanks to their offline status, OST files are accessible without an internet connection. The changes you do while offline synchronize with your online mailbox whenever connectivity is available.
When an Exchange or IMAP email account is deleted, Outlook can no longer perform synchronization and the OST won’t be updated. You can’t access such OST files in another account as OST files are linked to the email account in which they’re created. Likewise, your old OST files can’t be accessed or imported into Outlook
Thankfully, your data is not lost forever. By using an OST to PST converter, you can regain access to your lost data.
Stellar Converter for OST: The Best Option to Convert OST Into PST
Trusted by IT administrators, Stellar Converter for OST is the best option for OST to PST conversion. With regular feature updates, no file size limitations, and support for all versions of Outlook (2021, 2019, 2016, and earlier), Stellar Converter for OST makes offline OST to PST conversion process easier than ever before. The software converts all mailbox components with complete integrity. This includes emails, attachments, contacts, calendars, and other data. It only takes a few simple steps to convert your orphaned OST files into PSTs.
How does Stellar Converter for OST work?
Using Stellar Converter for OST , inaccessible OST data (even if it is supposed to be encrypted) can be converted into PST files, which can then be easily read with Outlook. The tool converts all OST components including emails, attachments, contacts, deleted items and calendar items. So, nothing is lost.
Notable Features
Stellar Converter for OST comes with many notable features. The best features include:
- Gain Access to Data—The most common use for this OST converter is when a user’s account is deleted from Exchange and was not backed up. Because the OST file is usually left unharmed, users can then process it through the converter so that they can regain access via the newly formed PST file.
- Export Files to Multiple formats—Another common use of this tool is to export files to another file formats such as, PST, MSG, RTF, EML, HTML & PDF .
- Give Free Preview: There is a preview of emails & calendars before the actual conversion
- Migration to Microsoft 365/Live Exchange—Lastly, Stellar Converter for OST Technician edition, can convert and migrate OST files to Microsoft 365/Live Exchange.
How to Get Started
First, you’ll want to download the Stellar Converter for OST. Keep in mind that it will take up a little over 100 MB. Once downloaded, proceed to open up the program.
Step 1: Run Stellar Converter for OST
Step 2: After the launch of the software, a dialogue box titled List Configured Profiles appears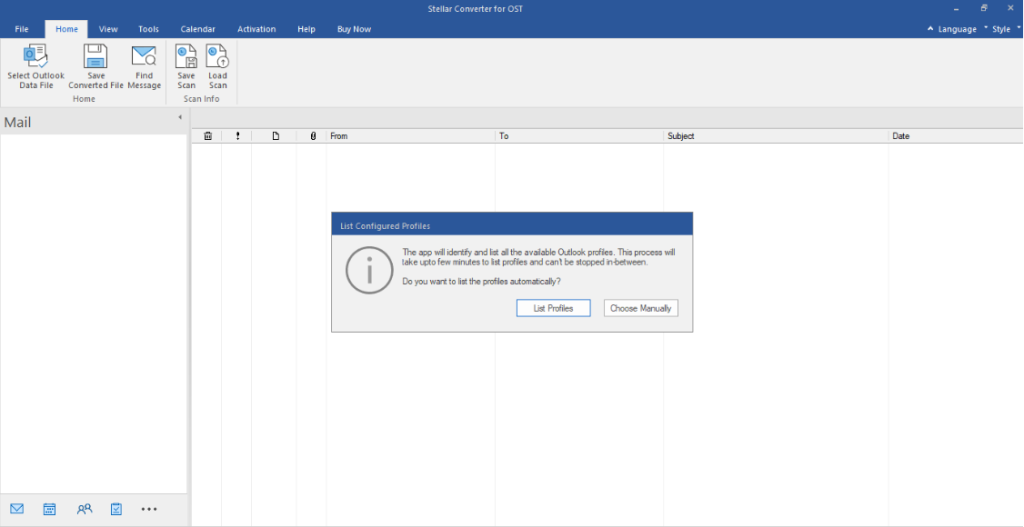
Step 3: From the box, select List Profiles or Choose Manually to add Outlook Data File (.ost)

Step 4: The Select Outlook Data File for Conversion box opens after choosing an option.
Note: The File menu or Home ribbon can also be used to access the “Select Outlook Data File” for Conversion box.
Step 5: To choose and convert an Outlook Data File (.ost), two tabs are available: Profile List and “Choose Mailbox Manually”.
Profile List:
If you want to convert a configured Outlook Data File, use the “Profile List” tab. This option instantly syncs and lists all of your configured OST files.
- Choose the necessary outlook profile from the list.
- To begin the converting process, click Convert.
- A Conversion Complete dialogue box with the message “Selected file has been converted” shows after the procedure is finished.
Note: Use the “Save Converted File” button from the Home ribbon to save the converted file.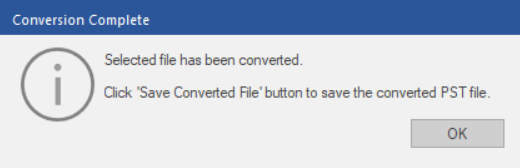
Click OK to finish the process.
Choose Mailbox Manually:
Use the “Browse” or “Find” options on this tab to locate the OST file in your system.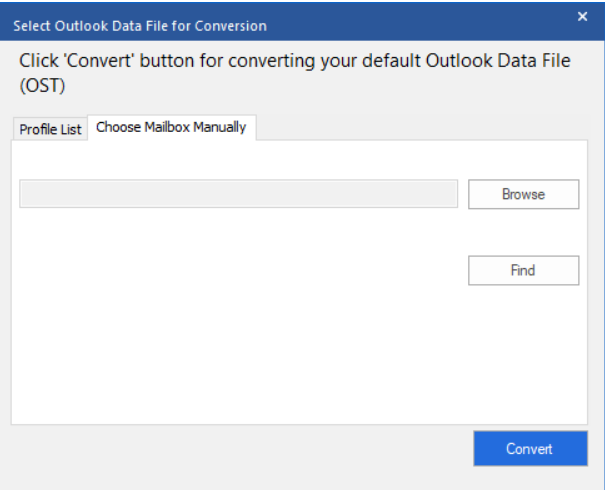
Browse:
If you know the exact location of your OST file, use the Browse button.
Step 1: Click Browse. Find the OST file, select it, and click Open.
Step 2: Click the Convert button to begin the converting procedure.
Step 3: Once the procedure is finished, a Conversion Complete dialogue box with the message “Selected file has been converted” displays.
Note: The Save Converted File button on the Home ribbon can be used to save converted files.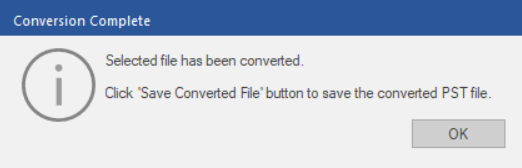
Click OK.
Find:
You can use the Find button to look for OST files on the discs, folders, and subfolders of your system.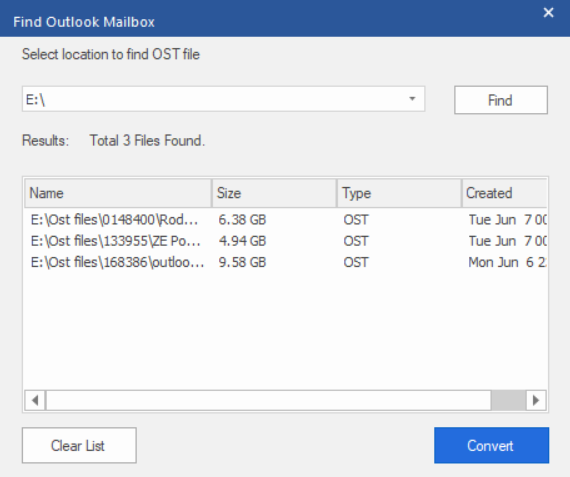
Step 1: Click Find and wait for the Find Outlook Mailbox screen to appear
Step 2: From the drop-down list, choose the drive where you want to look for OST files. However, you can only choose one drive at once.
Step 3: Select the Find button to launch the search.
Note: Click Stop to end the search process.
Step 4: The number of OST files located is displayed in the Find Complete dialogue box after the search is complete.
Step 5: Then select OK.
Step 6: In the Results section, a list of all OST files discovered on the chosen drive is shown. Choose the file you want to convert. Remember, only one file may be chosen at once.
Note: Click Clear List to remove the search results.
Step 7: To begin the converting process, click Convert.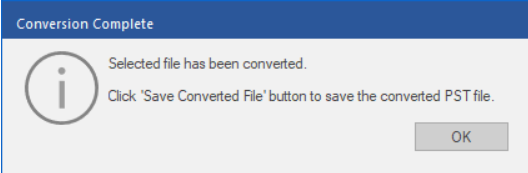
Step 8: Click OK
You’ll notice a preview of all the files associated with your OST file is displayed on the left. At the bottom left of the tool (circled in red), you’ll notice that you can switch through three different folder categories: mail, calendar, and contacts.
Then, there is the button with three dots that contains your “Toolbar Options.” These options will display three more folder categories along with a navigation pane.
The navigation pane allows you to quickly scan and find the documents you are looking for without having to potentially look through hundreds or even thousands of files.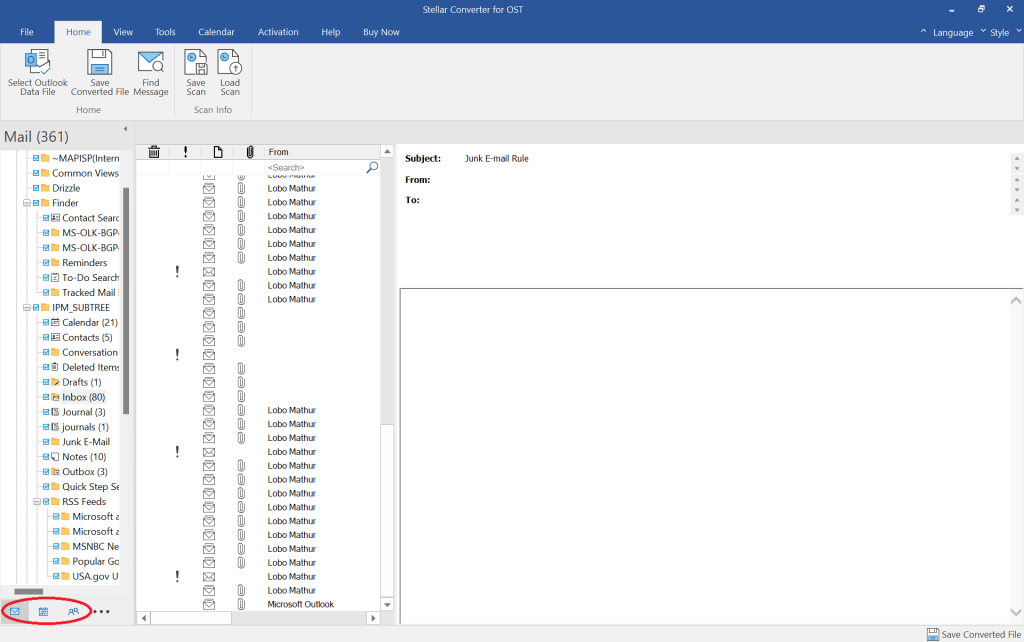
If you want to save the newly converted PST file, then you’ll need to press the “Save Converted File” button on the bottom right.
You’ll notice that the free version limits the number of files that you can save. After activating, you’ll have to enter a key that is sent to your email and then choose a file format.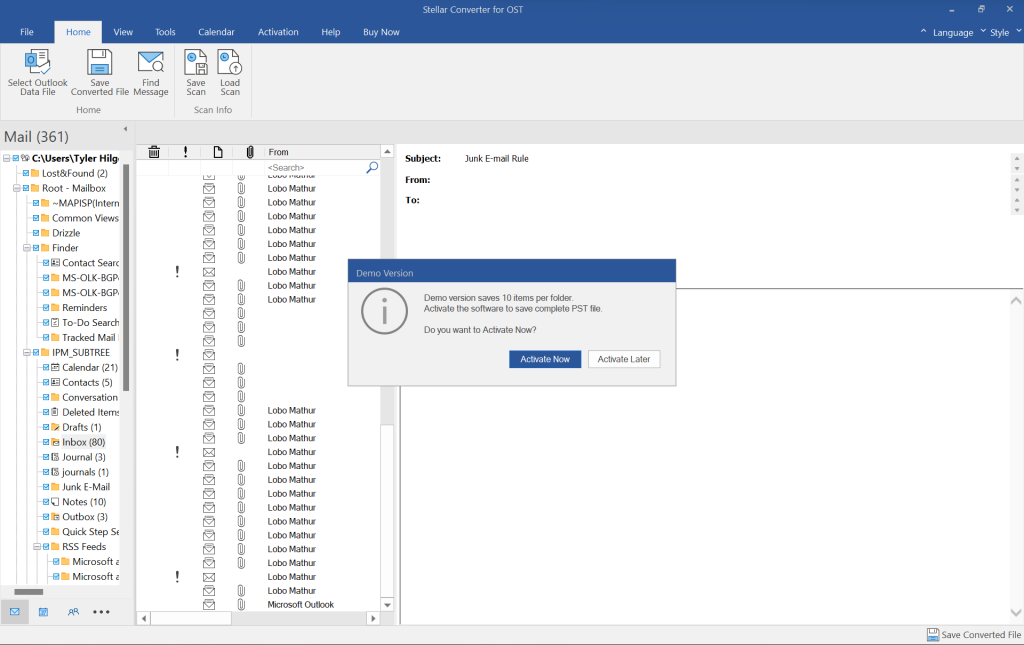
Stellar Converter for OST Subscriptions
Since the free version is limited to converting only a small portion of files, you may need to opt for a paid version. Stellar has three year-long subscriptions options: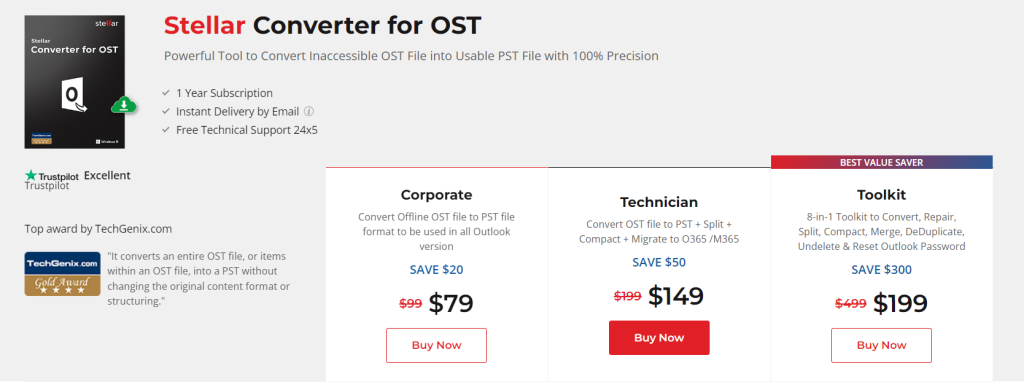
Corporate
With the “Corporate” subscription, you’ll get up to five mailbox conversions along with one allowed device to install Stellar on. You’ll also get the capability to convert OST files to PST files.
Technician
The “Technician” subscription comes with unlimited mailbox conversions along with an option to set the number of devices that you’d like to install Stellar on.
You’ll also get everything that the “Corporate” subscription comes with—plus additional features such as exporting files to Microsoft 365 or Exchange Server, Batch File conversion, Split and Compact the larger OST file etc.
Toolkit
The “Toolkit” subscription comes with everything that the “Technician” subscription comes with—plus over ten more features such as data recovery and file repair.
Final Verdict
Overall, Stellar’s user interface is intuitive and does not take a technician to use. Converted files are easy to navigate due to the folders being organized into multiple different categories.
When it comes down to it, the Stellar Converter for OST does get the job done; however, the free version is likely to not be sufficient for your needs if you’re a business or technician.
Because of that, a paid subscription will be necessary. Compared to other similar tools on the market, the subscription costs are reasonable and do provide a lot of value.
In the end, it is safe to say that the Stellar Converter for OST is one of the best converters on the market.
Other Technical Reviews:- Reviews


