
Whether it is saving you from online streaming or saving important video calls for future reference, screen recording has its several benefits. Smartphones of the present all have the feature to screen record. Here is a step-by-step description on how to screen record with sound on iPhone with versions iOS 11 and iOS 12.
Adding Screen Record to Control Centre
Go to Settings on your Home Screen
From the choices displayed scroll to locate Control Center and tap to open it
Tap on Customize Controls
You will find a list of options including Apple TV Remote, Alarm, Notes, Hearing, Guided Access, etc. Scroll down to locate the Screen Recording option in this list and click on the (+) icon just beside it to add it to the Control Center.
Once done press the Home button to exit this page and return to the main Home Screen
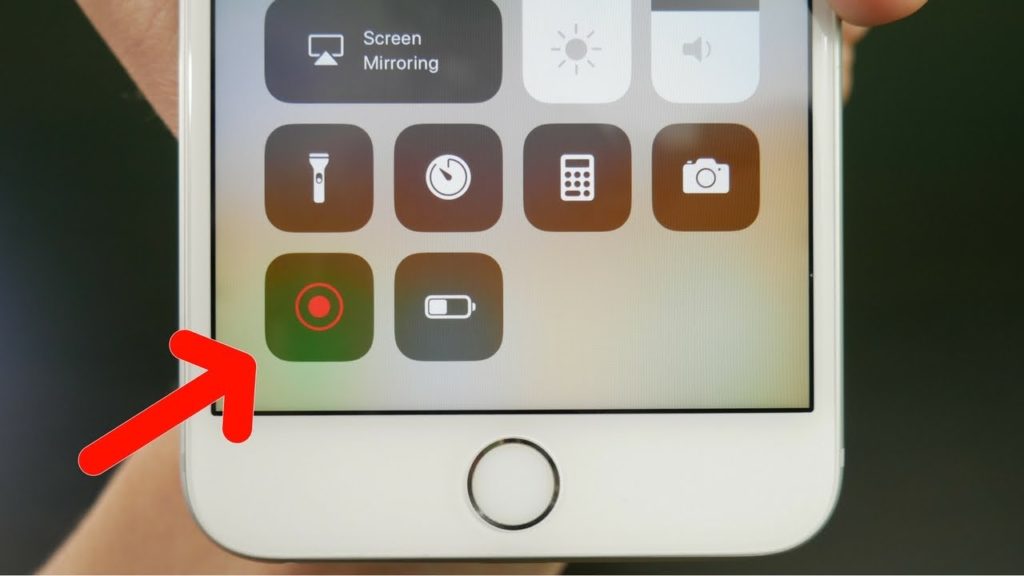
Now swipe your phone from the bottom or top to access the Control Centre. You will find a new icon which is the Record button. Its icon is a large dot within a circle.
How to Screen Record with Sound iOS 11 and iOS 12
Using the Screen Record feature is very simple. Whenever you want to record a screen open the Control Centre and press the Screen Record icon to begin recording the screen. Remember the screen will be recorded with audio/voice.
As you begin recording the screen a timer will appear to tell you for how long the screen has been recording.
When you want to discontinue screen recording tap on this timer and you will get a pop-up to confirm that you wish to stop screen recording. Tap on the Stop action to halt the recording.
Go to your Gallery and you will find the screen recording that you have saved along with other photos and videos.
Now that you know how you can Screen Record on your iOS 11 and iOS 12 go ahead and give it a try!


[…] is a leading and well-known App to sign which are available for Android and iOS devices. This application offers self-signed prompts, a remote signature, and in-person […]