
In this modern age, technology has advanced to a level where you even have ultra-high definition (UHD) videos of 4k resolution, packing hundreds of thousands of pixels to improve the graphics. On top of that, some extremely high-tech software like photoshop, video editors, etc., require enormous resources to work properly.
Before moving on, we must understand what a Random Access Memory (RAM) does. A clear understanding makes it easy to know the reasons for the issue and how to tackle them technically. Like the Central Processing Unit (CPU), RAM is a component of your computer. RAM is a memory that computers use to store data for quick future access temporarily.
For instance, you opened up software. All the data related to that software will be loaded into the RAM. Now, what is the benefit of doing that? Whenever you open that software again, the processor can access all the files related to that software quickly. In layman’s terms, this will increase the speed.
That was it. Now let’s see what VRAM is. VRAM stands for Video RAM. As CPUs use RAM, graphics cards use VRAM. This does the job but only does it for video-related tasks. It could be for games, 4k videos, image rendering software, video editing tools, etc. Less VRAM will make it harder for the graphics card to work at it’s potential level. But the best part is you can increase VRAM on Windows to get those extra performances out of your system. Let’s see how it’s done.
Dedicated and Shared Memory
When we talk about VRAM, there are two types. Every graphics-related task uses the memory from the dedicated memory block. If dedicated memory is not enough, the task will take some memory from the shared memory block.
The thing to note is that dedicated memory cannot be increased. We have to use some available memory for the shared memory block, which is what we will learn. You will often see the term total memory, and you might have guessed what it means. It is just the sum of dedicated memory and shared memory.
Find Out How Much VRAM You Have
● On Windows 7
Finding details about dedicated memory and shared memory is very easy. Just follow these simple steps.
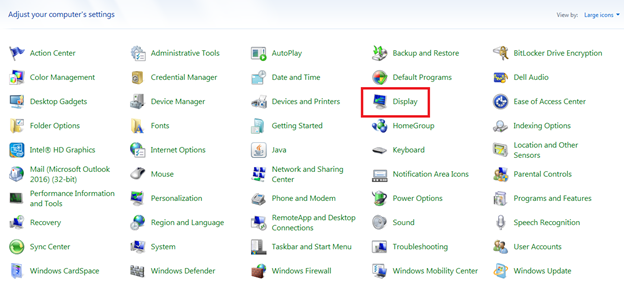
- Open up the Control Panel and select Display.
Select Change display settings
Click on Advanced settings.
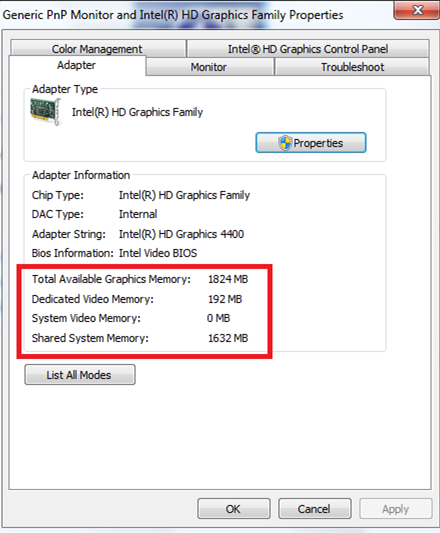
There you will see the total, shared, and dedicated memory.
● From Windows 8 onwards
Follow the steps to get the details on Windows 8 and 10.
Open Start.
Go to Settings -> System -> Display.
Click on Advanced Display Settings written in blue color.
A window will pop up. There is a Display adapter properties option at the bottom. Click this option to see the details of VRAM.
Three Methods to Increase VRAM on Windows
Method 1: Tweaking the Registry
Simultaneously press Win + R. This will open the Run Box.
Now, type Regedit in the input filed and hit enter. This will open the registry editor.
From the side-panel at the left, navigate to Computer -> HKEY_LOCAL_MACHINE -> Software -> Intel.
Right-click on the Intel folder and select New -> Key to create a new key. Name it GMM.
Select the GMM folder. Now right-click in the empty area at the right and select New -> DWORD (32-bit) Value.
Type DedicatedSegmentSize as the name for the DWORD value.
Double-click DedicatedSegmentSize. You will see two options under the One is hexadecimal, and the other is decimal. Choose decimal and type 512 in the Value Data input field. This is the extra RAM you allocated in megabytes (MBs).
Reboot the system to take effect.
Method 2: Tweaking the BIOS
BIOS stands for Basic Input Output System. It is a set of instructions used by the Operating System (OS). The OS uses BIOS to handle data flow to and from the attached components like the hard disk, video card, etc. Beefing up the VRAM using BIOS is easy and probably the best way. Also, some manufacturers do not allow you to tweak the BIOS.
Reboot the computer/laptop. When the system is restarting, repeatedly press the BIOS key to enter BIOS settings. Usually, the key is But, you do not need to worry if that is not the key in your system. During the restart process, every system displays the key to be pressed to enter the BIOS.
Click on Advanced or Advanced Options depending on your system.
Select Video/Graphics Settings or VGA Share Memory Size, depending on your system.
Select Pre-Allocated VRAM and type your desired memory size to be allocated.
Reboot the system to take effect.
Method 3: Go For a Dedicated GPU
Doing some tweaks in the BIOS or Registry editors can be effective if you need just a little more processing power for rendering the graphics. Those approaches could be very effective for software or applications that are not very resource-hungry.
Unfortunately, the integrated Graphics Processing Unit (GPU) that comes with the system is not designed to handle extensive rendering tasks. If you want real horsepower to boost your graphics experience to a whole new level, you have to go for a dedicated GPU.
A dedicated GPU will allow your resource-hungry software to use as many resources as they want for a smooth experience. As dedicated GPUs are more powerful, even an older dedicated GPUS will outperform the latest integrated GPU.
Wrapping Up
Running software like video editors, AutoCAD, or any simulation-related tool requires a tremendous amount of resources to work properly. Packing so much of pixels and doing complex power-consuming tasks to render graphics need resources accordingly. Similar to RAM, which stores data for various tasks, VRAM is used to store data related to graphics rendering.
If you are using a particular tool or playing a game and need more resources to render the graphics, you can increase VRAM on Windows to smooth the processes. The cherry on the cake is that boosting the VRAM is super easy and requires just a few minutes.
Experiencing difficulties with your Device, check out our “How To” page on how to resolve some of these issues.


