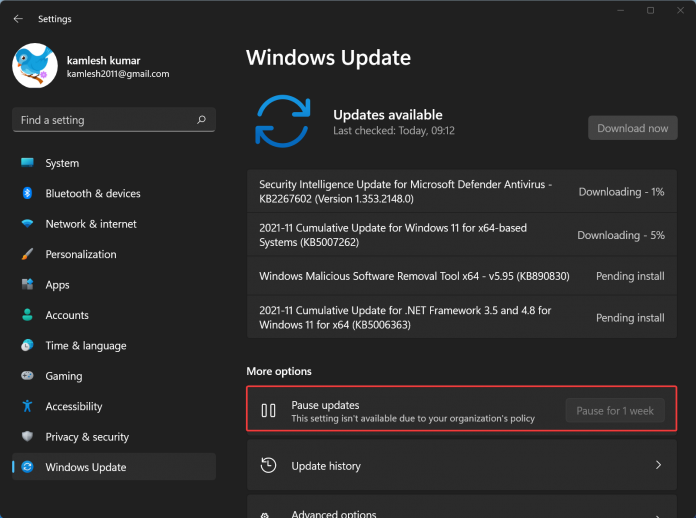
Many users of Windows 11 have reported that the option to Pause Updates is greyed out on the Windows Update page and that they are unable to use this feature on their system. It is not recommended to skip the windows or any additional updates on your system because a driver update may be released, which will help the OS and other apps run more smoothly. Windows will also check for updates automatically and download and install them by default. However, if a user wants to stop Windows from downloading and installing updates for a set period of time, the Pause updates option must be enabled. However, if this feature is greyed out on the Windows Updates page, don’t worry. Here we will discuss how to fix the greyed out pause updates option in Windows 11. So, continue reading this article.
Fix The Greyed Out Pause Updates Option In Windows 11
The “Pause updates” option can be disabled using the Local Group Policy Editor and the Registry Editor. If you accidentally enabled such a setting in either tool, you may encounter this issue in Windows Settings. As a result, it is necessary to check and double-check the corresponding settings.
Method 1: Using Local Group Policy Editor
Group Policy Editor, a snap-in for the Microsoft Management Console, allows users to change group policy settings for sites and domains. Your company can use this to disable the Pause update feature on your work system.
Even on a personal computer, a misconfigured Pause updates policy can result in the option being disabled on the Settings page.
The Group Policy Editor snap-in is not included in Windows 11 Home. So, if you’re using Windows Home, here’s how to get to Group Policy Editor.
To enable the Pause Updates policy in Group Policy Editor, follow these steps:
Open the Run dialogue by pressing Win + R.
Then, type gpedit.msc in the Run box and click OK to open the local group policy editor
In the local group policy editor window, search for the following path as shown below.
Computer Configuration > Administrative Templates > Windows Components > Windows Update > Manage end user experience
Remove access to the “Pause updates” feature policy by double-clicking it in the right pane.
After that, in the pop-up window, choose not configured or disabled.
To save your changes, click Apply and OK.
Close Group Policy Editor and move on to the next method if the policy has already been set to Not configured.
Now, to get to the WinX menu, press Win + X.
From the context menu, choose Windows Terminal.
After that, in the Windows Terminal window, type gpupdate /force
Then, press Enter to force update the policy changes
When the policy update is completed, exit Command Prompt.
Now, go to Settings and then Windows Update to check if the Pause update option is restored
Method 2: Using Registry Editor
Registry Editor is a Windows program that allows users to add and remove features by modifying, viewing, and editing the Windows Registry. It’s important to note that modifying registry entries incorrectly can cause your system to malfunction. As a result, you should create a restore point before continuing with the steps below.
To change the registry value for SetDisablePauseUXAccess, do the following:
To open Run, press Win + R.
Type Regedit in the Run dialogue box
Then, click on OK to open the Registry Editor
Go to the following location in the Registry Editor.
Computer\HKEY_LOCAL_MACHINE\SOFTWARE\Policies\Microsoft\Windows\WindowsUpdate
After that, locate the SetDisablePauseUXAccess DWORD value in the WindowsUpdate key
Select Delete by right-clicking on the value
Then click on Yes to confirm.
[Note: If you don’t have a value named SetDisablePauseUXAccess in your Windows Update folder, skip this step.]
- After the deletion, close the Registry Editor and restart your computer
The pause update should now work in Settings after the restart.
Conclusion:
Performance improvements, security patches, and bug fixes are all included in critical Windows updates. If you have a limited Internet plan or want to put off installing updates for a few weeks, you can pause them for up to 35 days.
You can also use third-party update blocker tools to permanently disable Windows automatic updates.
Experiencing difficulties with your Device, check out our “How To” page on how to resolve some of these issues.


