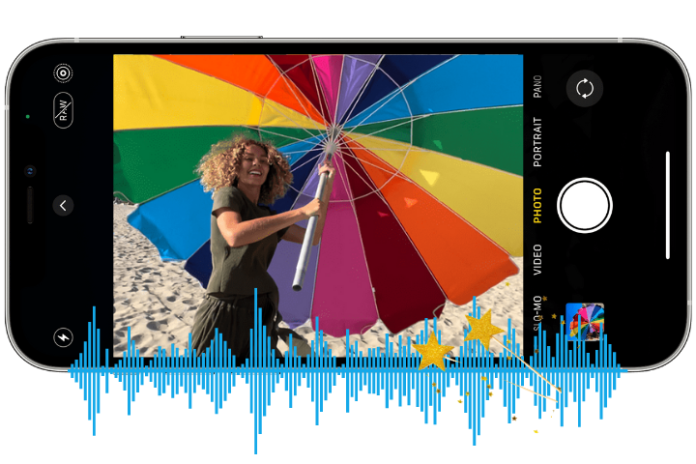
Getting your perfect shot is now made easy with live photos by Apple. These live photos are the photos on steroids. They help bring your photos to life by turning these into gifs, such as 1.5 seconds videos capturing moments before and after snapping a photo. These GIF-like videos will capture the sound, energy, and movement that will go to your photo-worthy moment. Rather than having a static photo, it will capture real-life background and movement sound, so you can choose the exact moment in the time of your best shot.
But, showing the total scene of one Live video with an Android user or on social media is impossible without converting your live photo to a video first. Debuted in 2015, Live Photos are quite easy to create as the process is pretty similar to any other type of photo. If you are wondering how to make a video with a live photo, keep reading this article.
The process of shooting any Live Photo is similar to taking any normal photo, but it provides much more for working with. Live photos will help you select a specific moment while your subject looks the best instead of an unflattering, crooked, or blurry photo. In their native form, Live Photos can only be viewed by the rest of the iOS users. For sharing your Live Photos with someone, you can convert them to a GIF or video. Otherwise, while the Live photos have been shared exterior the Apple ecosystem, they will revert to static images.
To find all your Live Photos, you just need to launch your Photos app and then tap on the Albums icon. This will lead to an album named Live Photos, whereby you can view every photo shot when the option of Live Photo is enabled. Live Photos will help you save your storage space and energy and thus help you get the perfect shot instead of clicking multiple photos that you click back to back. If you wish to preserve the ambient audio and movement of your Live Photos, you will have to convert them into videos for viewing elsewhere. Here, we will be explaining how to perform that.
Why convert Live Photo into video
Whether you are capturing moments at any concert, taking an old photo or recital, or sharing the wonder of any beautiful view, it is a safe bet to take a Live Photo. The problem is that while you are sharing these on social media or maybe with any non-Apple user, automatically, they do not share any video. Rather they see only the Key Photo and none of the energy and movement surrounding it.
Nowadays, virtually every social media platform prefers video. Fortunately, Live videos today serve as any two-in-one video and photo. You can share these moments behind the scenes by converting Live Photos with anyone. This is quite a better way of telling your story and a better chance to stop viewers mid-scroll. You can share that on any device with anyone when converted to a video.
Steps to make a video with a live photo:
Loop or Bounce
Apple has introduced the Loop and Bounce feature of the Photos app in iOS 11, and it still comes in handy to create a special effect animation or video. Loop will turn your Live Photo into a short loop that continuously plays without a pause. Bounce will make the subject of your photos move forward and the background.
- First, open the Photos app and then select a Live Photo
- Tap on an image on iOS that you wish and then tap the Live button directly above it and then from the pull-down menu, select either the Loop or the Bounce.
Save as Video
An option in the Photos app on iOS 13, 14, as well as 15, features the ‘Save as video’ and it enables saving one Live Photo as one video with one single tap without needing any third-party required.
- Tap the Album icon in the Photos app and then select Live Photos
- In the gallery, open a Live Photos
- Next, tap the Share bottom
- Next, tap on the save as video
Use Shortcuts
Also, you can use the Shortcuts app, which has been integrated into iOS for converting your Live Photo to any GIF or video. This app works with iOS 12 or higher. The best way to add the premade third-party shortcuts is to try them to see if they work. When you receive an alert, then follow the onscreen directions. Maximum third-party shortcuts immediately work.
- First, open the Shortcuts app application
- Navigate to the shortcuts gallery website for accessing and downloading the ready-made shortcut Convert Live Photos to video.
- On the resulting page, tap Get Shortcut
- When the shortcut has been downloaded into the library, you need to tap to open it and then go to the Live Photo that you wish to use.
- Select the number of times you will permit the shortcut to use this photo.
- The shortcut Convert Live Photos to Video is now in the Shortcut Gallery to use at the moment you will want need to use it.
Now that you have created one Live Photo video file, users can share it via text, mail, or social media.
Wrapping up
Live photos let the users capture music in the background, laugh behind the camera, and have subtleties of light-peeking via the clouds or blowing winds. You can turn Live Photos of 1.5 seconds into professional videos. You need to ensure to turn the Live Mode on in your camera setting to capture your most exciting, engaging, and authentic content yet. Then with the above-mentioned tips and tricks, you can take your videos to the next level.
Experiencing difficulties with your Device, check out our “How To” page on how to resolve some of these issues.


