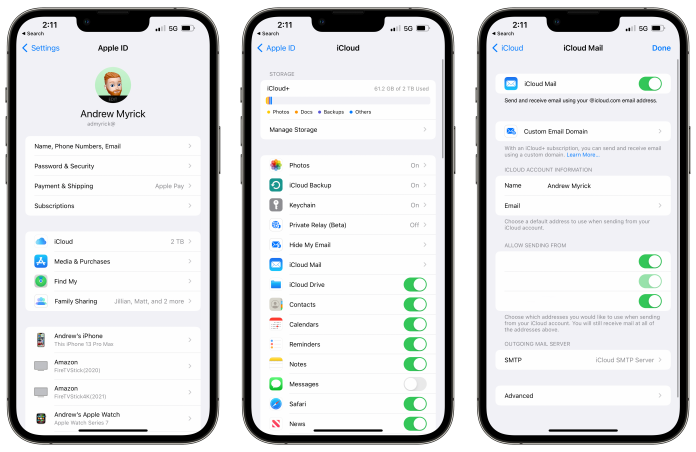
Are you aware of the perks that a simple upgrade to iCloud+ will help you enjoy? The first and foremost one is the ability to set up custom email domains with iCloud Mail on your iPhone. To get an overview of this feature, Apple brings you the ‘personalize iCloud Mail with a custom email domain and share with family‘ note. If you happen to be a part of any Family Sharing Group, you will be enjoying the privilege of sharing the email domain with all the group members. With this, anyone from your Family Sharing Group will be able to proceed with the addition of a custom domain and decide whether to share it or not. However, not all users across the world will enjoy this custom domain feature. This feature comes with region restriction.
As you Start …
So, as you start here, you should look at a few things.
If you have an existing email address/s at a domain you wish to keep using, prepare a list of such addresses to help you configure them in iCloud. If you do not have any existing email addresses, create one once you are done adding the domain to the iCloud.
You must have two-factor authentication enabled for generating your Apple ID. You can simply turn on one at the Apple ID account website for those who don’t have it.
To set up a custom email domain, owning a primary iCloud Mail address is a must. Create one primary email address if you don’t have it.
Family Sharing must be setup up for those who wish to share the domain with their families. Each family member must also turn on the two-factor authentication and own a primary iCloud email address.
Steps To Set up Custom Email Domains With iCloud Mail On iPhone
Here are some of the steps that you need to follow to set up custom emails domain with iCloud mail on your iPhone:
Step 1: First, you need to enter your domain details and select if you wish to share it with the other members of your family using the Family Sharing Group.
- Open iCloud.com and visit Account Settings, then click on Manage in the ‘Custom Email Domain’ section.
- You need to indicate who will be the domain user- ‘Only You’ or ‘You and Your Family’.
Step 2: If you have a pre-existing email address for the custom domain, go ahead adding them, followed by assigning them to the members of the Family Sharing Group if you have selected the ‘ you and your Family’ option in the first step.
Step 3: You need to set you the custom domain now and make the next step of selecting your default email address.
Wrapping Up
Setting up custom Email Domains With iCloud Mail On iPhone is not a complex process to accomplish if you follow all the steps mentioned above properly. So, take your time to understand the saying and complete it successfully.
Experiencing difficulties with your Device, check out our “How To” page on how to resolve some of these issues.


