We all know that iTunes is the best way of transferring file from iPhone to Mac or vice versa. But, if you are wondering that how to access iPhone files on Mac without iTunes, there are plenty of ways for that. And we have discussed here all the possible ways. So, keep reading.
Ways to transfer files from iPhone to Mac
There are mainly two ways for that. You can choose to transfer files from iPhone to Mac using a USB cable. And the other way is wirelessly. All the processes are explained here in details.
Transfer files from iPhone to Mac using a USB cable
Method 1: Through EaseUS MobiMover
If you are wondering that how to transfer photos from iPhone to laptop without iTunes, this is a one of the simplest ways for that. EaseUS MobiMover is a free iOS data transfer tool that allows you to transfer all kind of files from iPhone to Mac, computer and Vice versa.
But you need to first ensure that the iPhone is running iOS 8 or later and the Mac is running macOS 10.12 sierra or later. Once you are confirmed about this, proceed to follow the below steps.
Connect both the devices the Mac and the iPhone through a compatible USB cable and tap on the ‘Trust this computer’ on your iPhone.
Next, run the tool EsaeUS Mobimover on the Mac and choose the ‘iDevice to Mac’ on the Mac screen.
You can choose any kind of file for transferring. This process allows you to select data together or else you can transfer one kind of data at a time.
The next step is to choose the storage route. Click at the file icon at the upper right corner to choose the required path. However, if you do not select any path, everything will be exported to a folder in the Mac desktop.
Once done, tap on the Transfer button at the below and it will start the transferring process. You can then check the downloaded files in Mac by clicking on the View option.
So, this is how to access iPhone files on Mac without iTunes.
Method 2: Using iPhoto app
If your question is how to transfer photos from iPhone to Mac, nothing can be better than using iPhoto. This is an in-built option from Apple that allows users to transfer photos from iPhone to Mac easily. But, remember that this process will be applicable just for the photos.
First, connect the iPhone and your Mac through a compatible USB cable. Once the two devices are connected, iPhoto will be launched
However, you can also open it by going to application> iPhoto app
It will open all the photos of iPhone to the Mac screen. You can choose the ones to be transferred and then click on the ‘import selected’ option.
You can then use the cut paste or copy-paste option to get the desired photos on the Mac.
Method 3: Using the Preview application
Preview is a built-in feature in the Mac device that allows you to transfer files from iPhone to Mac with ease. Here is what to do for that.
First connect both the devices through a USB cable.
Open the Preview application then on your Mac.
Here go to the file section and choose import from the iPhone device option.
It will bring a list of files of the iPhone.
You can use the drag and drop option then to keep the files at the required position on your Mac.
Transfer files from iPhone to Mac wirelessly
In case you are tired of the USB cable and looking for some ways to transfer files from iPhone to Mac wirelessly, there are several ways for that. We have discussed the best ways, so have a read.
Method 1: Using AirDrop
AirDrop is the best way if you are planning to access iPhone files on Mac without iTunes and wirelessly at the same time.
The first step is to turn on AirDrop on your Mac. Go to Finder> Go> AirDrop and the switch on the Bluetooth and Wi-Fi which will turn on the AirDrop on Mac. Next, you need to set the option as ‘allow to be discovered by’ everyone or else by ‘contacts only’.
The next step is to turning on Airdrop on iPhone. Open the control center by swiping up from bottom of the screen. Tap on AirDrop and the set it to be discovered either by everyone or by contacts only.
Now, you can easily transfer files from iPhone to Mac easily Here we have taken an example to show how it happens. This is for the photos app. Go to the photos app> click the photos to be transferred> tap on the share button and that’s it.
Method 2: Using iCloud

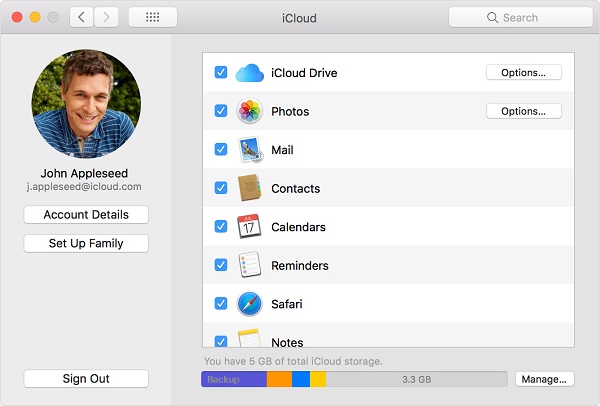
Another best way of transferring files from iPhone to Mac wirelessly is through iCloud. Here is how to do that.
You just need to have a strong Wi-Fi connection ad that’s it. Also, ensure that the iPhone and Mac are updated to the latest version of OS.
- First sign in to the iCloud with the same Apple ID and password on your iPhone and Mac.
- Next, on your phone go to settings> your name> iCloud> and then turn on iCloud Drive and Photos.
- On your Mac, go to Apple menu> System preferences> iCloud and tap on the iCloud Drive.
- Now, access the iPhone files on the Mac in iCloud.com.
So, these are the ways of transferring files from to iPhone to Mac. You can use any of them that is convenient for you.


[…] as Mac OS Mojave or Sierra. Anyways, there are plenty of ways to install telnet Mac Mojave. Whether you are using Mac Mojave or Sierra, the processes are same. So, have a […]
[…] If you were to leave it to the app, then your books would usually be organized under labels like audiobooks and finished. But if you want to organize your books for easy reading, then here are the steps to help you manage your library in Apple Books on iPhone and iPad. […]